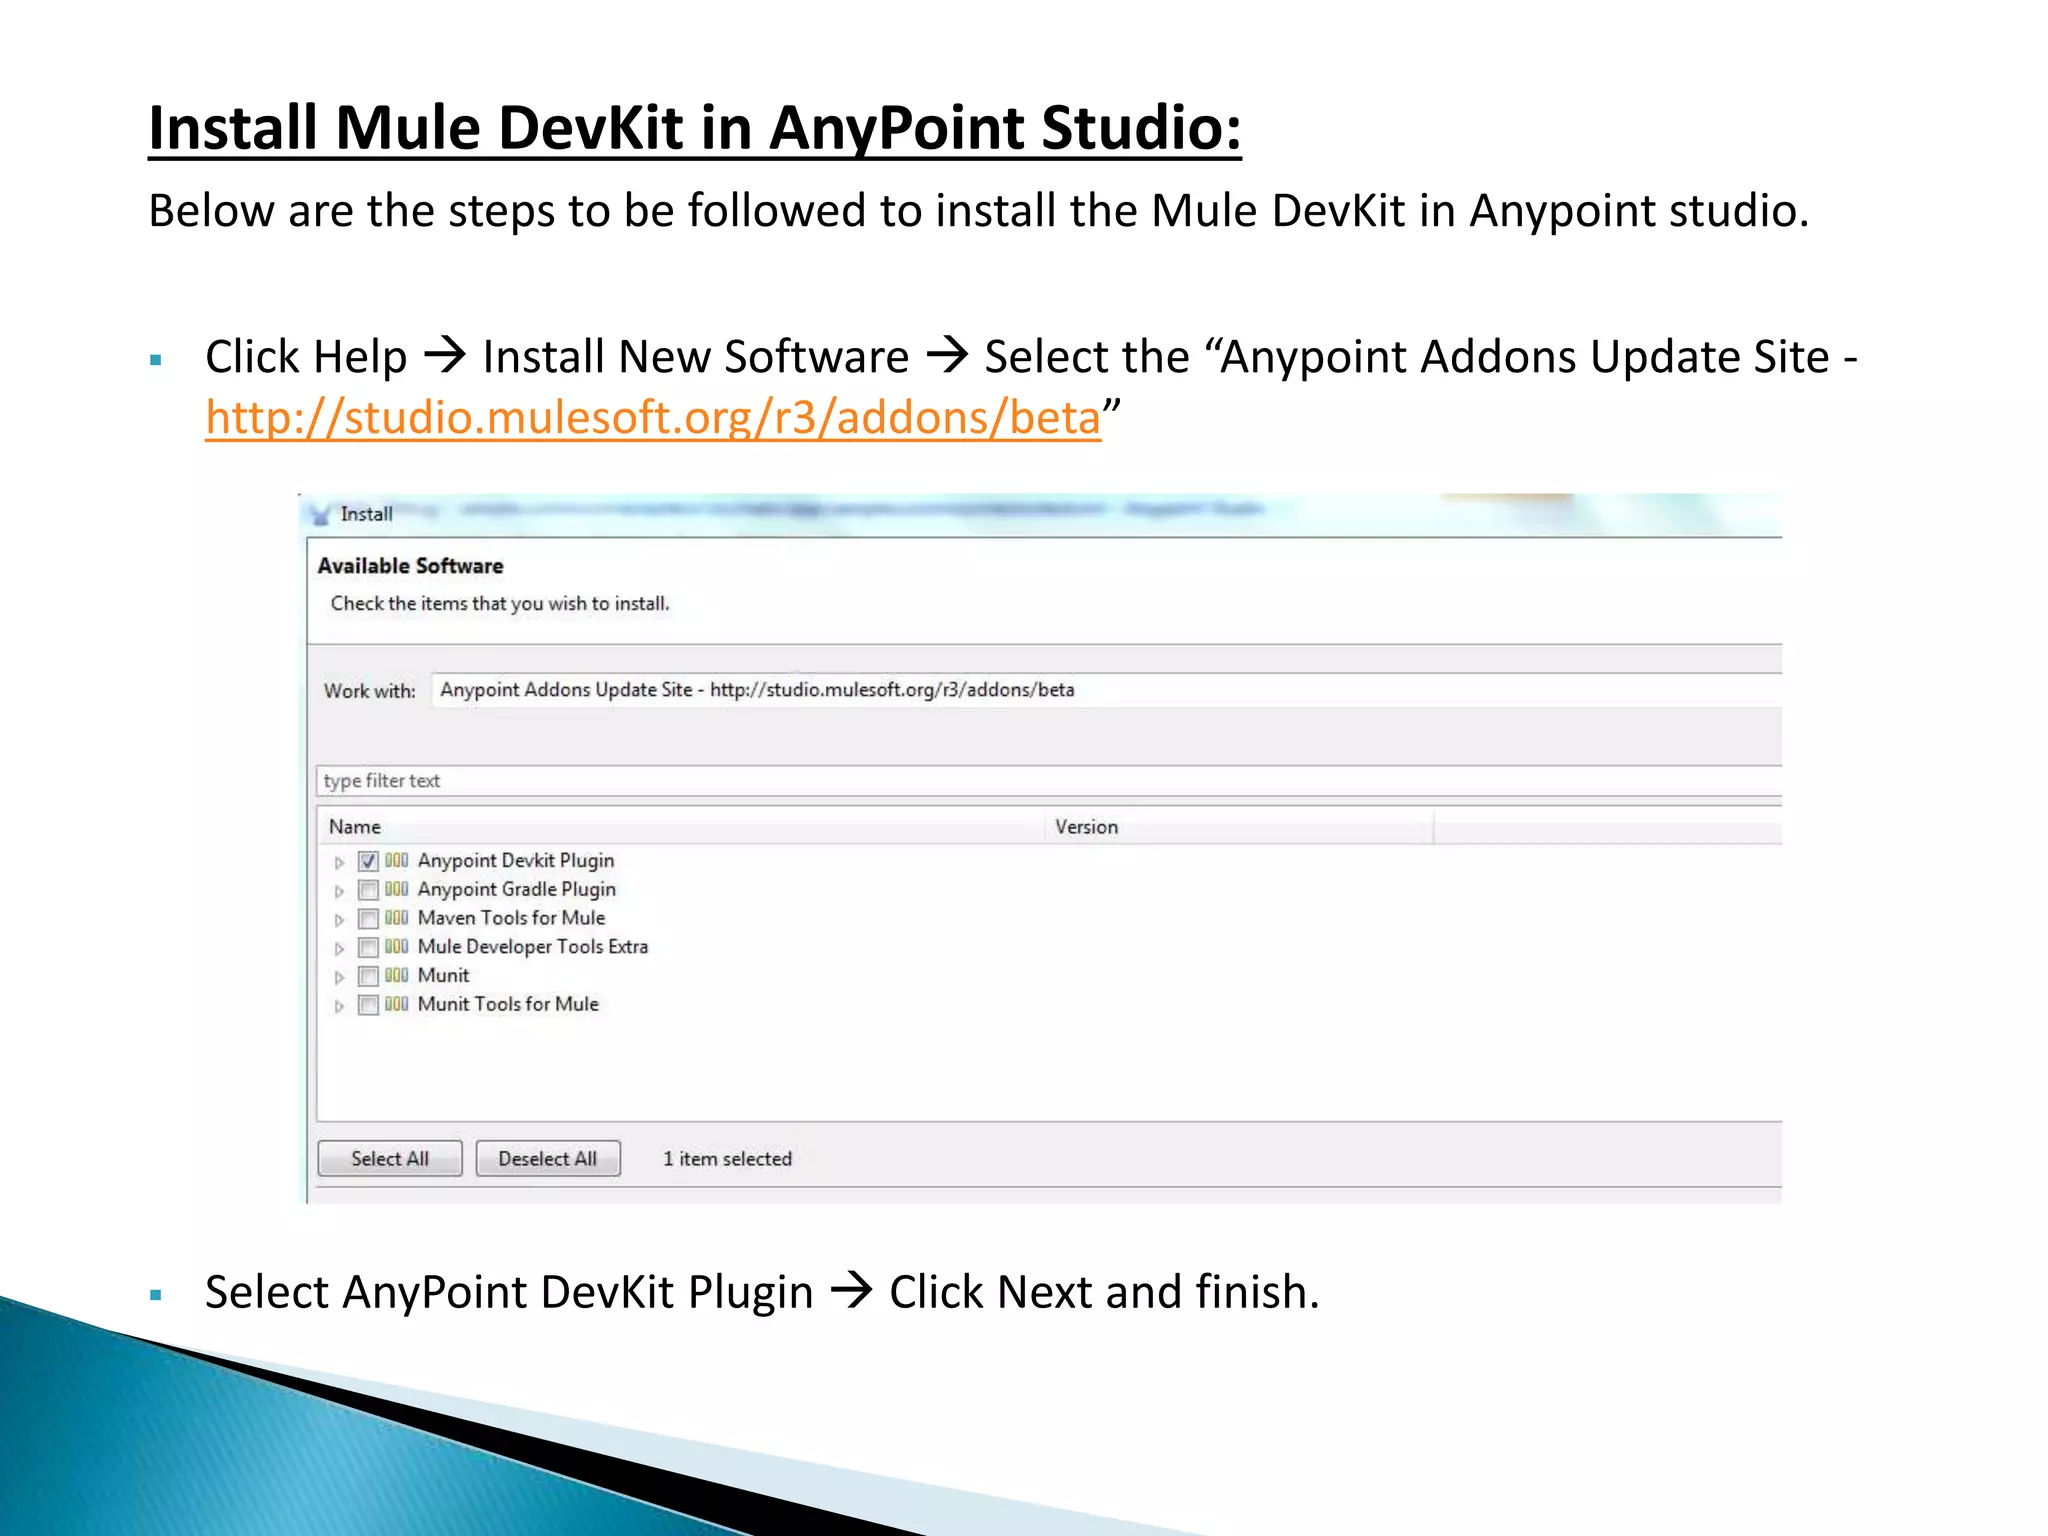
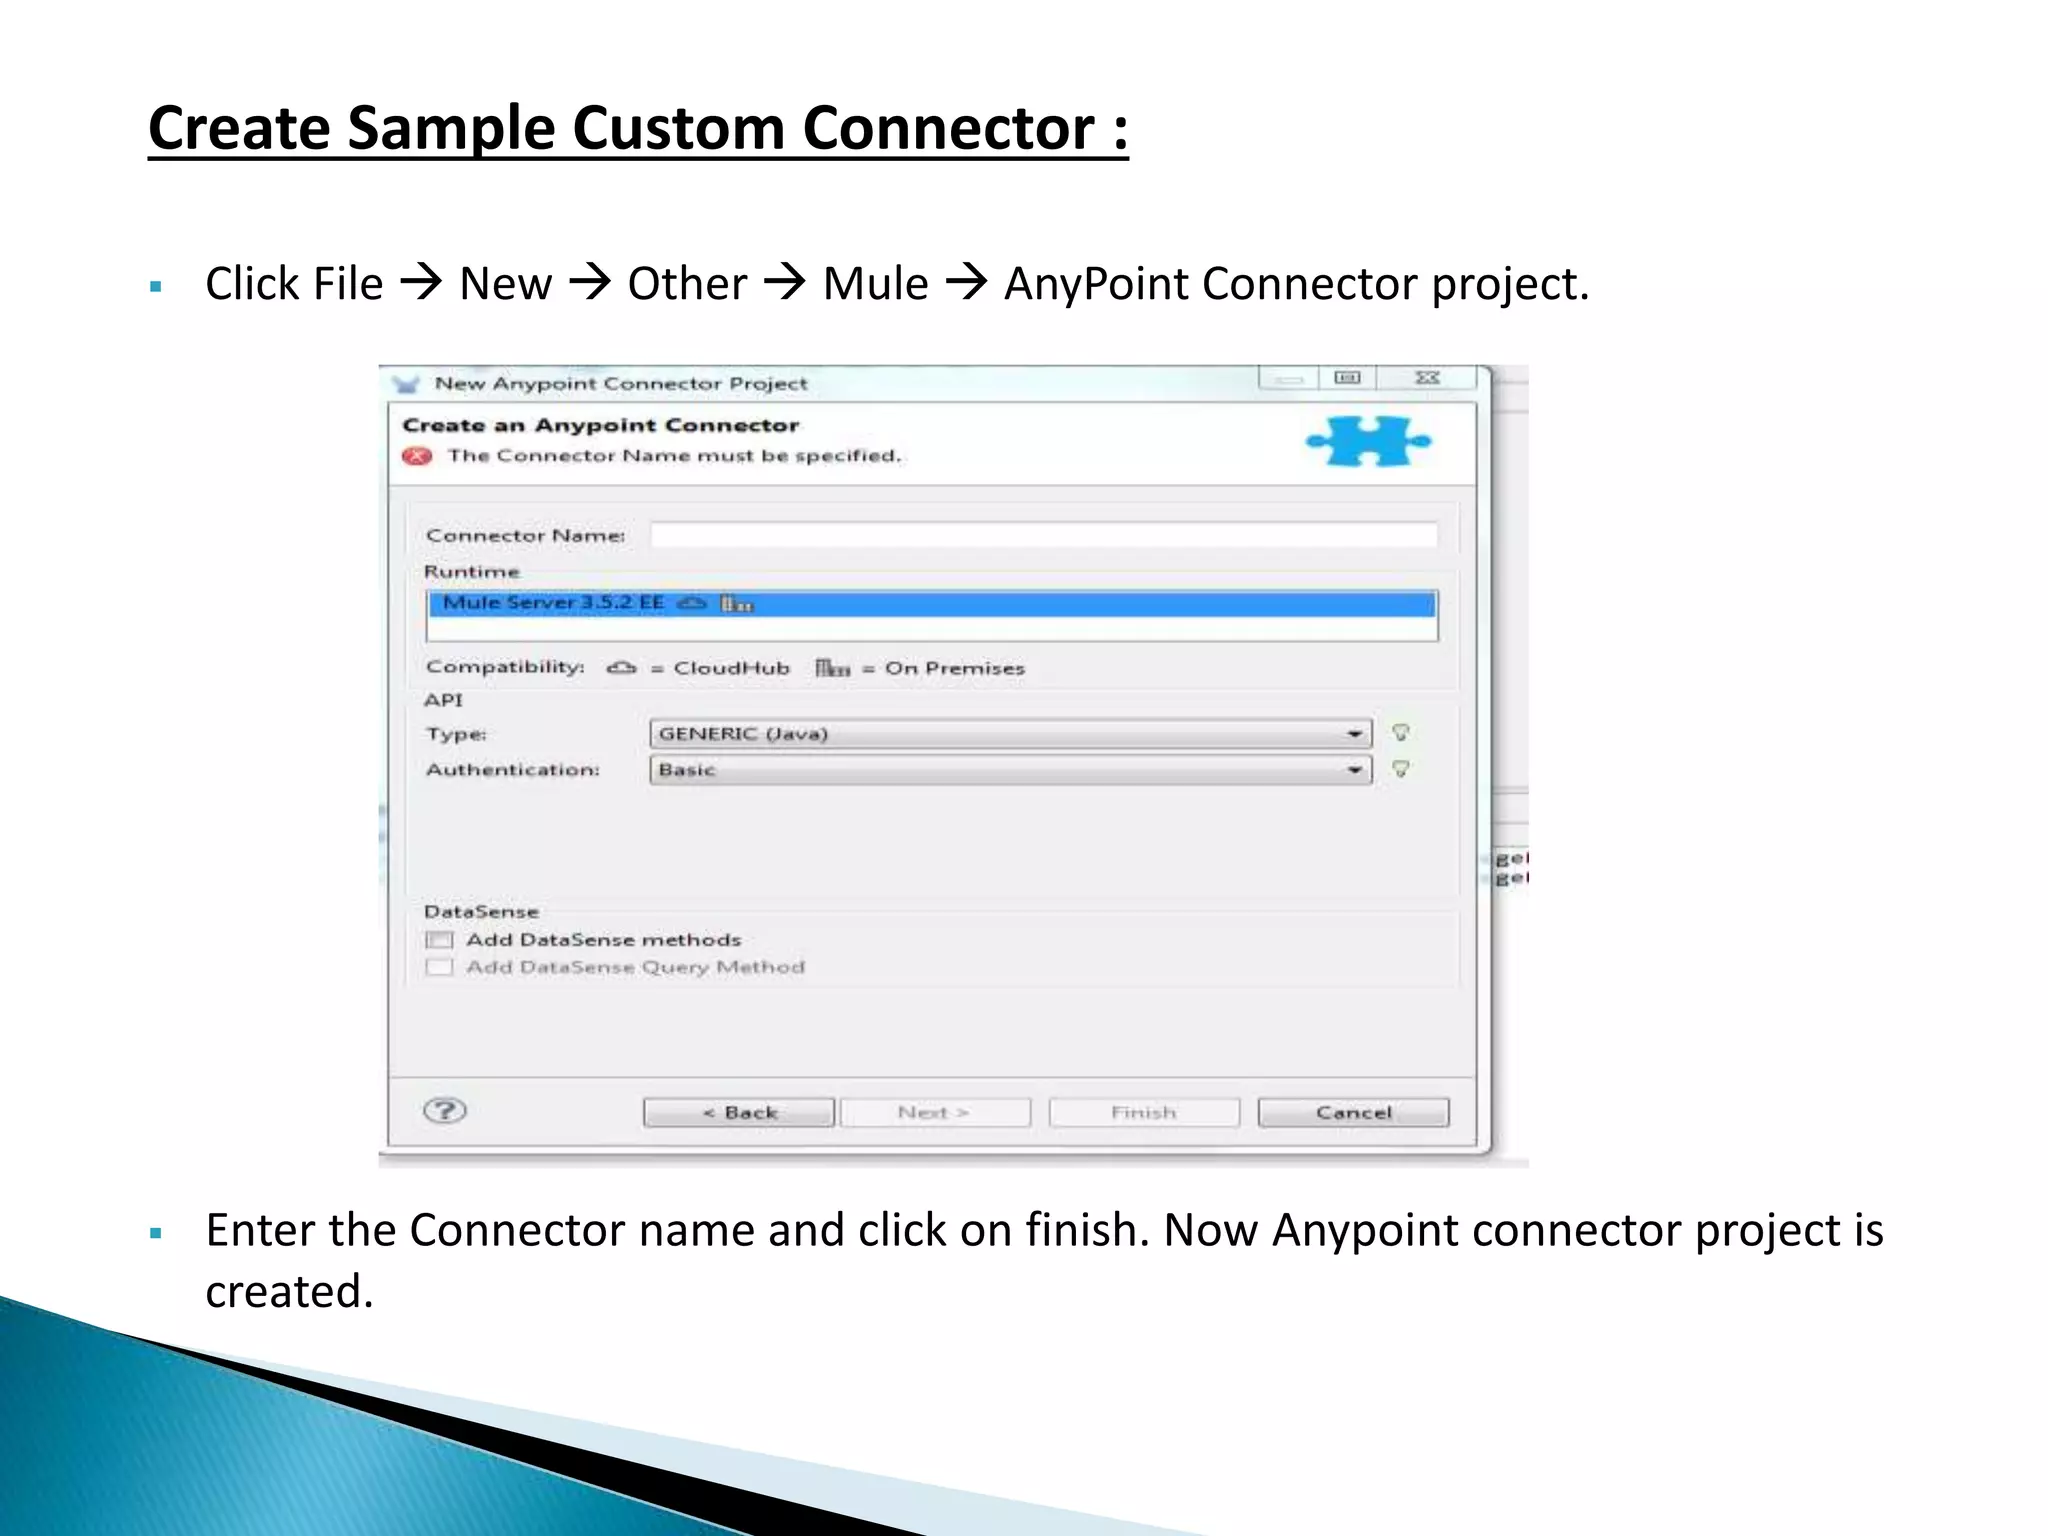
By Ramakrishna Narkedamilli
Overview: MuleSoft is a popular ESB technology to integrate Different on-premise and cloud applications for data exchange. It provides powerful toll called Mule DevKit to enable the option to develop Custom connectors. Using this we can create connector for any underlying system using there exposing API services. In this presentation will going to see  How to install Mule Devkit in Mule Anypoint studio.  Creating sample connector to consume Rest API  Build and Install the Custom Connector.  Creating sample Mule project and flow by using the Sample custom connector.  Run and Testing the application.
Install Mule DevKit in AnyPoint Studio: Below are the steps to be followed to install the Mule DevKit in Anypoint studio.  Click Help  Install New Software  Select the “Anypoint Addons Update Site - http://studio.mulesoft.org/r3/addons/beta”  Select AnyPoint DevKit Plugin  Click Next and finish.
Create Sample Custom Connector :  Click File  New  Other  Mule  AnyPoint Connector project.  Enter the Connector name and click on finish. Now Anypoint connector project is created.
 Open the Java class available under src/main/java. You can see Java class with some template methods and now we need to edit as required.  So will modify the methods to consume the rest api ( Weather api service to get the weather for a city). Its simple line of code.  For this replace the custom processor method with below code @Processor @RestCall(uri = "http://api.openweathermap.org/data/2.5/weather?q={cityName}", method = HttpMethod.GET) public abstract Object getWeatherByCity(@RestUriParam("cityName") String cityName) throws IOException;  Class will show error and change the class type as abstract.  Now Custom connector code is ready to build and install.
Build and Install the custom connector:  Right click on Custom Connector project  AnyPoint Connector  Install or Update.  It will build and install the Custom connector in case of no errors. Based on studio version It will ask permission to install or for latest version it will install automatically. You may required to studio restart based on Studio version.
Create Sample Project for Testing:  Click File  New  Mule project.  Add Http inbound endpoint To trigger the service.  Now your able to see Custom connector in the custom connectors list.  Configure SampleCustom global connector by providing required values.  Add SampleCustom outbound endpoint by referring to Global connector and provide required values
 Add logger component to print some loggers  Finally flow will look like below  Now we need to test the application.
Run and Test the application:  Right click on Project  Run as  Mule application.  Open the browser and hit the URL http://localhost:8081/getWeatherByCity  It showed the correct response get out from Connector.  For more details on Custom connector development refer the Mule documentation https://docs.mulesoft.com/anypoint-connector-devkit/v/3.7/
THANKS YOU By Ramakrishna Narkedamilli

Custom connector development using mule DevKit

  • 1.
  • 2.
    Overview: MuleSoft is apopular ESB technology to integrate Different on-premise and cloud applications for data exchange. It provides powerful toll called Mule DevKit to enable the option to develop Custom connectors. Using this we can create connector for any underlying system using there exposing API services. In this presentation will going to see  How to install Mule Devkit in Mule Anypoint studio.  Creating sample connector to consume Rest API  Build and Install the Custom Connector.  Creating sample Mule project and flow by using the Sample custom connector.  Run and Testing the application.
  • 3.
    Install Mule DevKitin AnyPoint Studio: Below are the steps to be followed to install the Mule DevKit in Anypoint studio.  Click Help  Install New Software  Select the “Anypoint Addons Update Site - http://studio.mulesoft.org/r3/addons/beta”  Select AnyPoint DevKit Plugin  Click Next and finish.
  • 4.
    Create Sample CustomConnector :  Click File  New  Other  Mule  AnyPoint Connector project.  Enter the Connector name and click on finish. Now Anypoint connector project is created.
  • 5.
     Open theJava class available under src/main/java. You can see Java class with some template methods and now we need to edit as required.  So will modify the methods to consume the rest api ( Weather api service to get the weather for a city). Its simple line of code.  For this replace the custom processor method with below code @Processor @RestCall(uri = "http://api.openweathermap.org/data/2.5/weather?q={cityName}", method = HttpMethod.GET) public abstract Object getWeatherByCity(@RestUriParam("cityName") String cityName) throws IOException;  Class will show error and change the class type as abstract.  Now Custom connector code is ready to build and install.
  • 6.
    Build and Installthe custom connector:  Right click on Custom Connector project  AnyPoint Connector  Install or Update.  It will build and install the Custom connector in case of no errors. Based on studio version It will ask permission to install or for latest version it will install automatically. You may required to studio restart based on Studio version.
  • 7.
    Create Sample Projectfor Testing:  Click File  New  Mule project.  Add Http inbound endpoint To trigger the service.  Now your able to see Custom connector in the custom connectors list.  Configure SampleCustom global connector by providing required values.  Add SampleCustom outbound endpoint by referring to Global connector and provide required values
  • 8.
     Add loggercomponent to print some loggers  Finally flow will look like below  Now we need to test the application.
  • 9.
    Run and Testthe application:  Right click on Project  Run as  Mule application.  Open the browser and hit the URL http://localhost:8081/getWeatherByCity  It showed the correct response get out from Connector.  For more details on Custom connector development refer the Mule documentation https://docs.mulesoft.com/anypoint-connector-devkit/v/3.7/
  • 10.