Downloaded 107 times


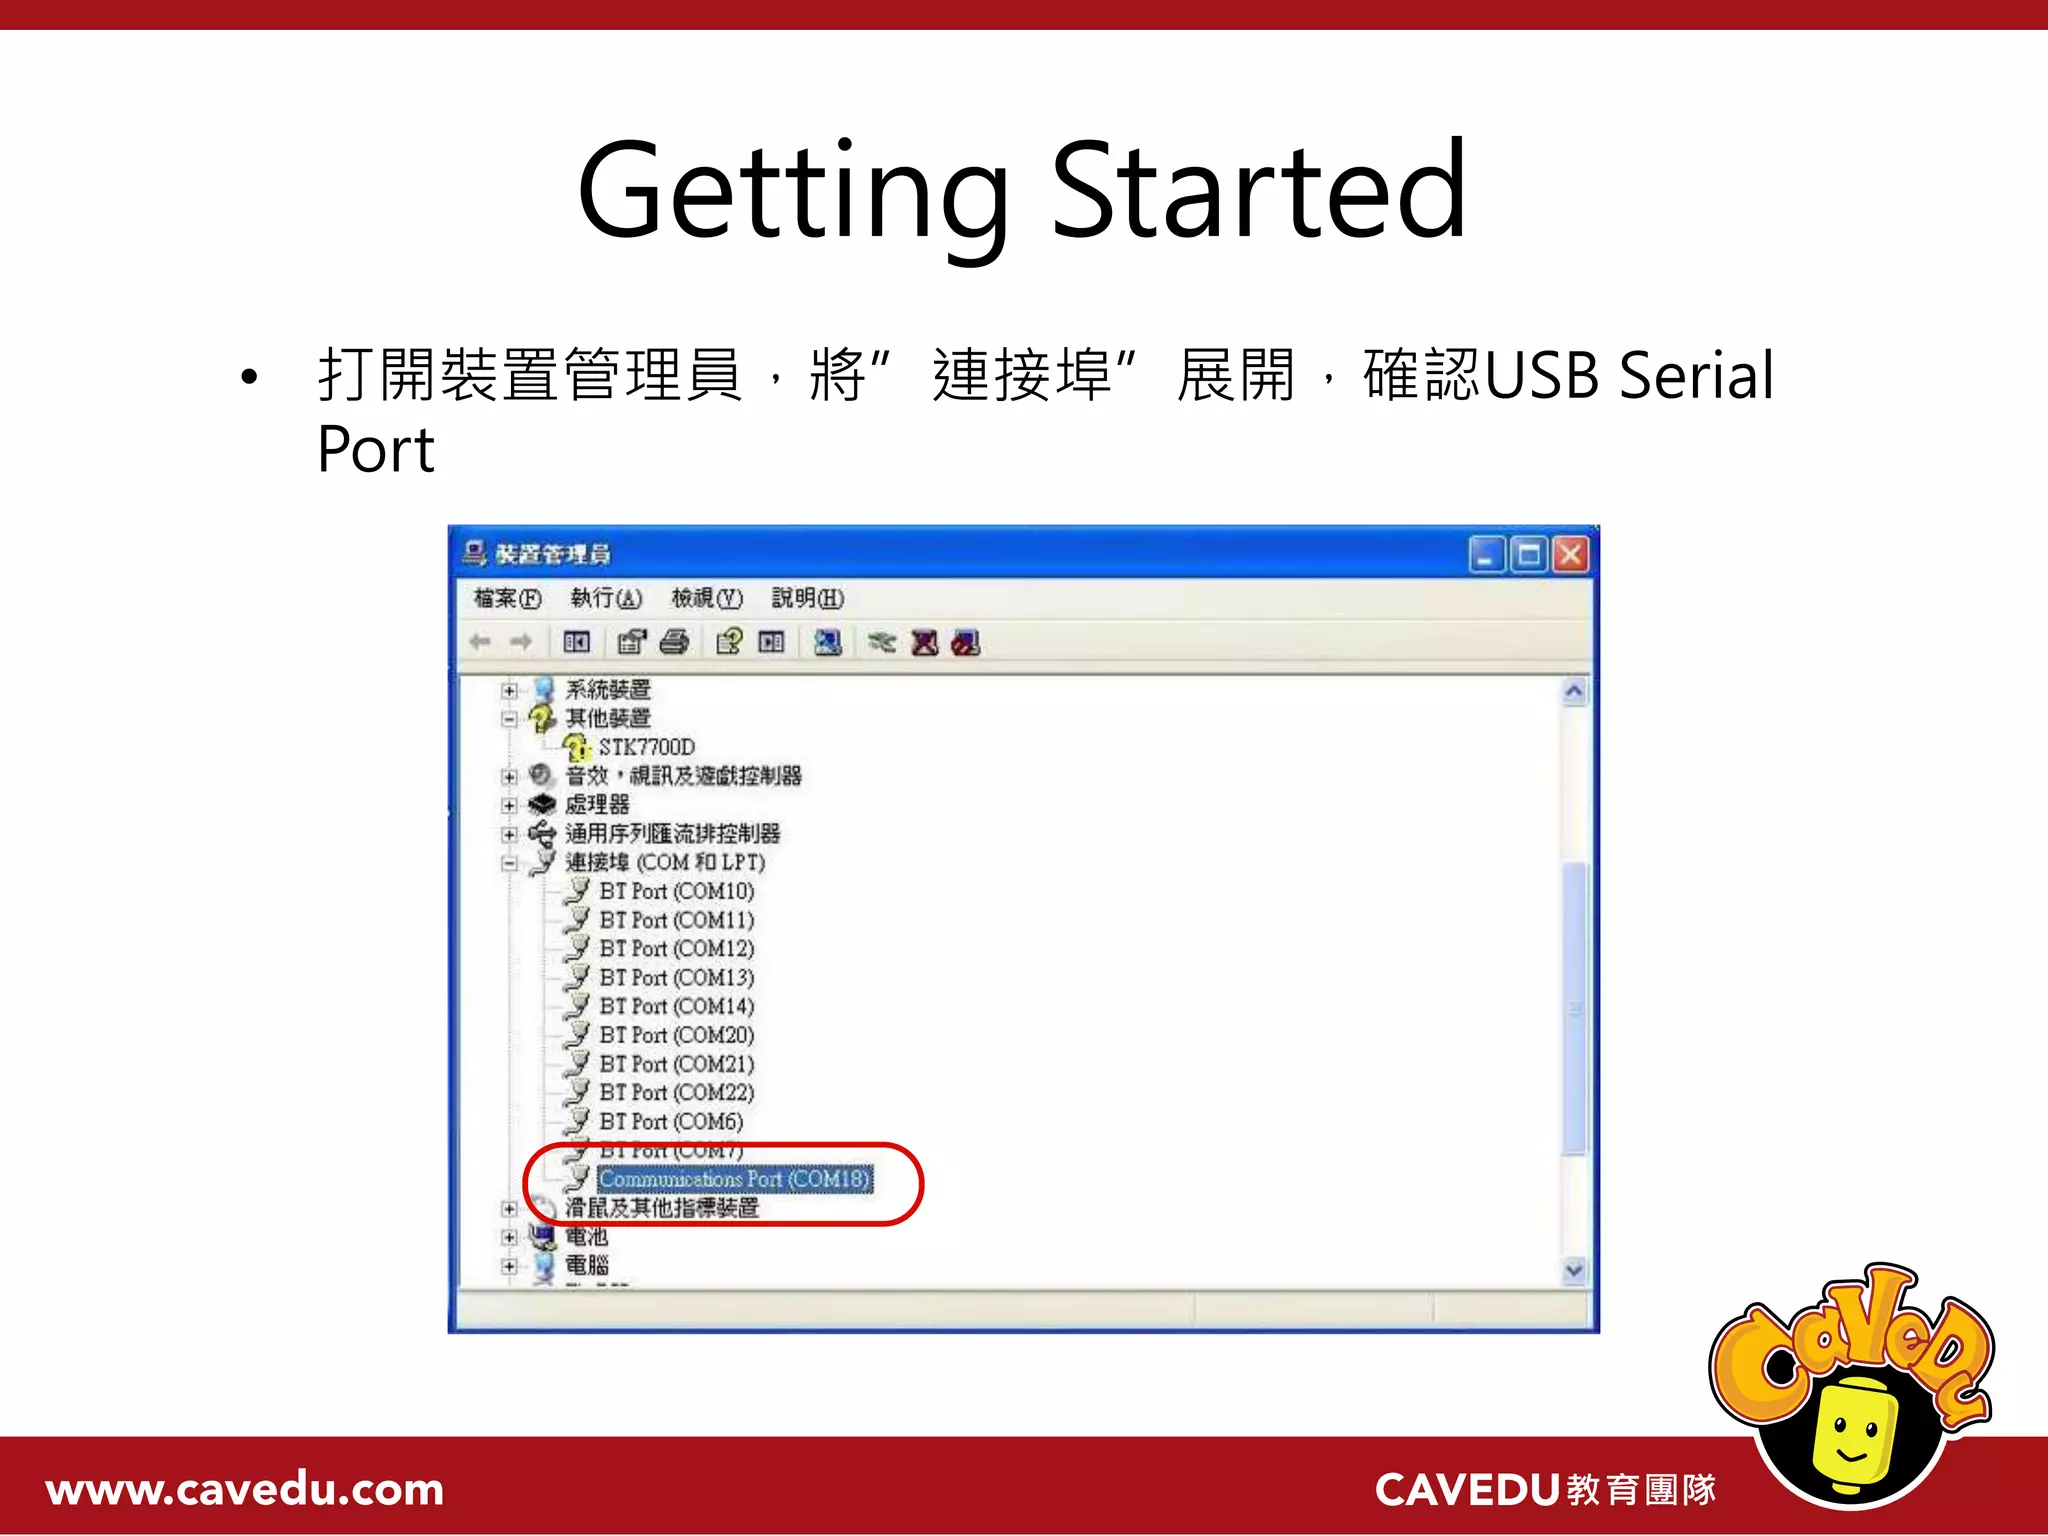
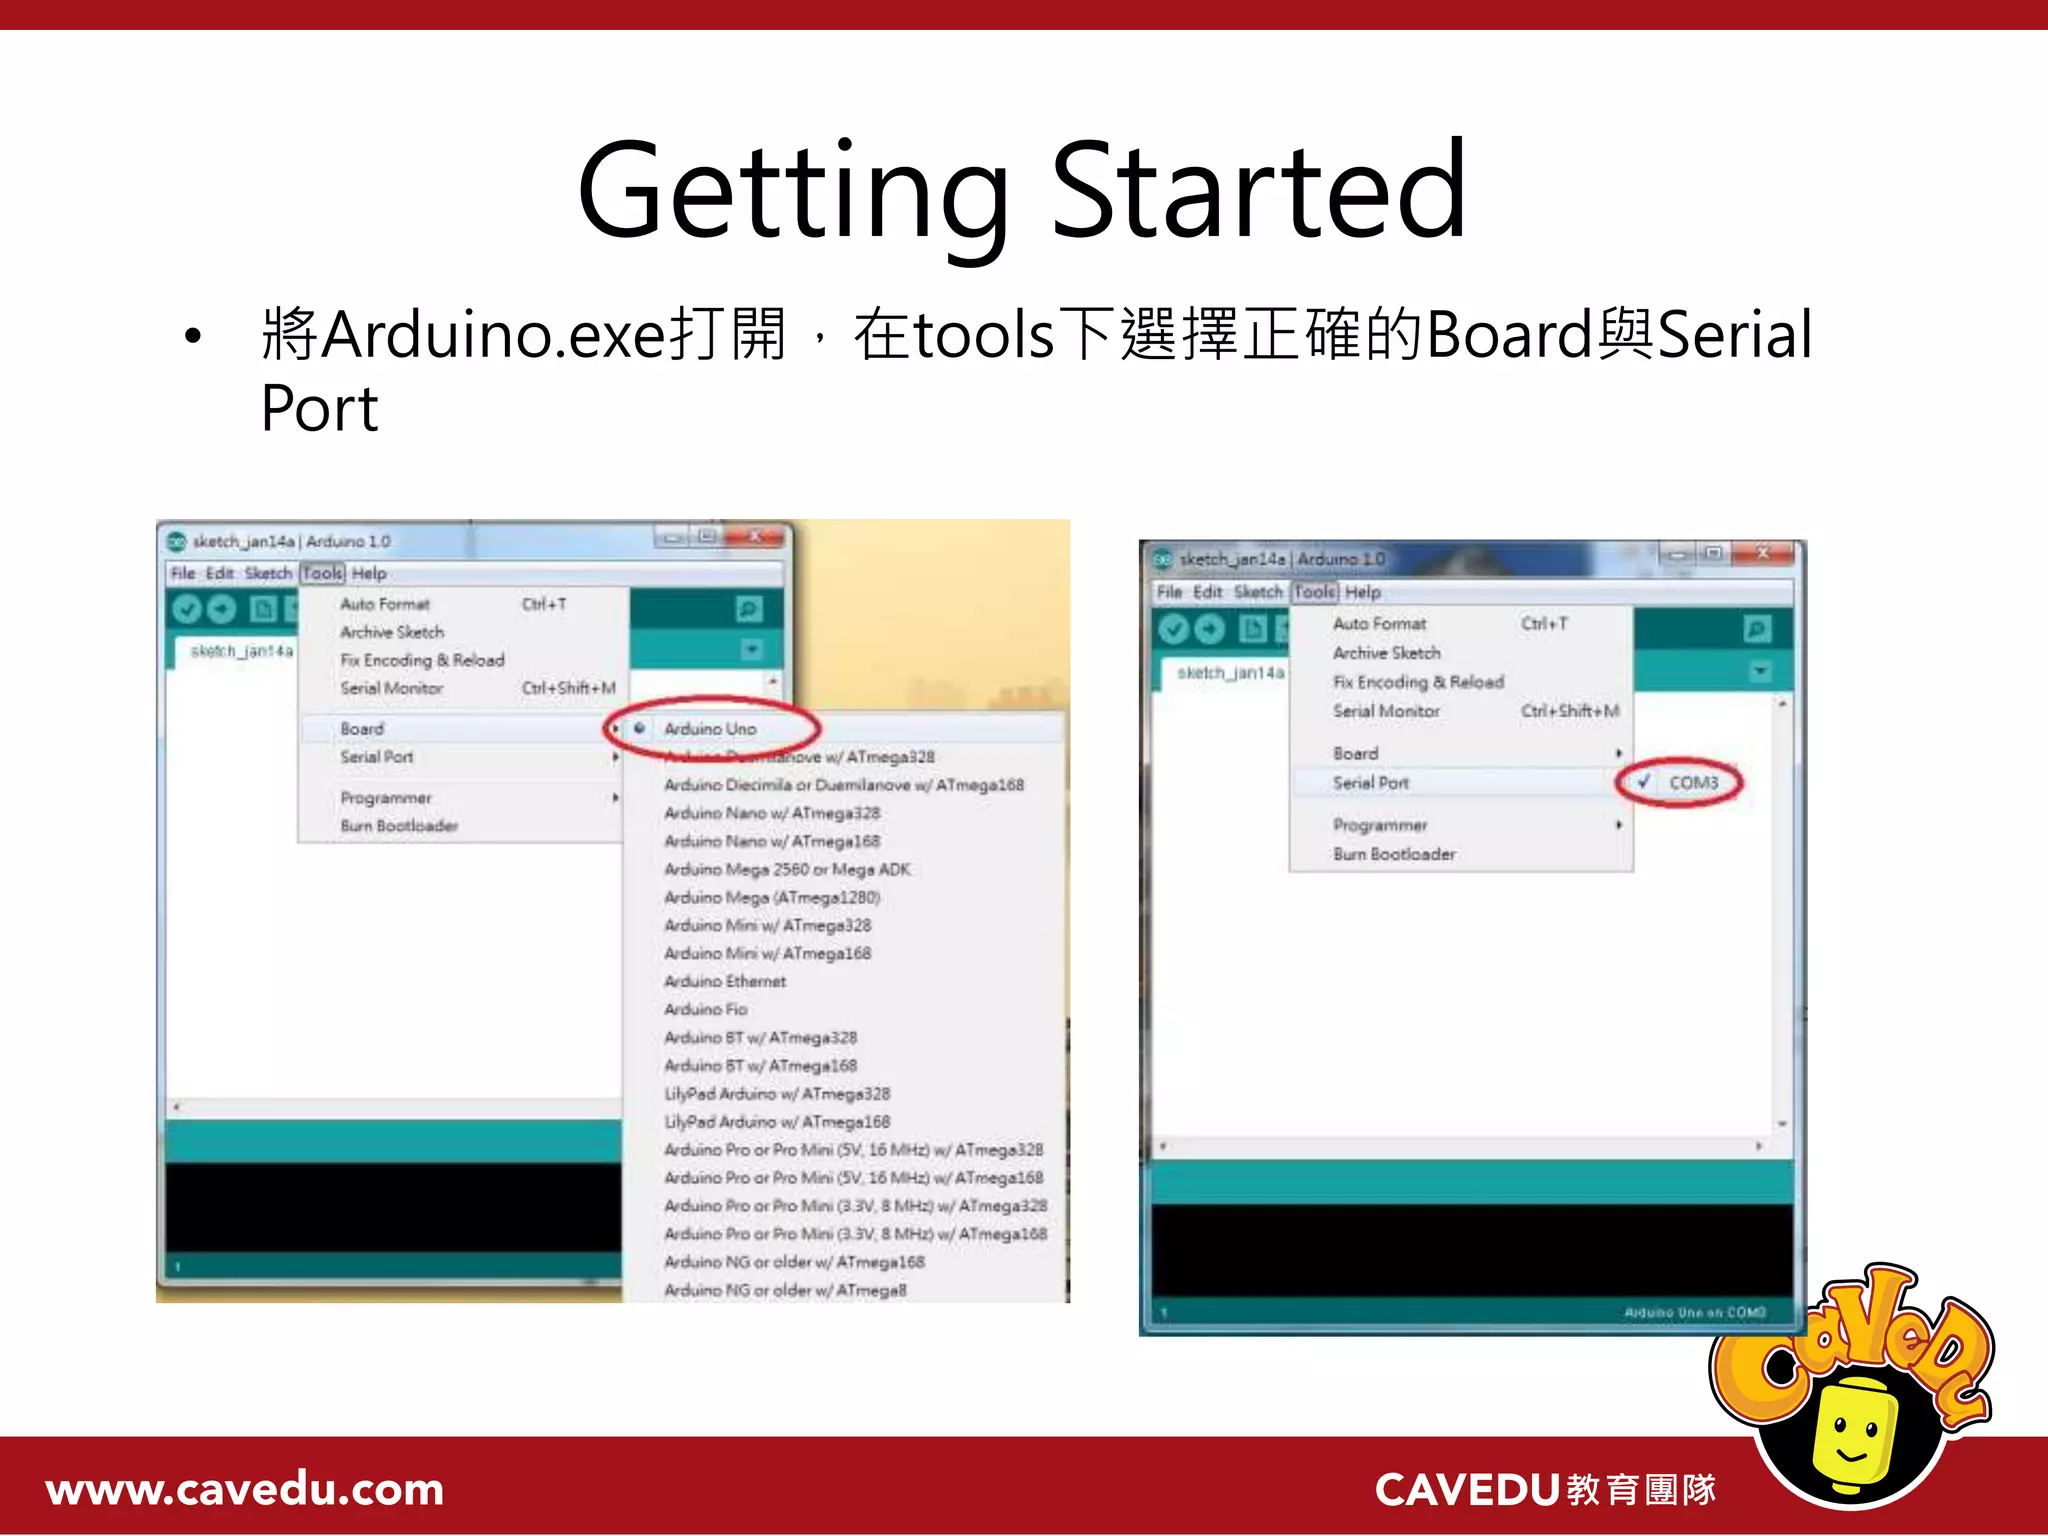

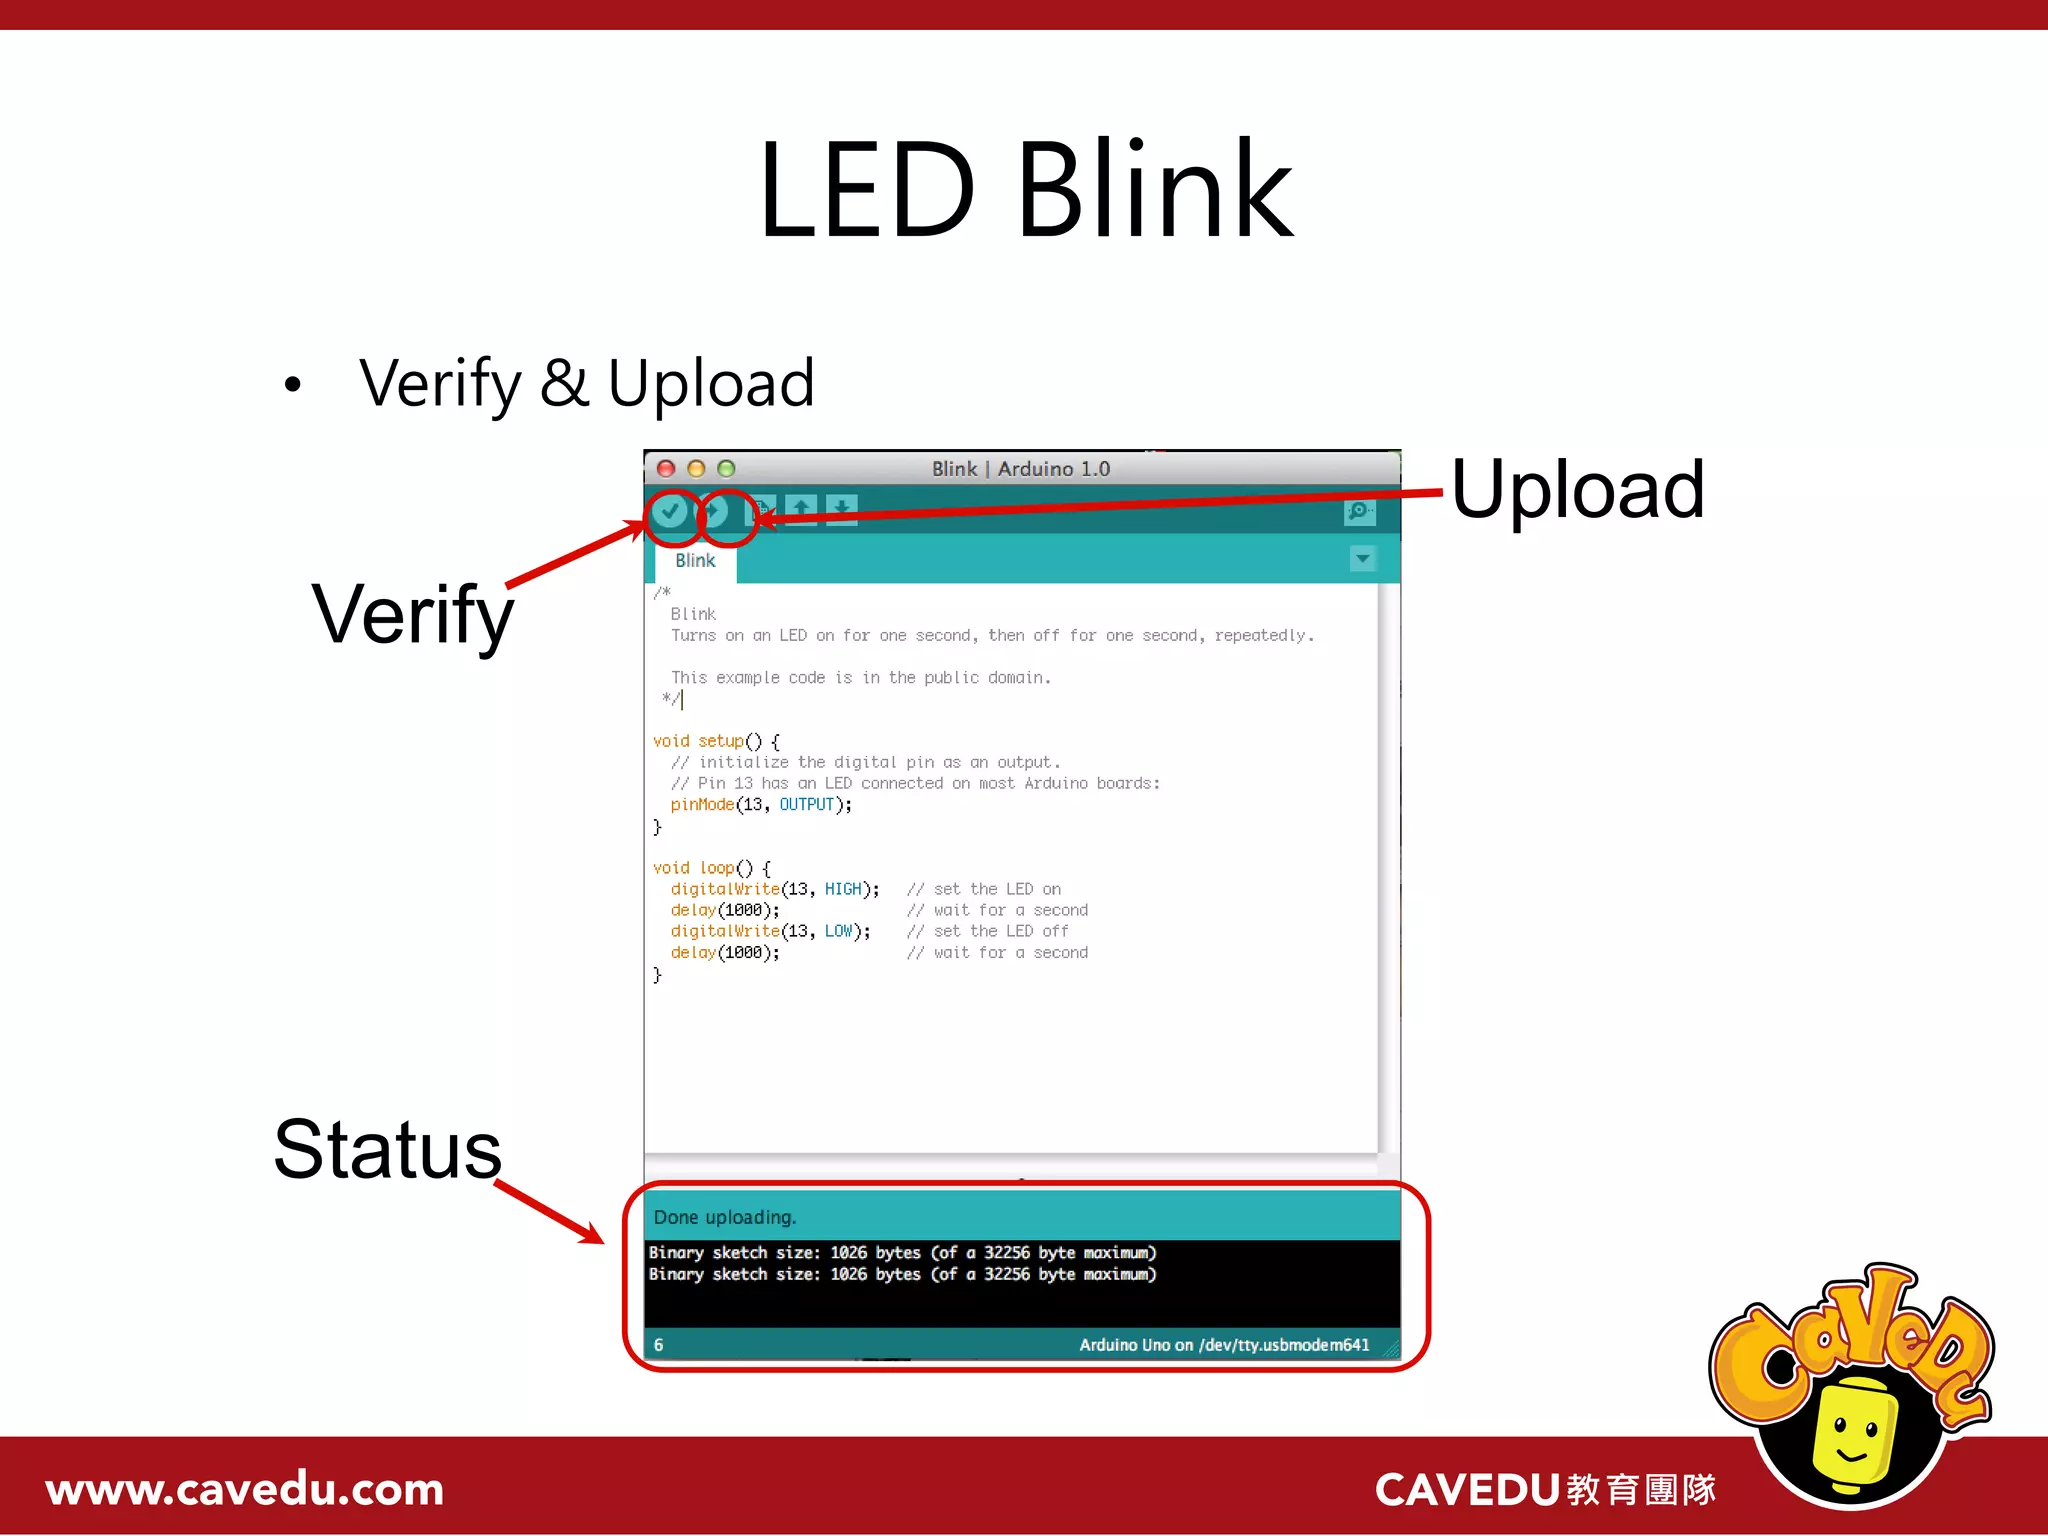


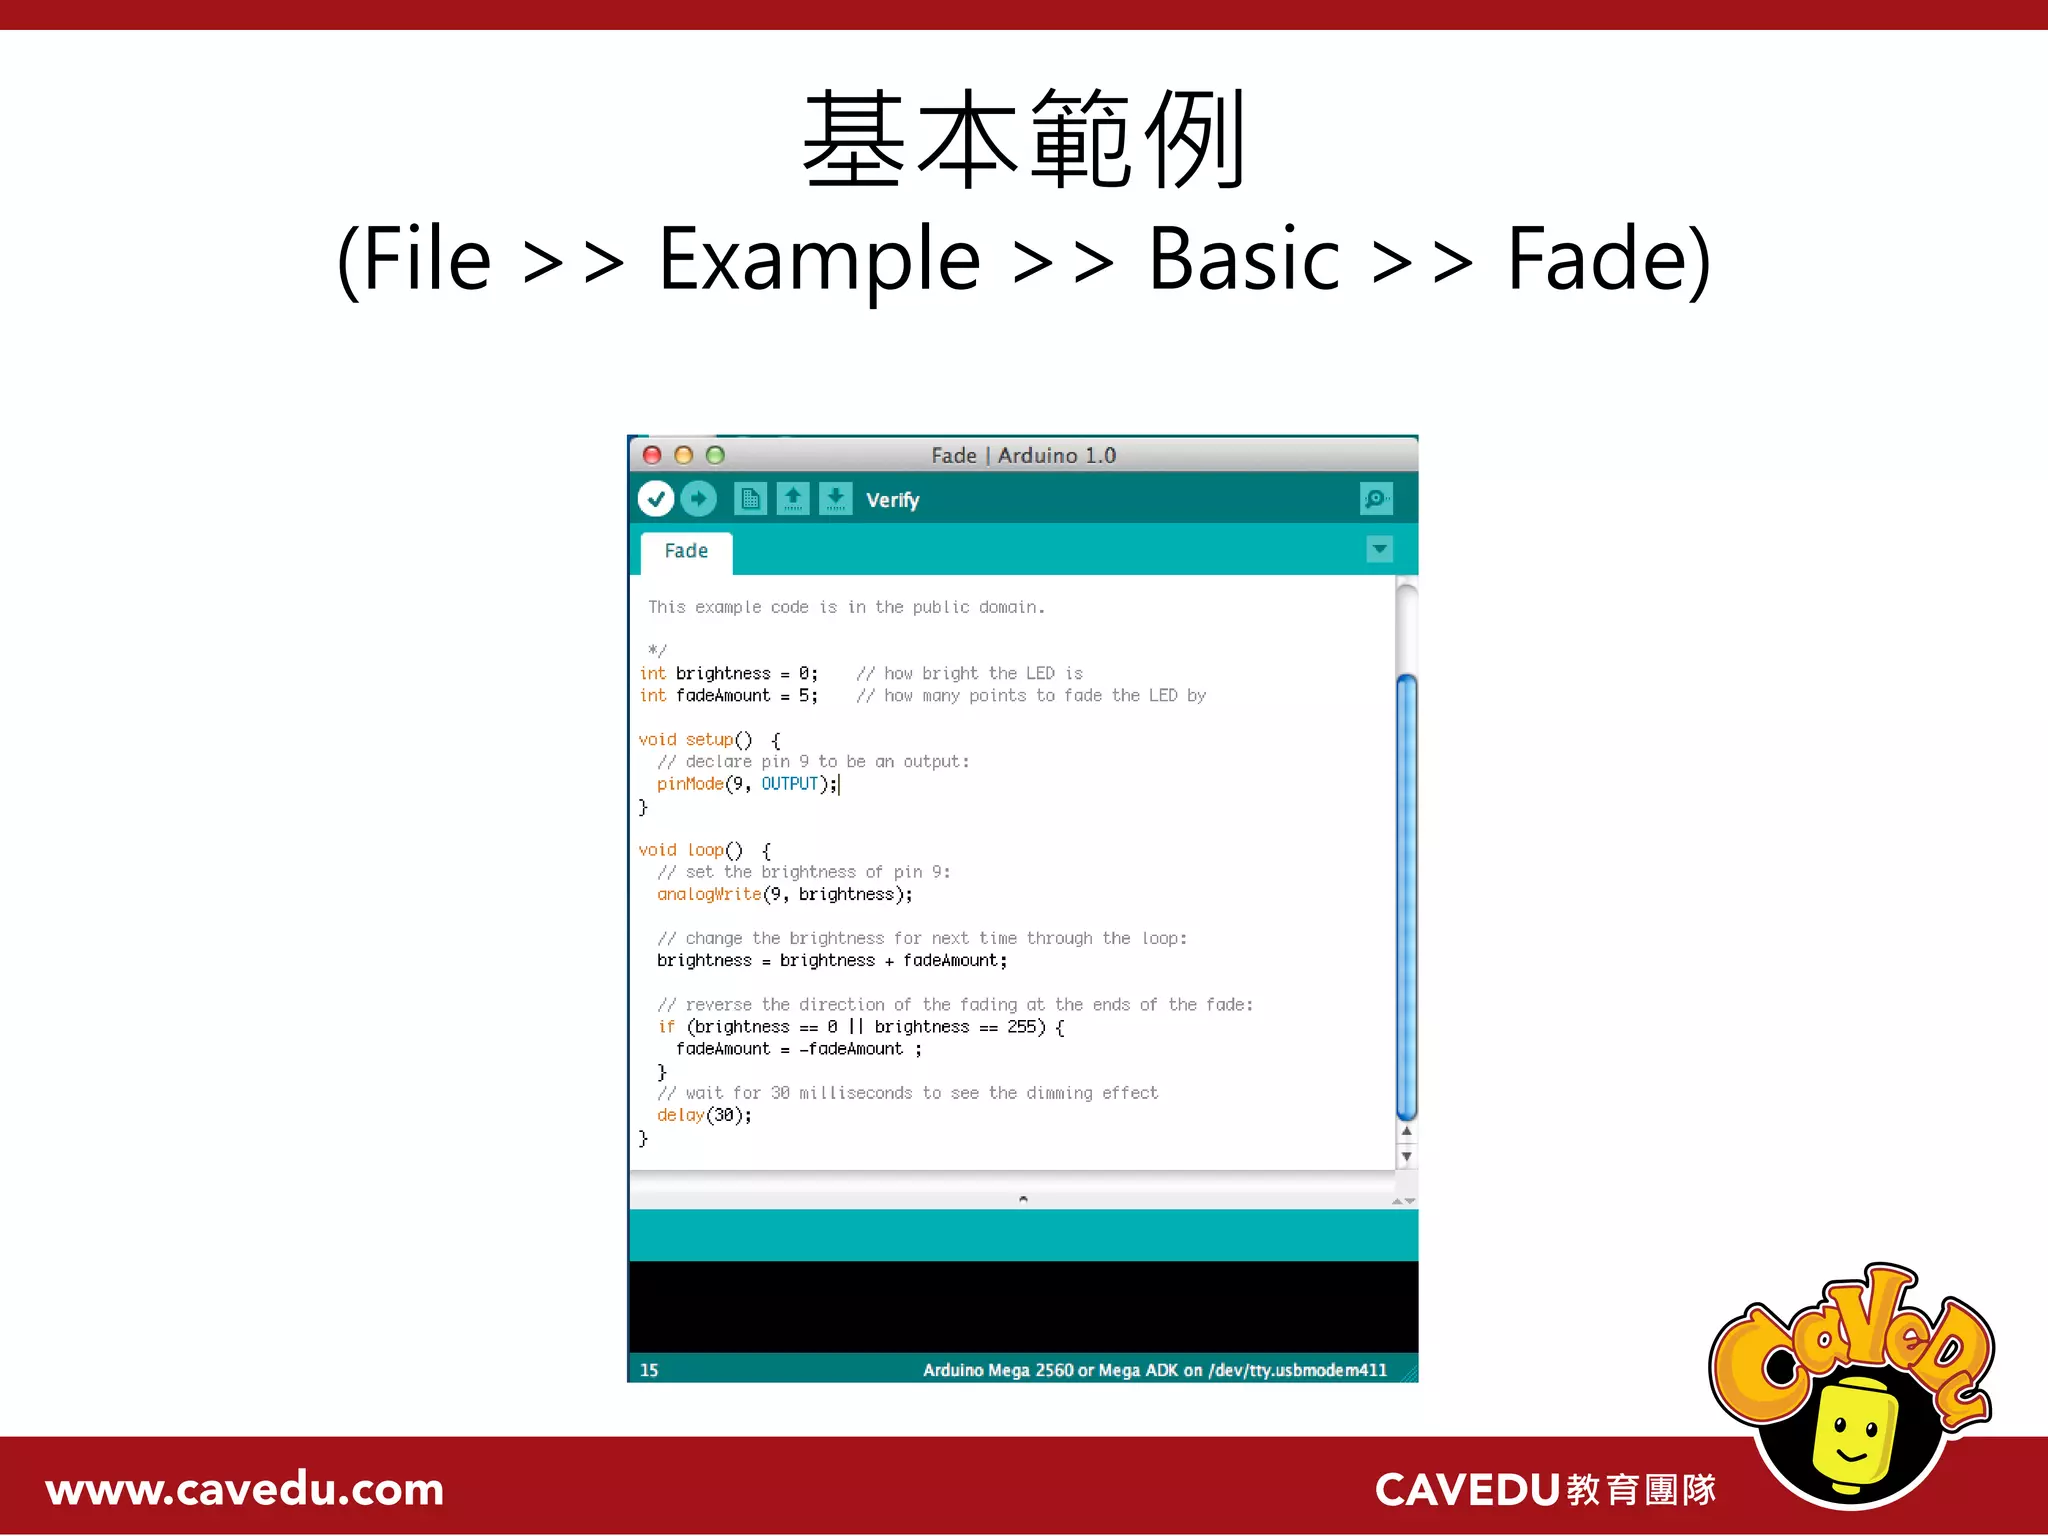


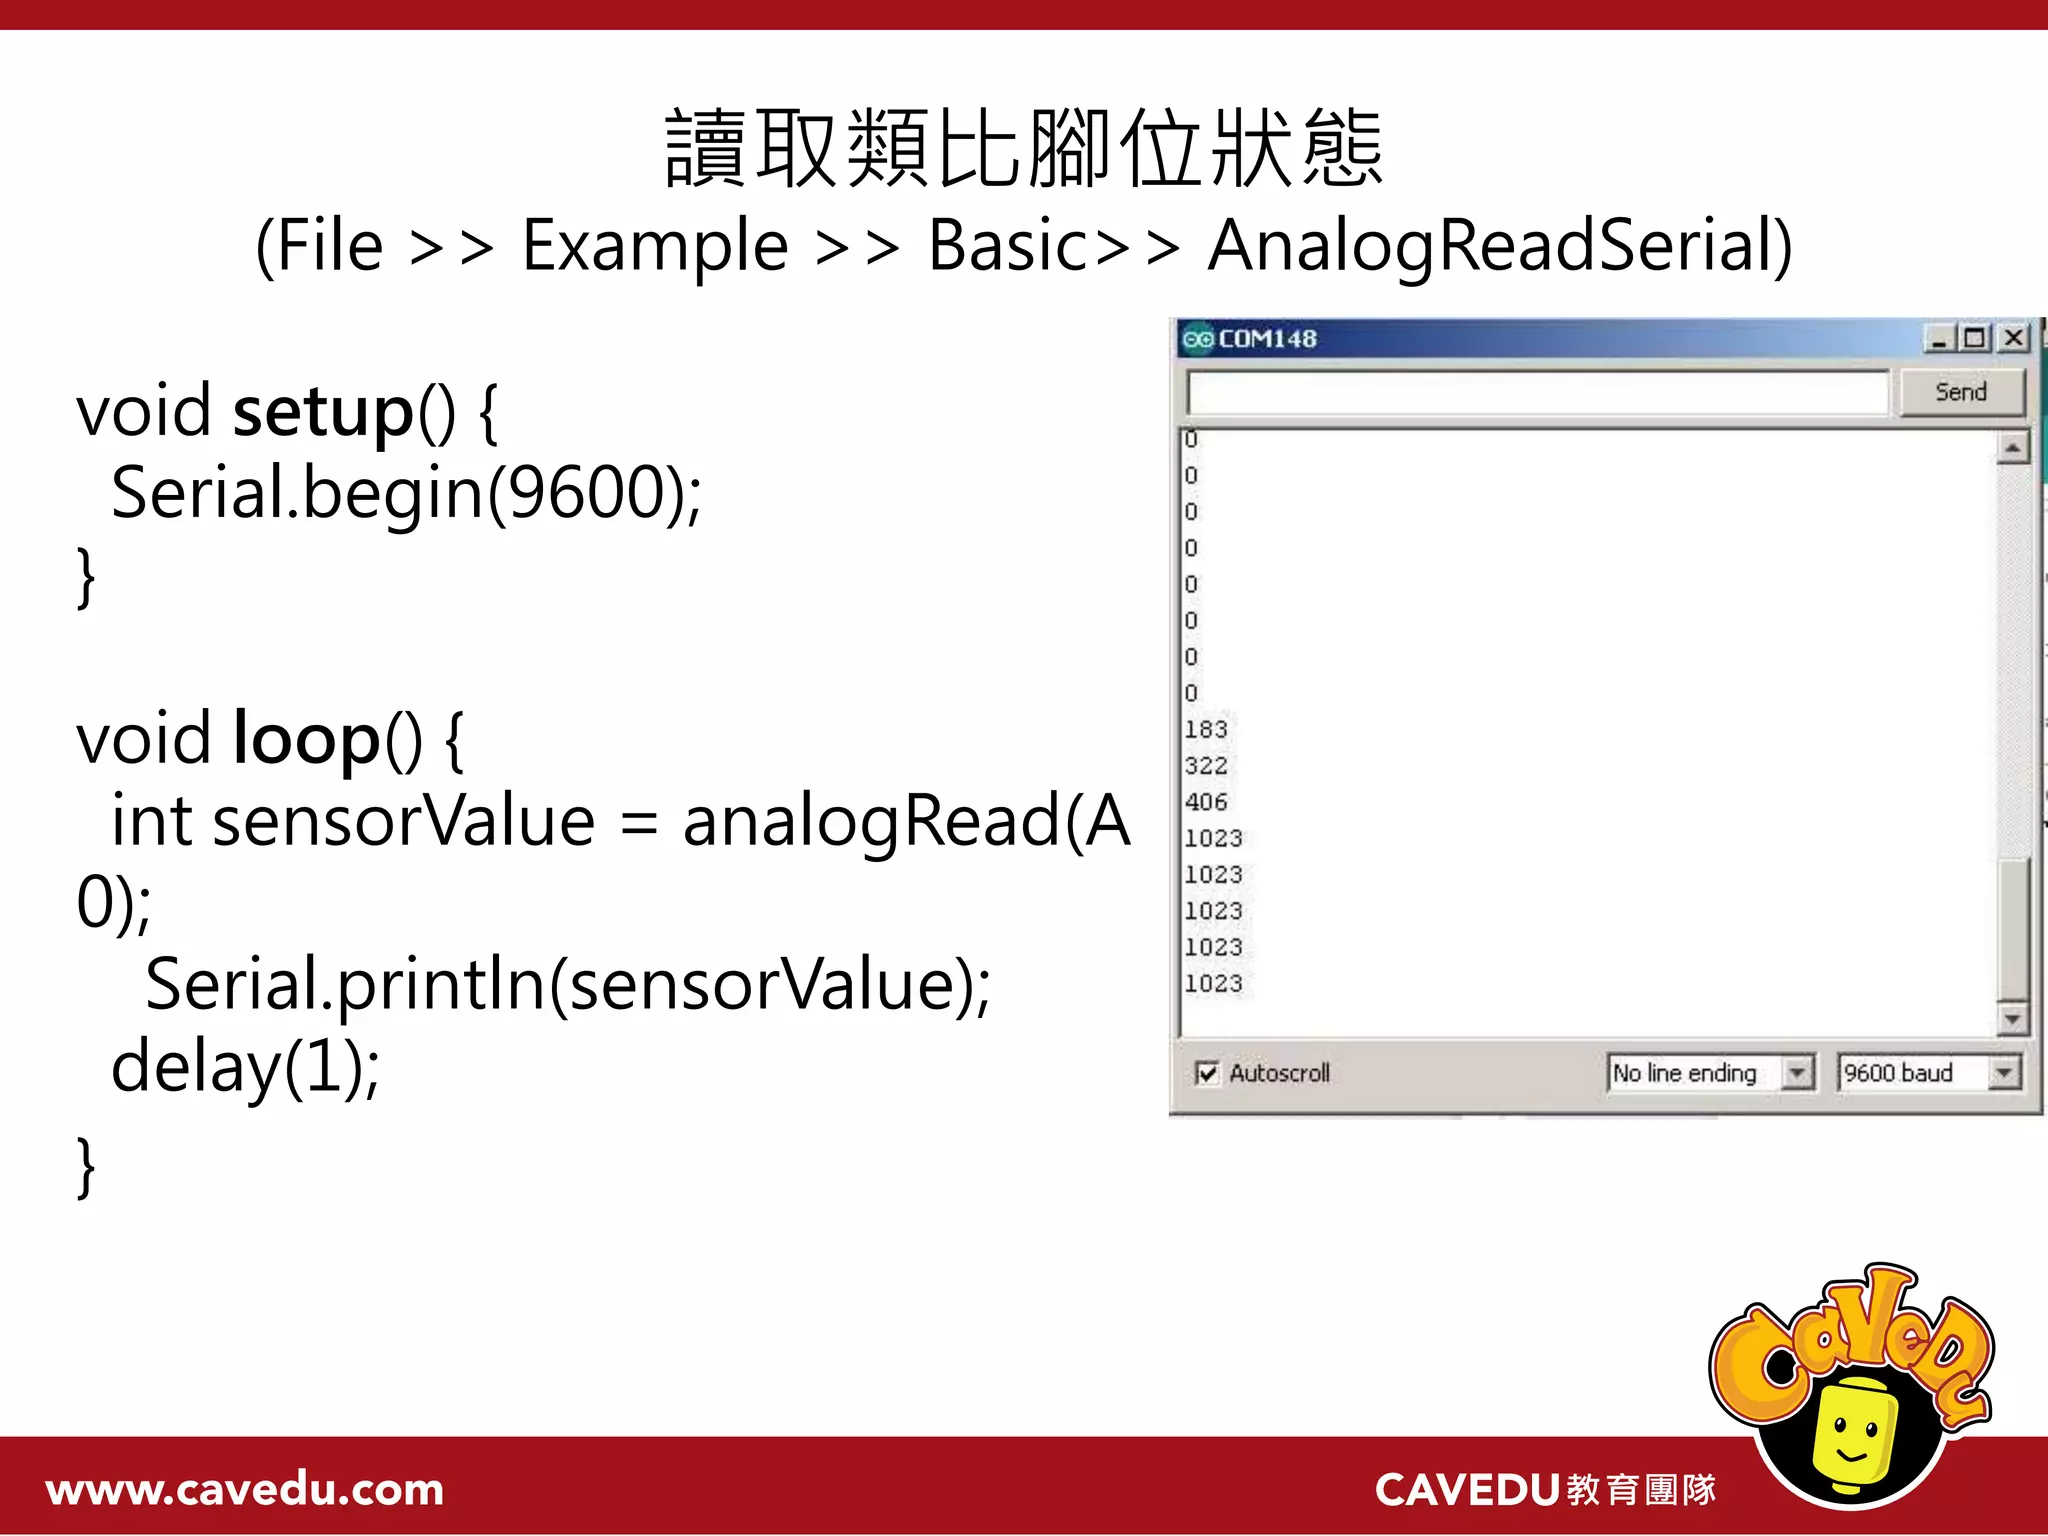


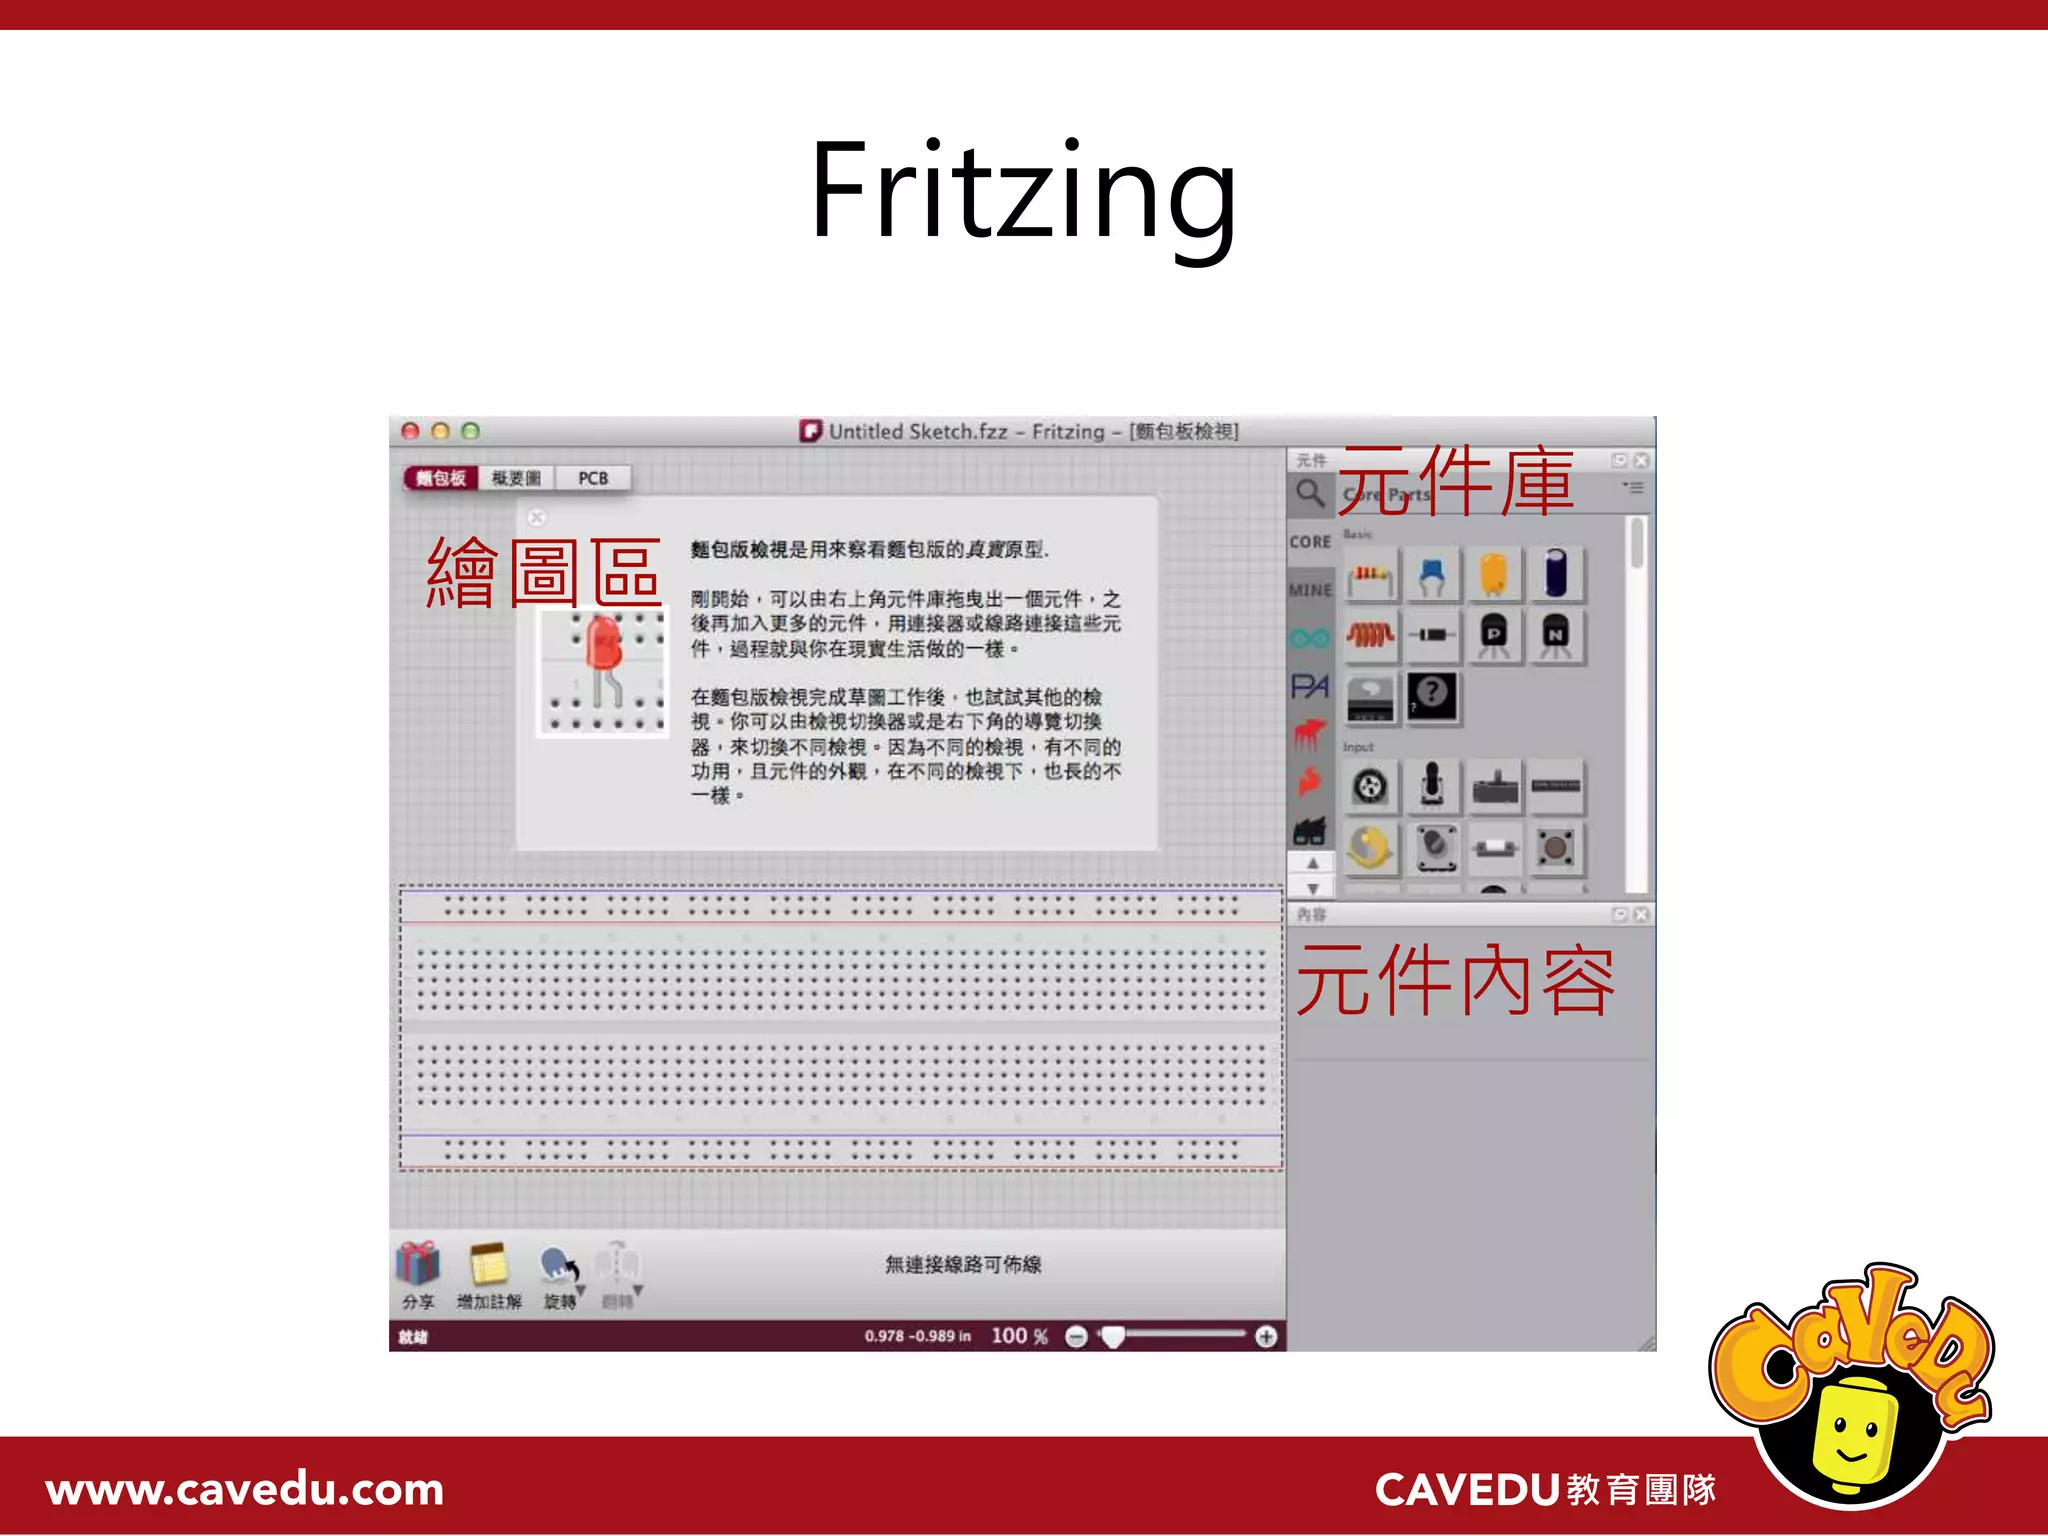


This document discusses an Arduino introductory project about lighting. It provides instructions on installing the Arduino driver, uploading a basic blinking LED program, and exploring analog input and output by reading the value of a potentiometer and fading an LED. It also introduces Fritzing and 123D Circuits as tools for circuit schematic design.