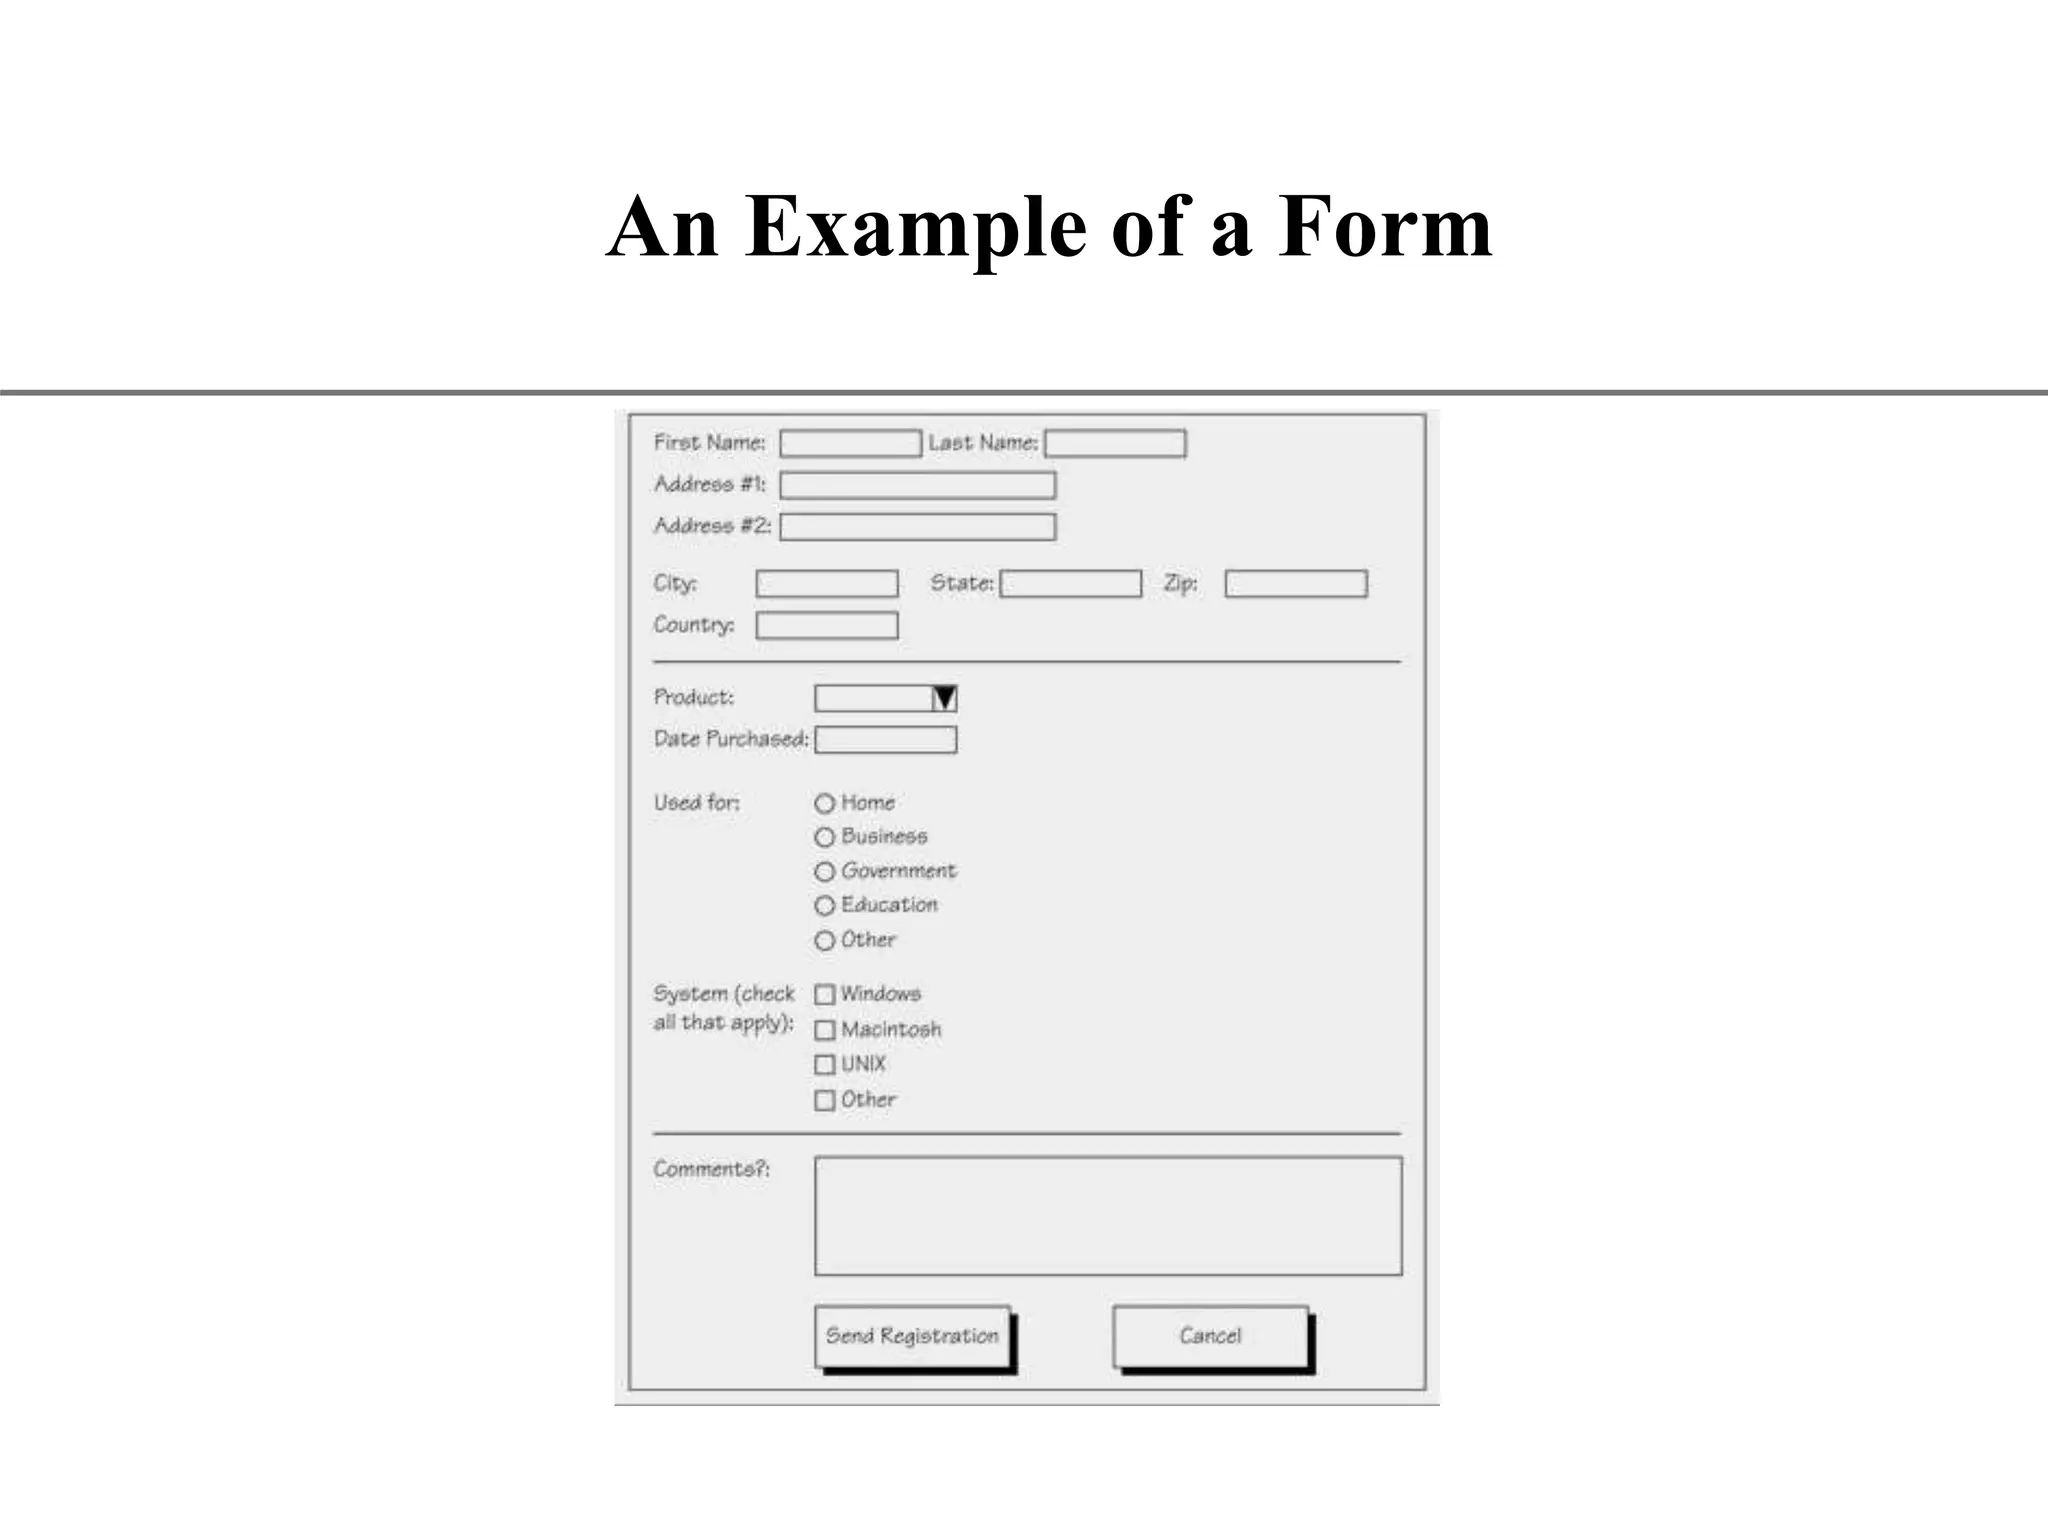
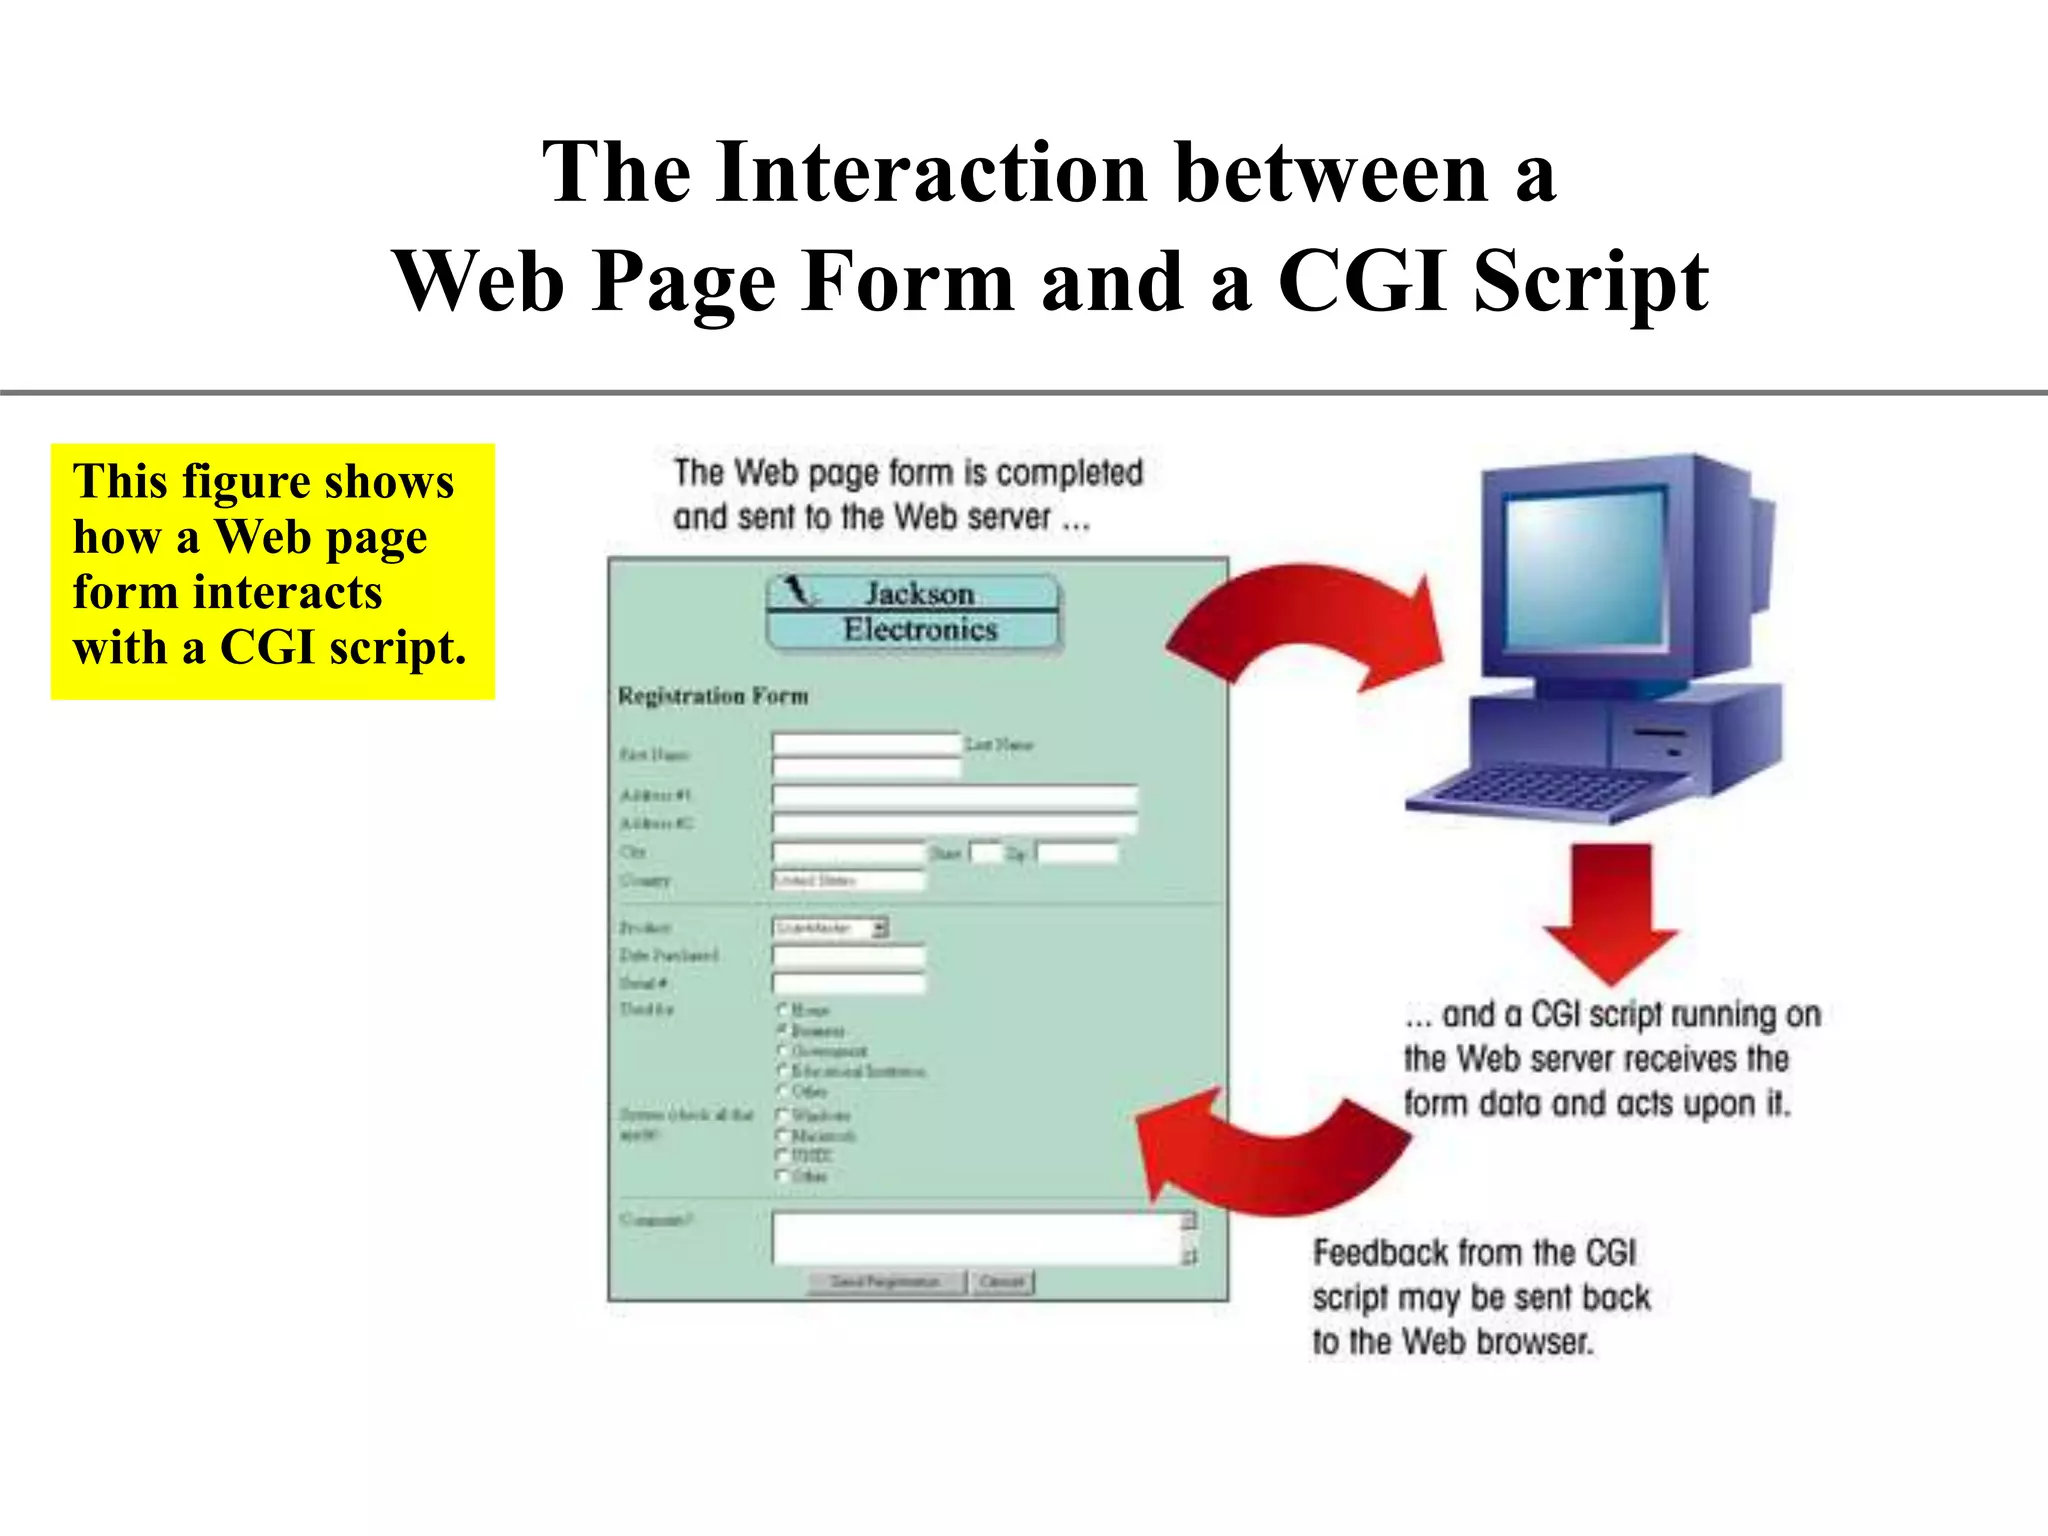
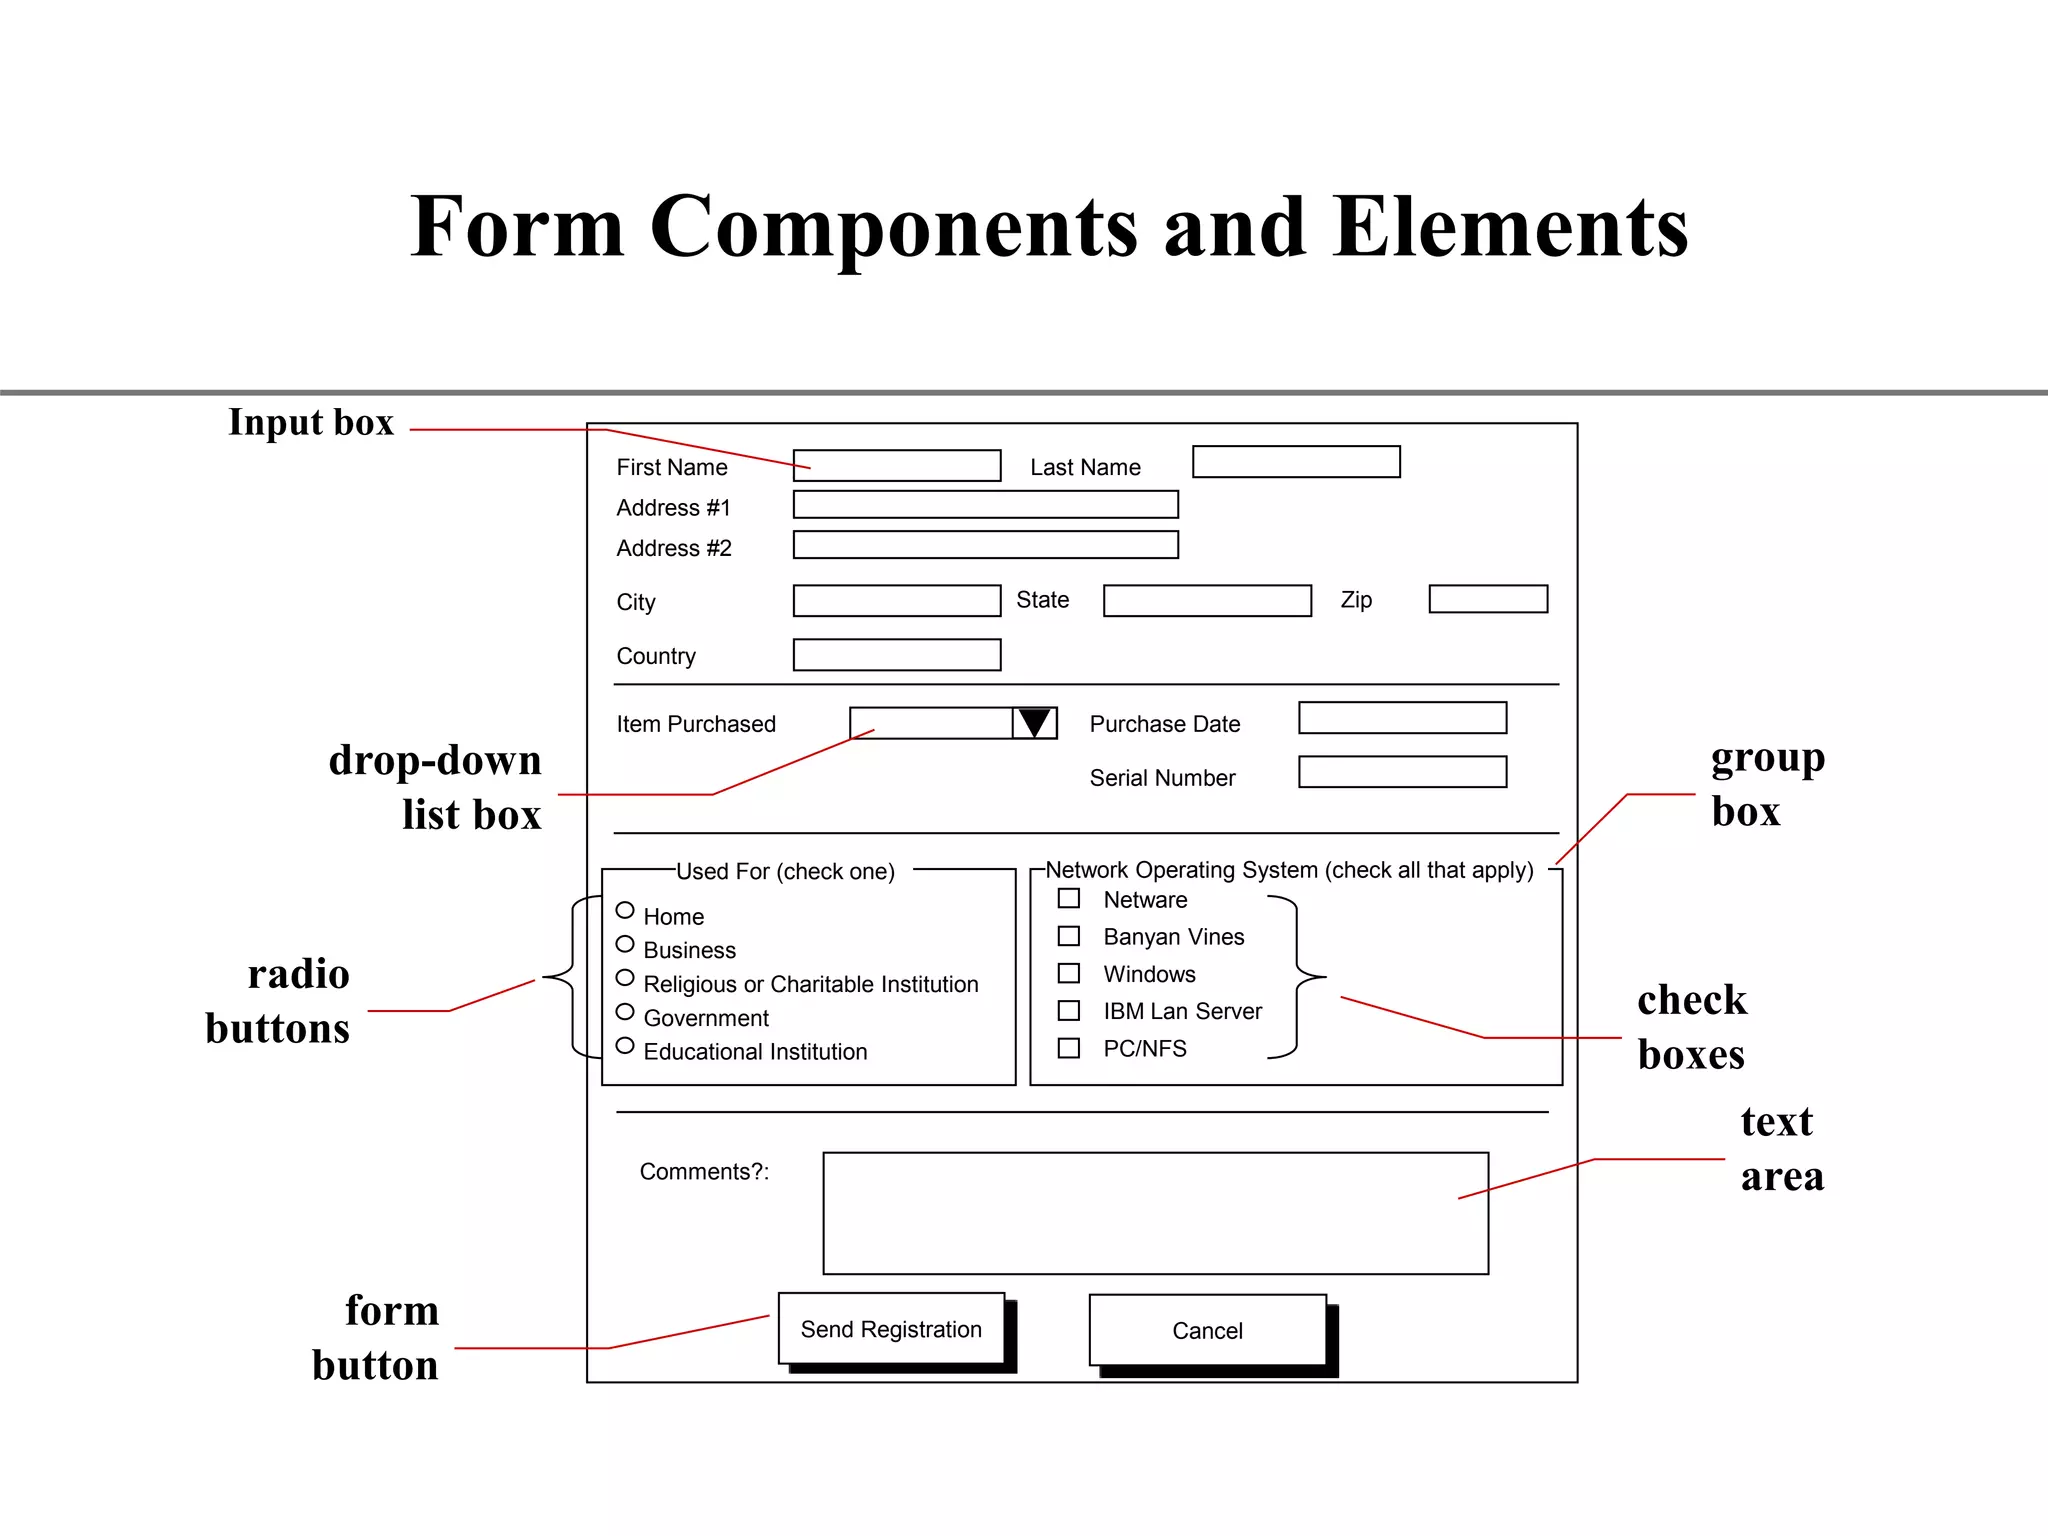
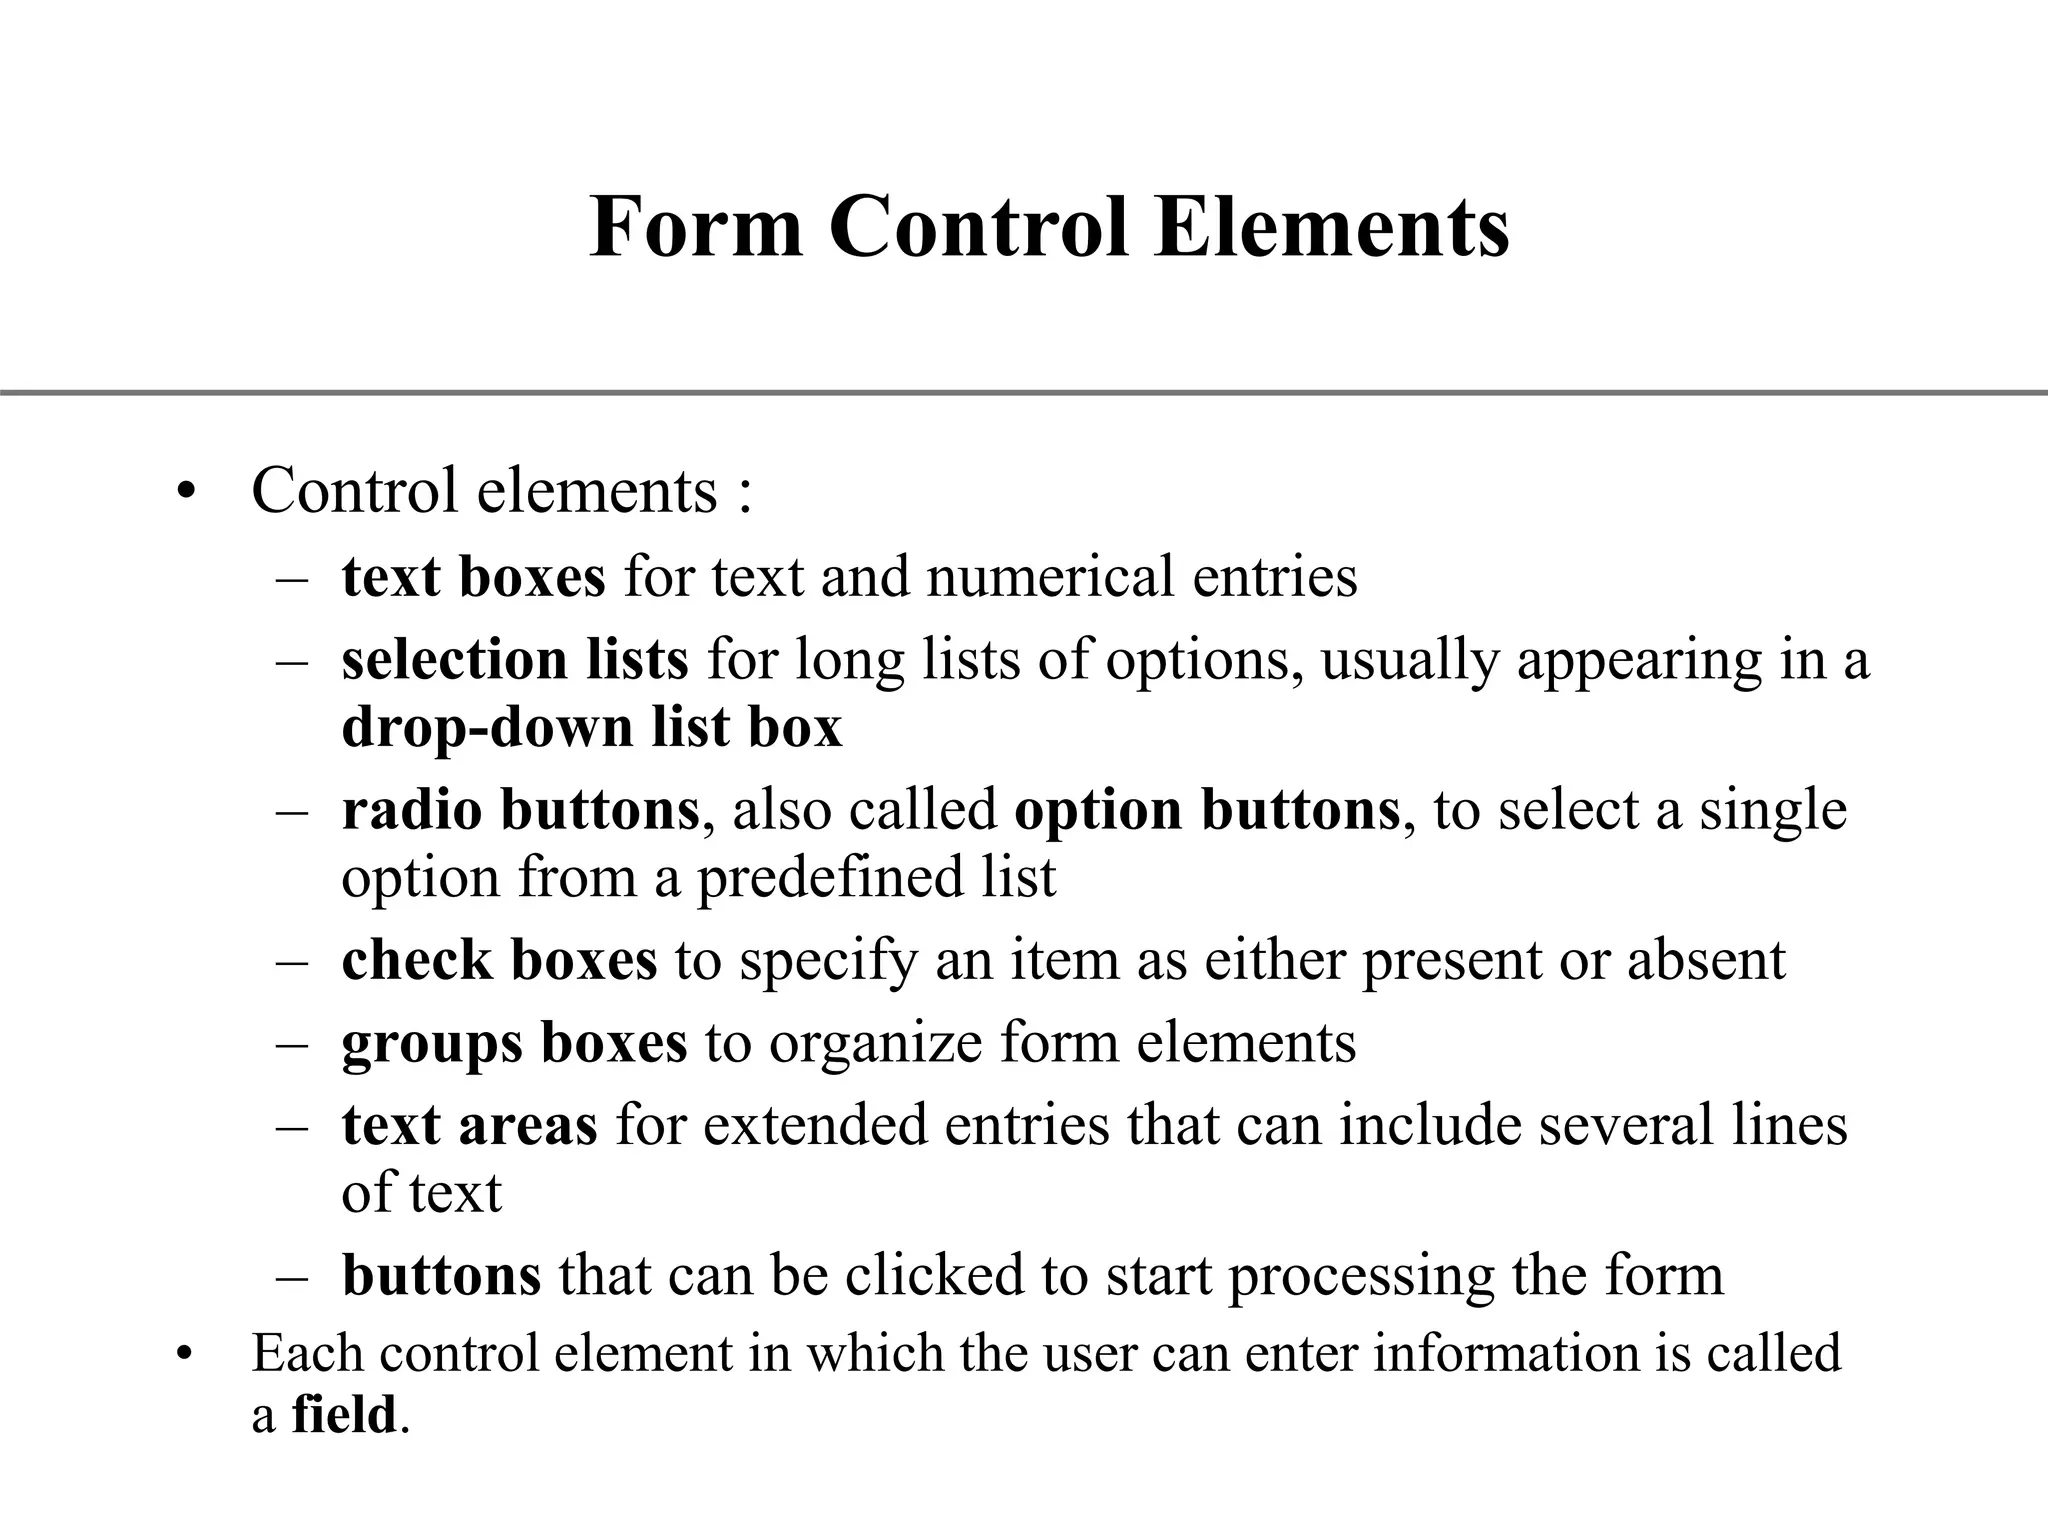
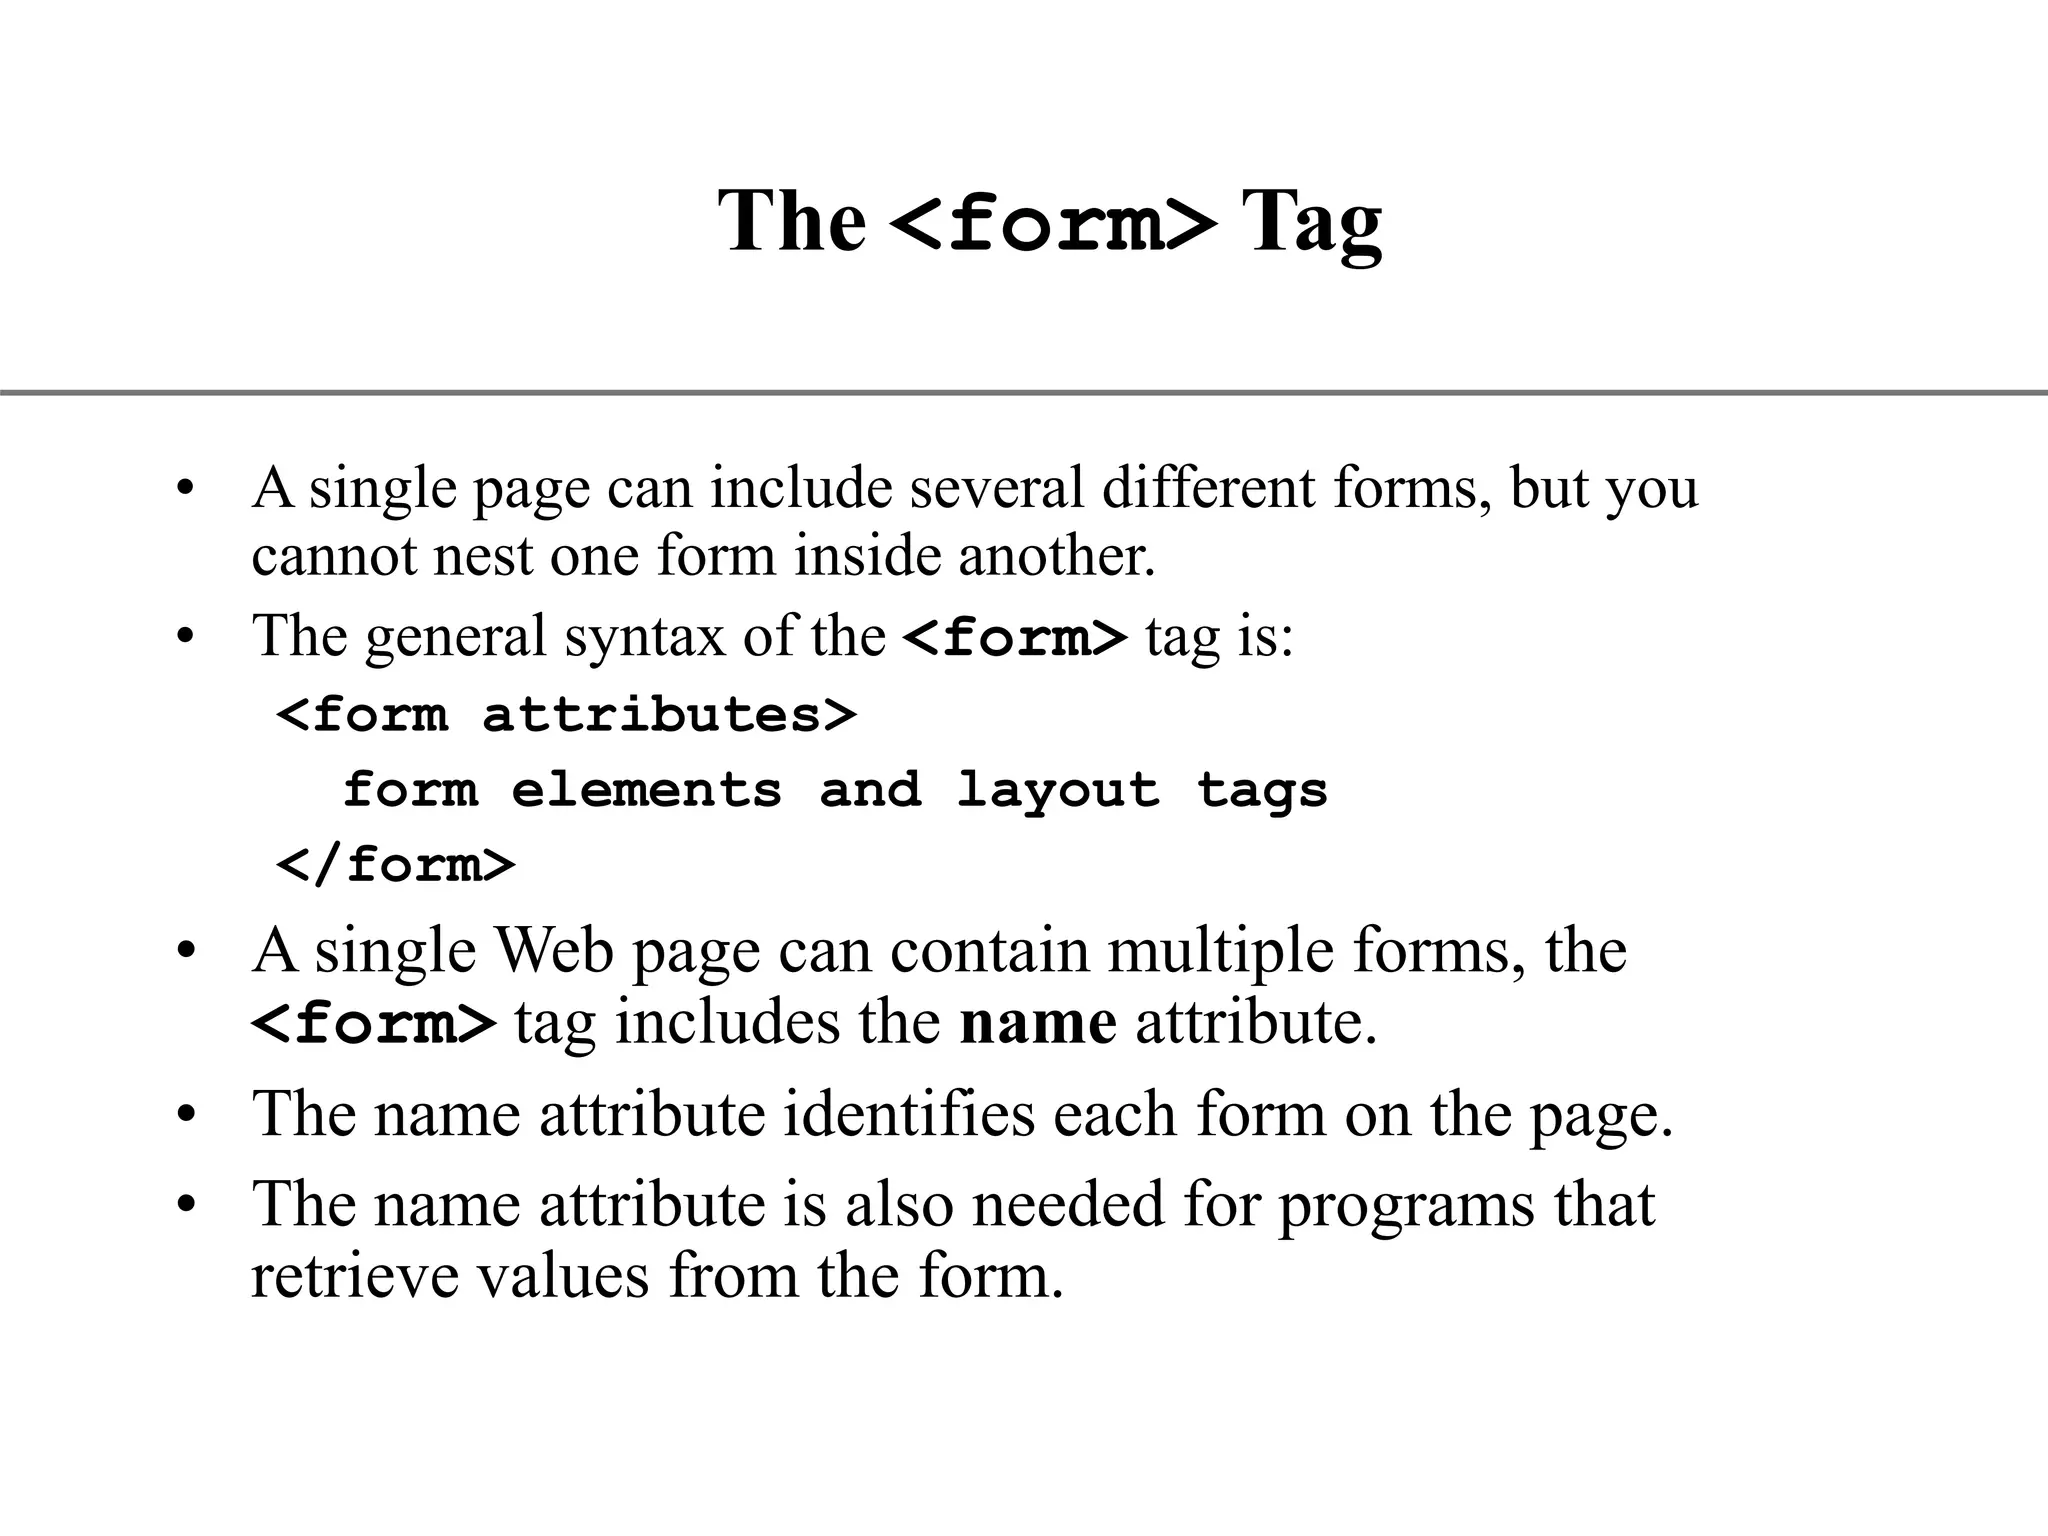
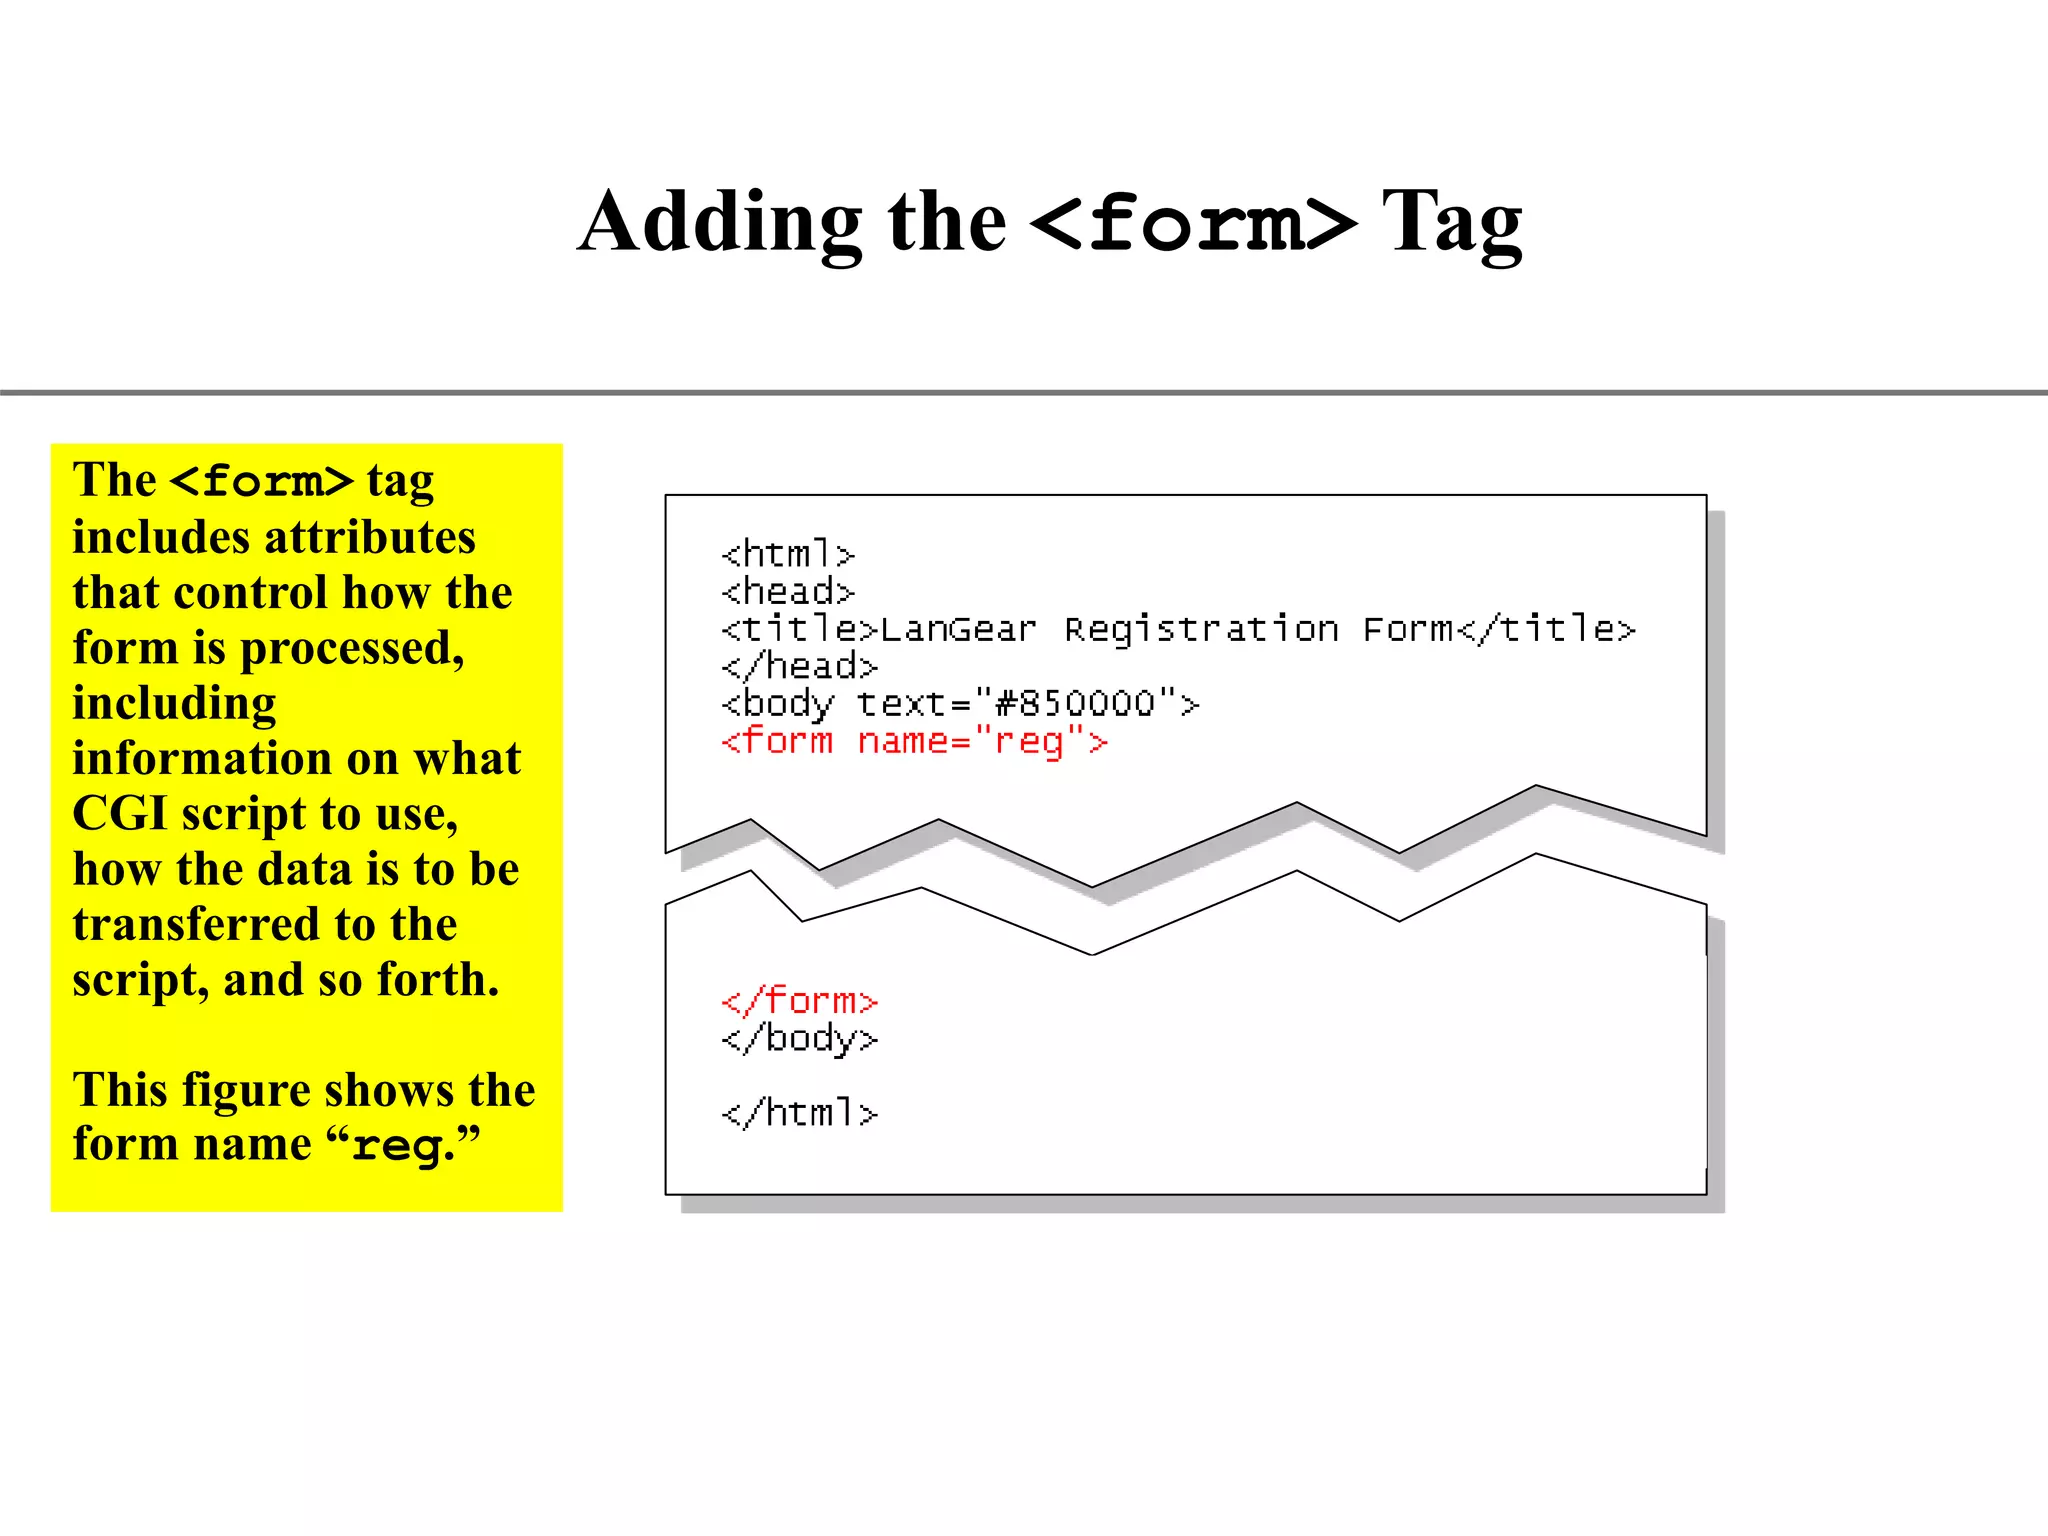
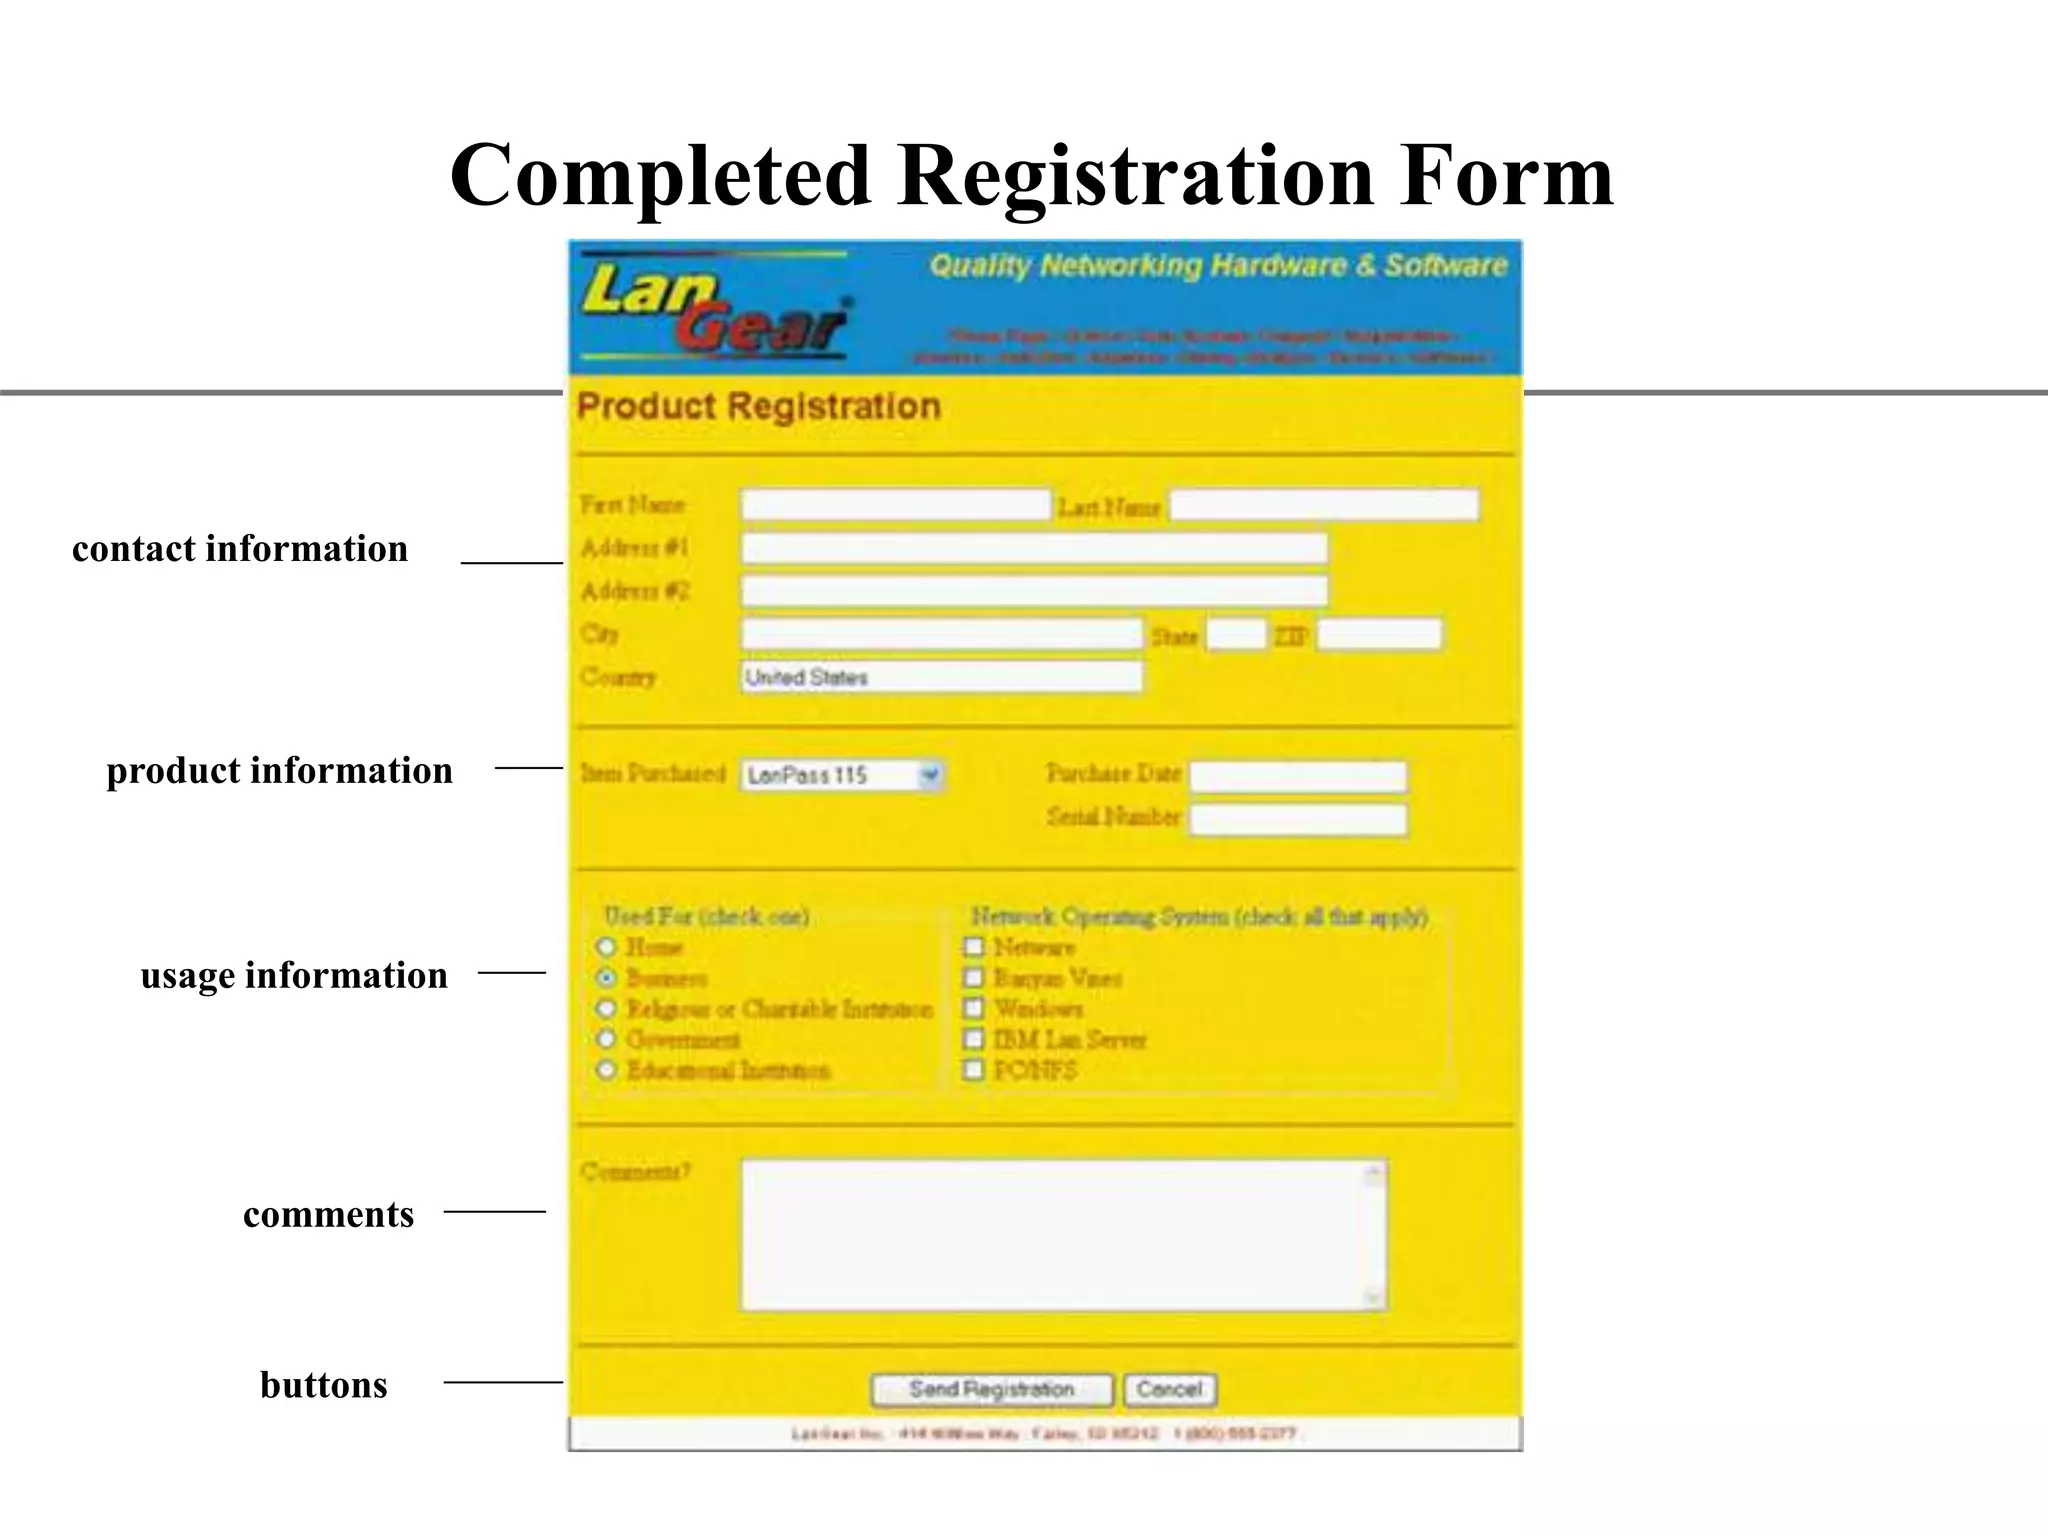
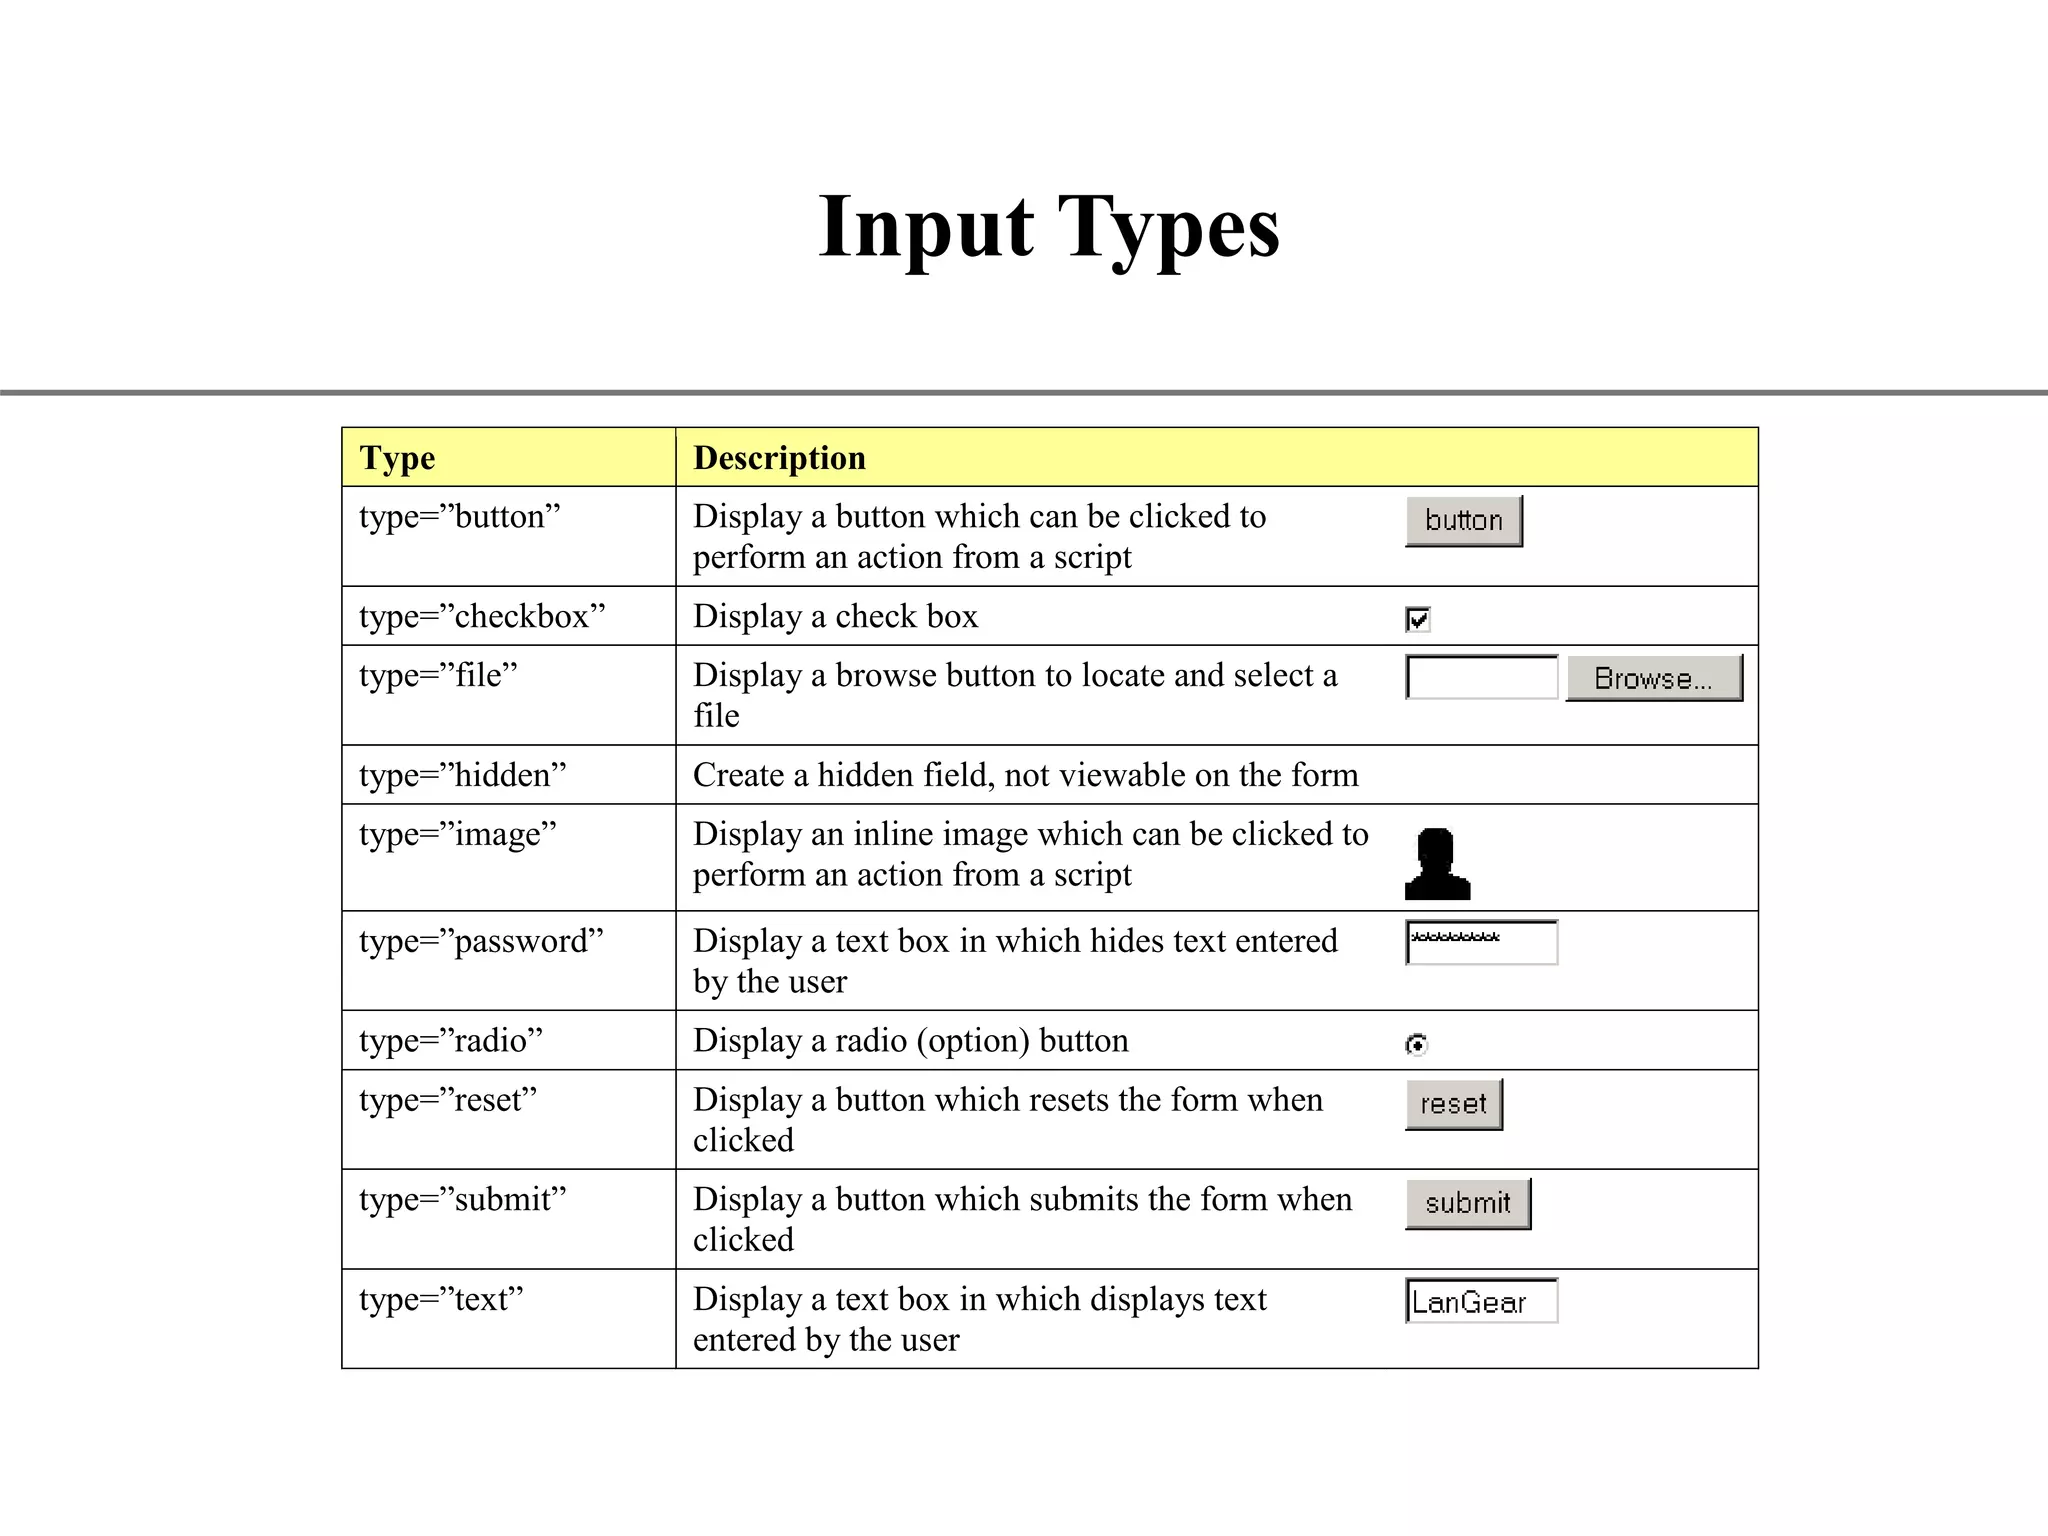
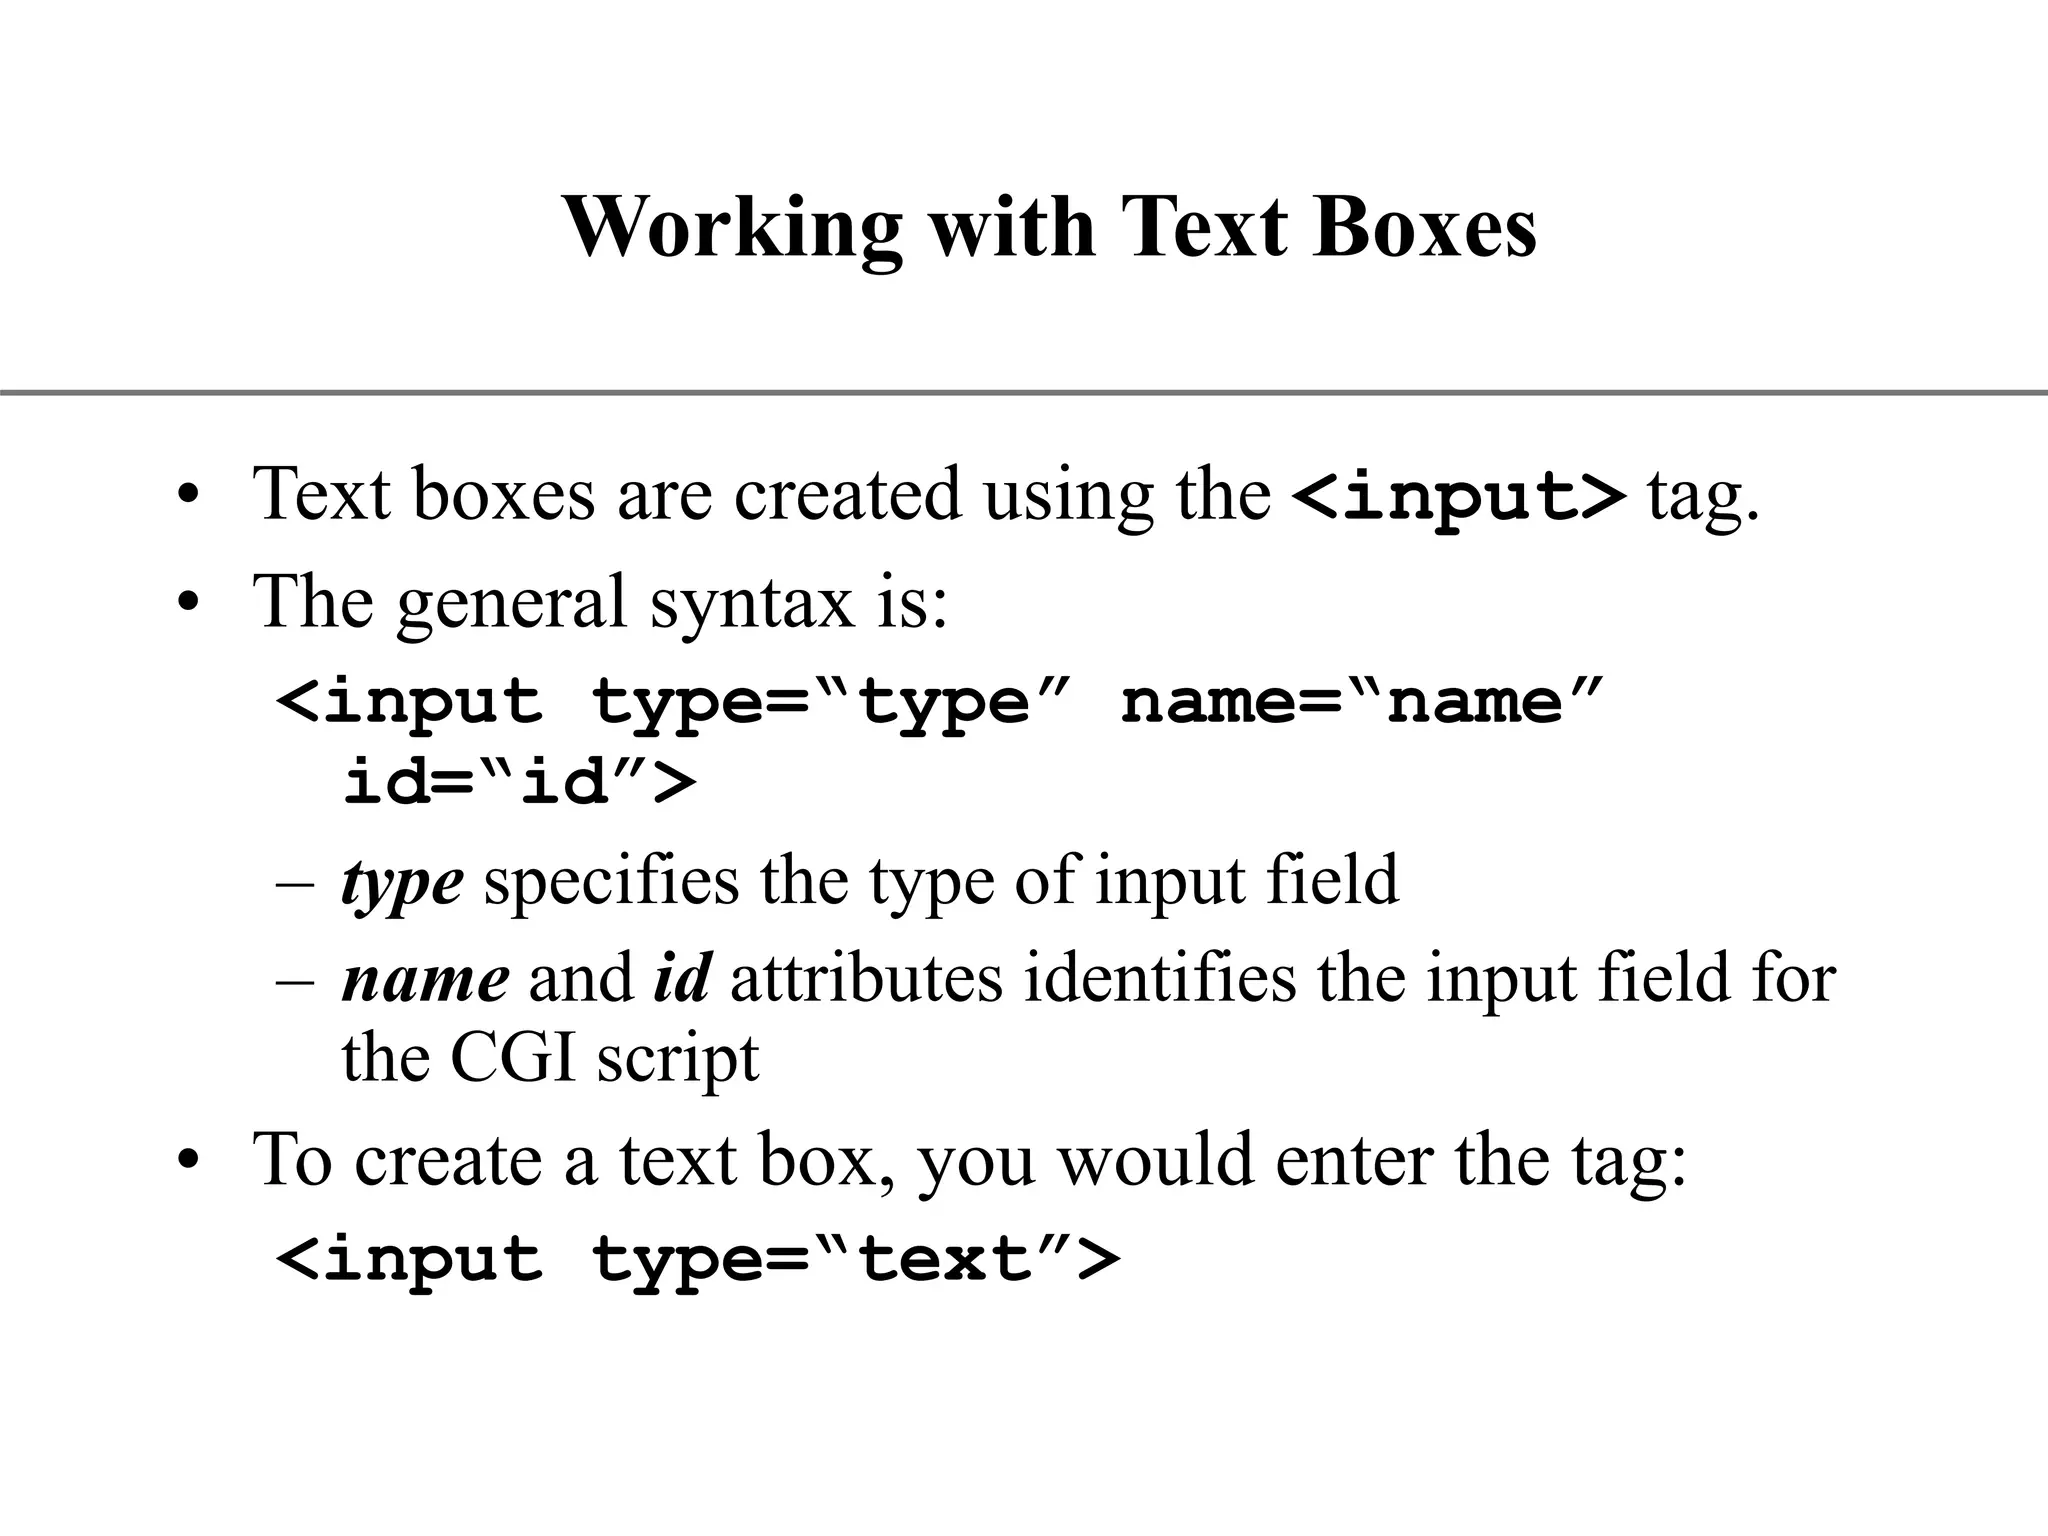
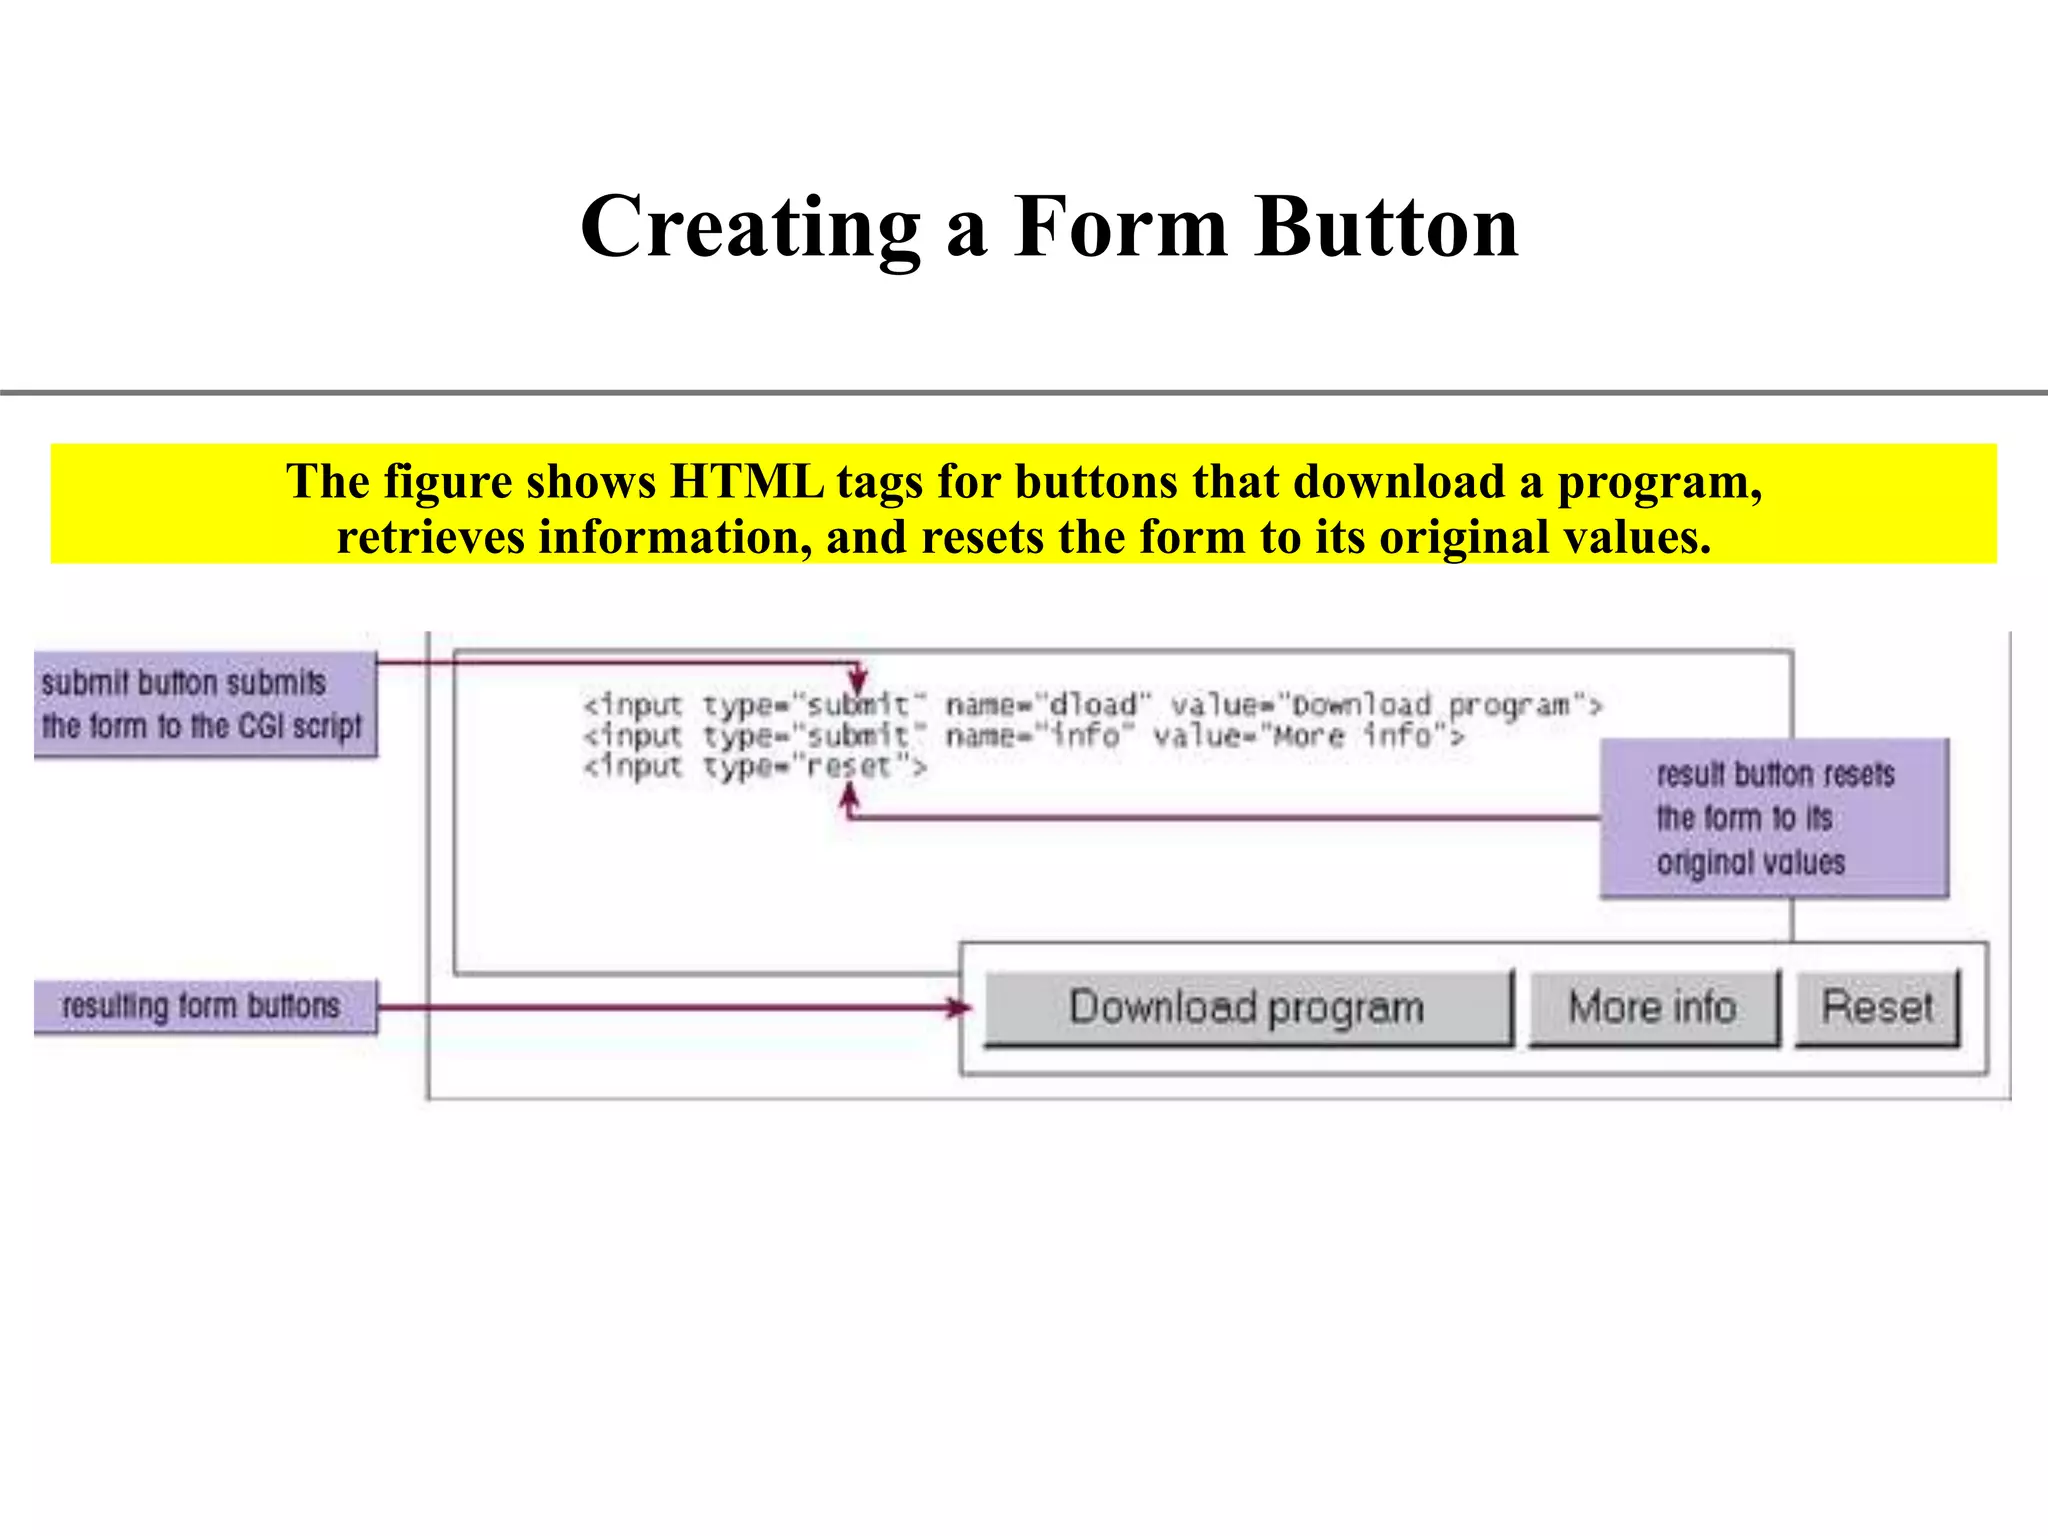
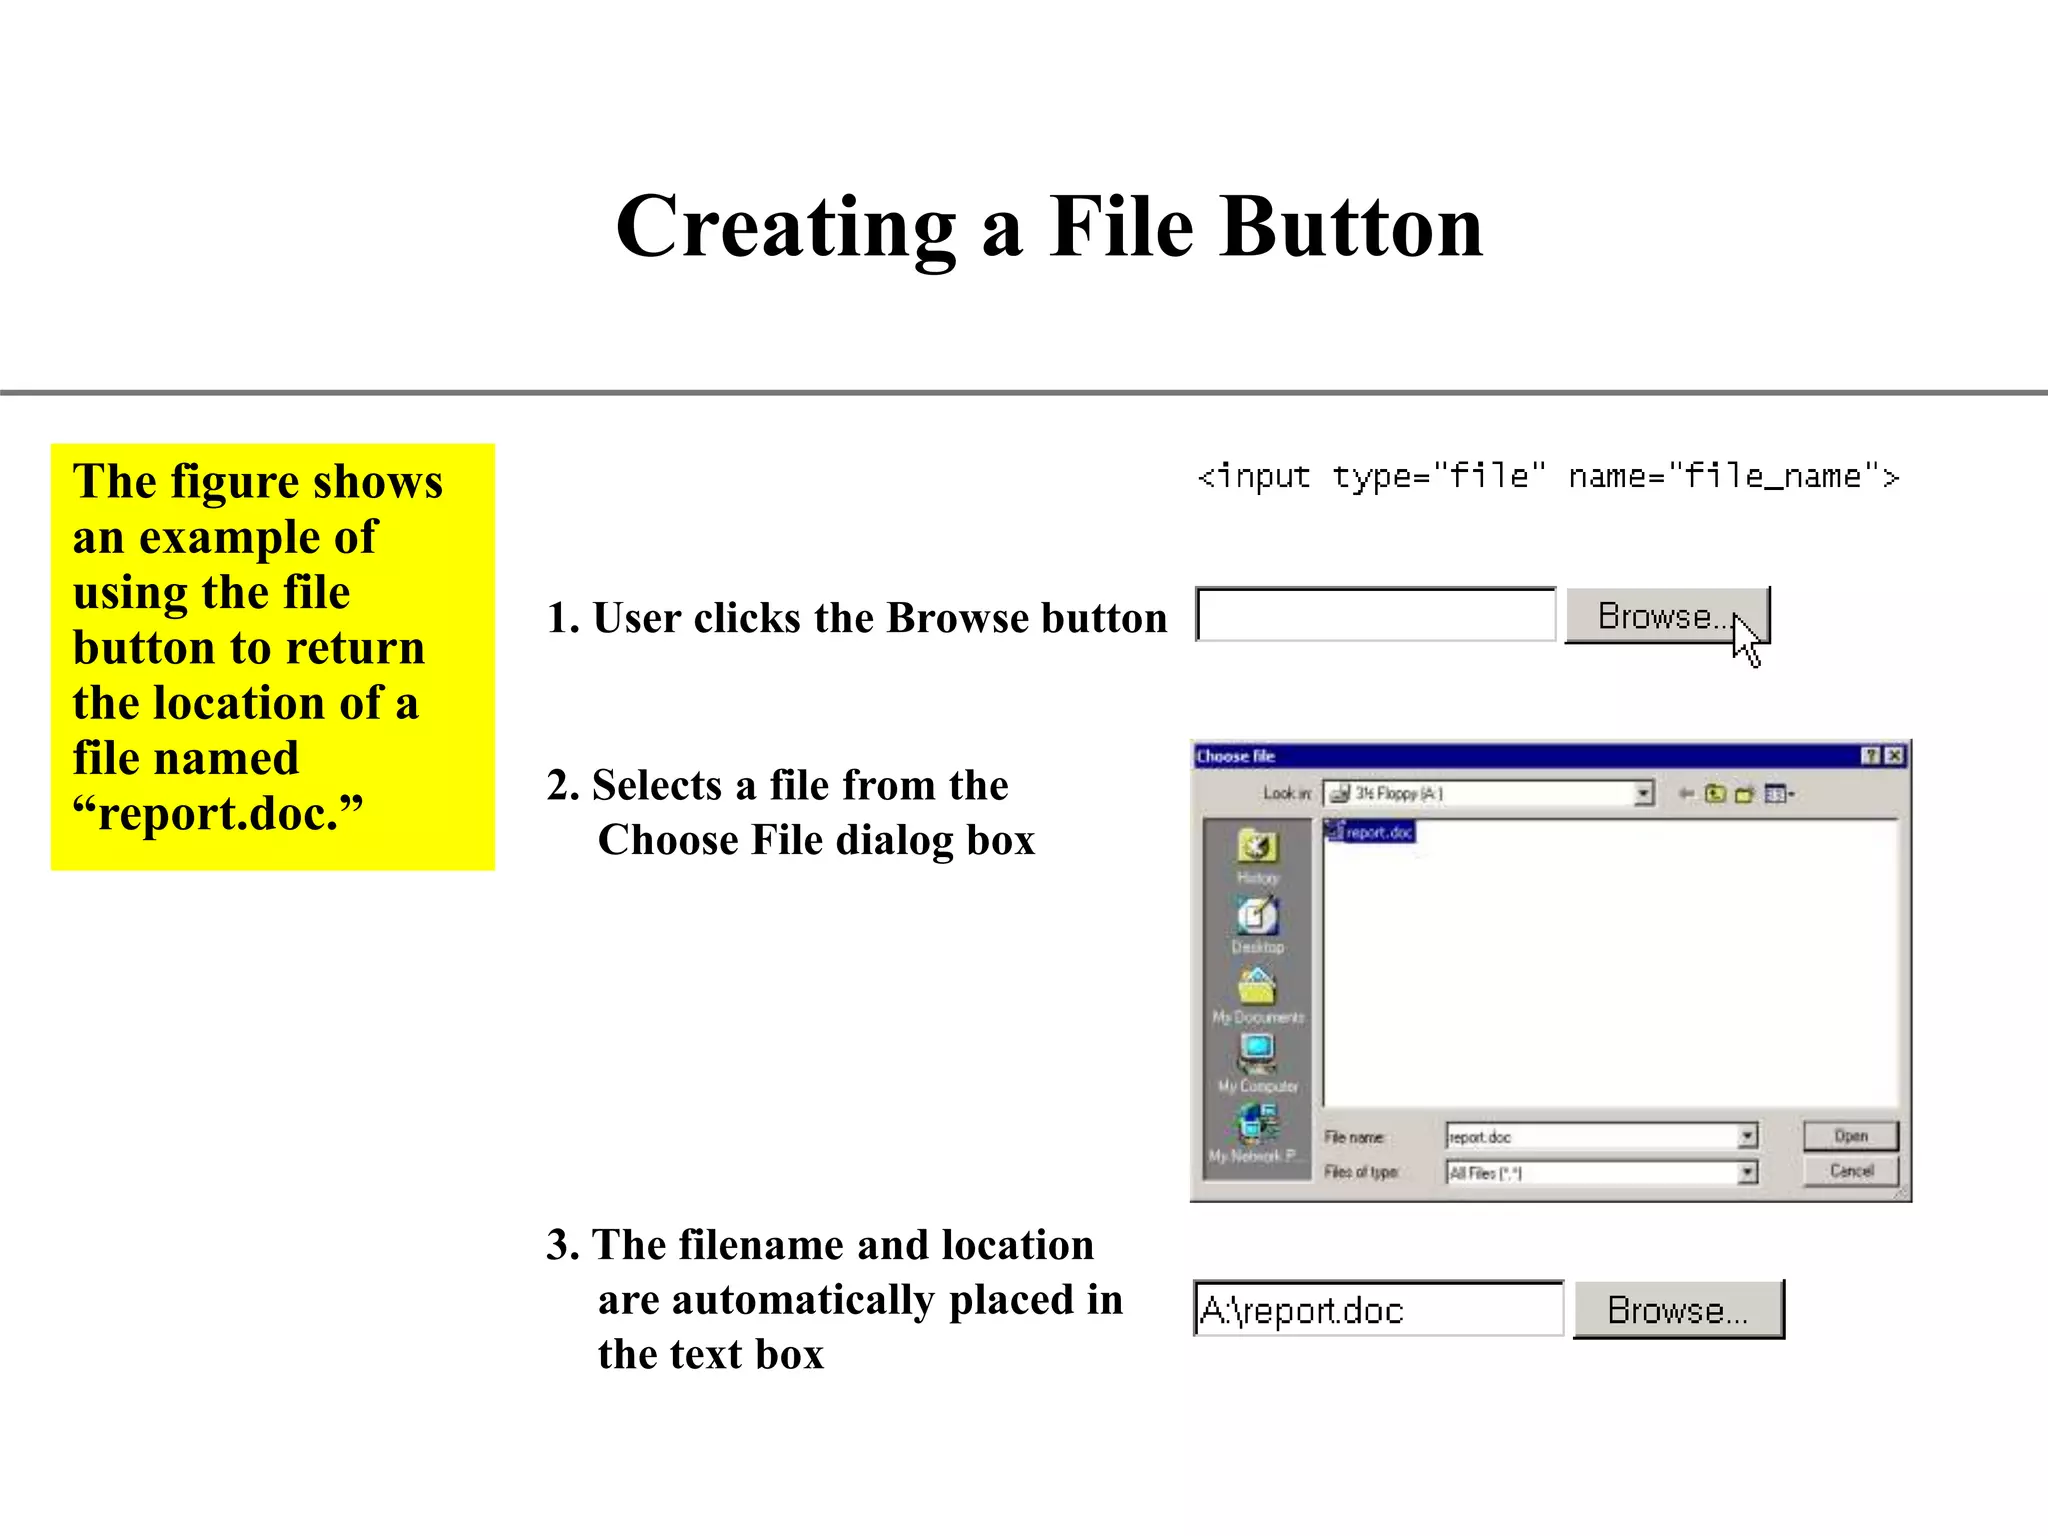
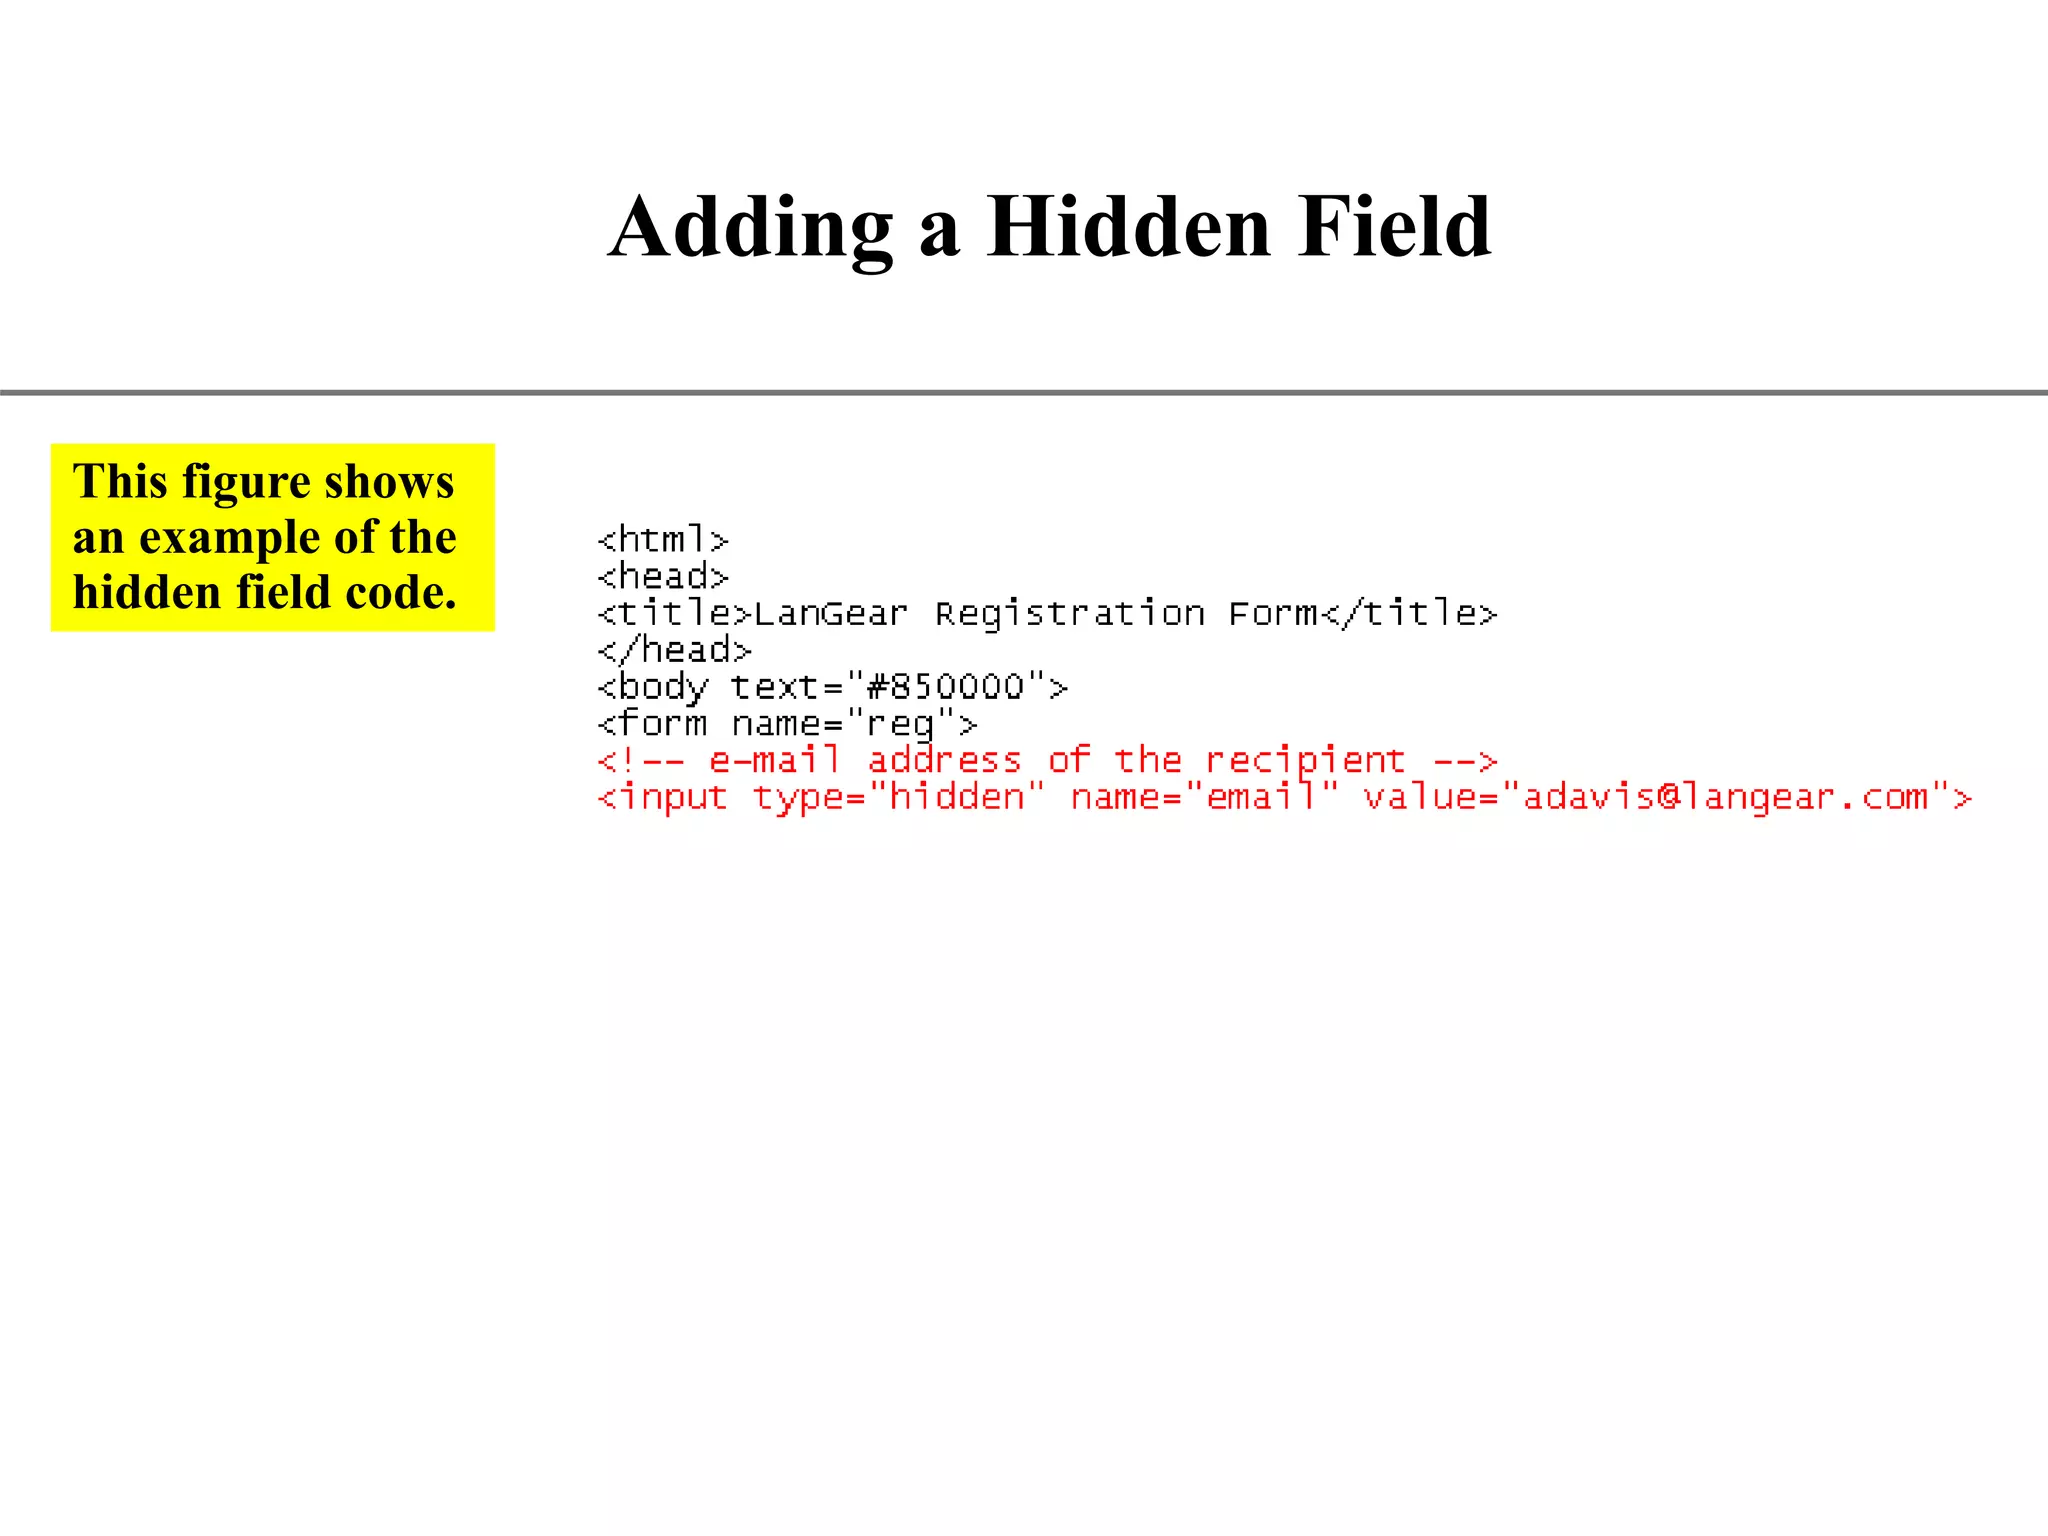
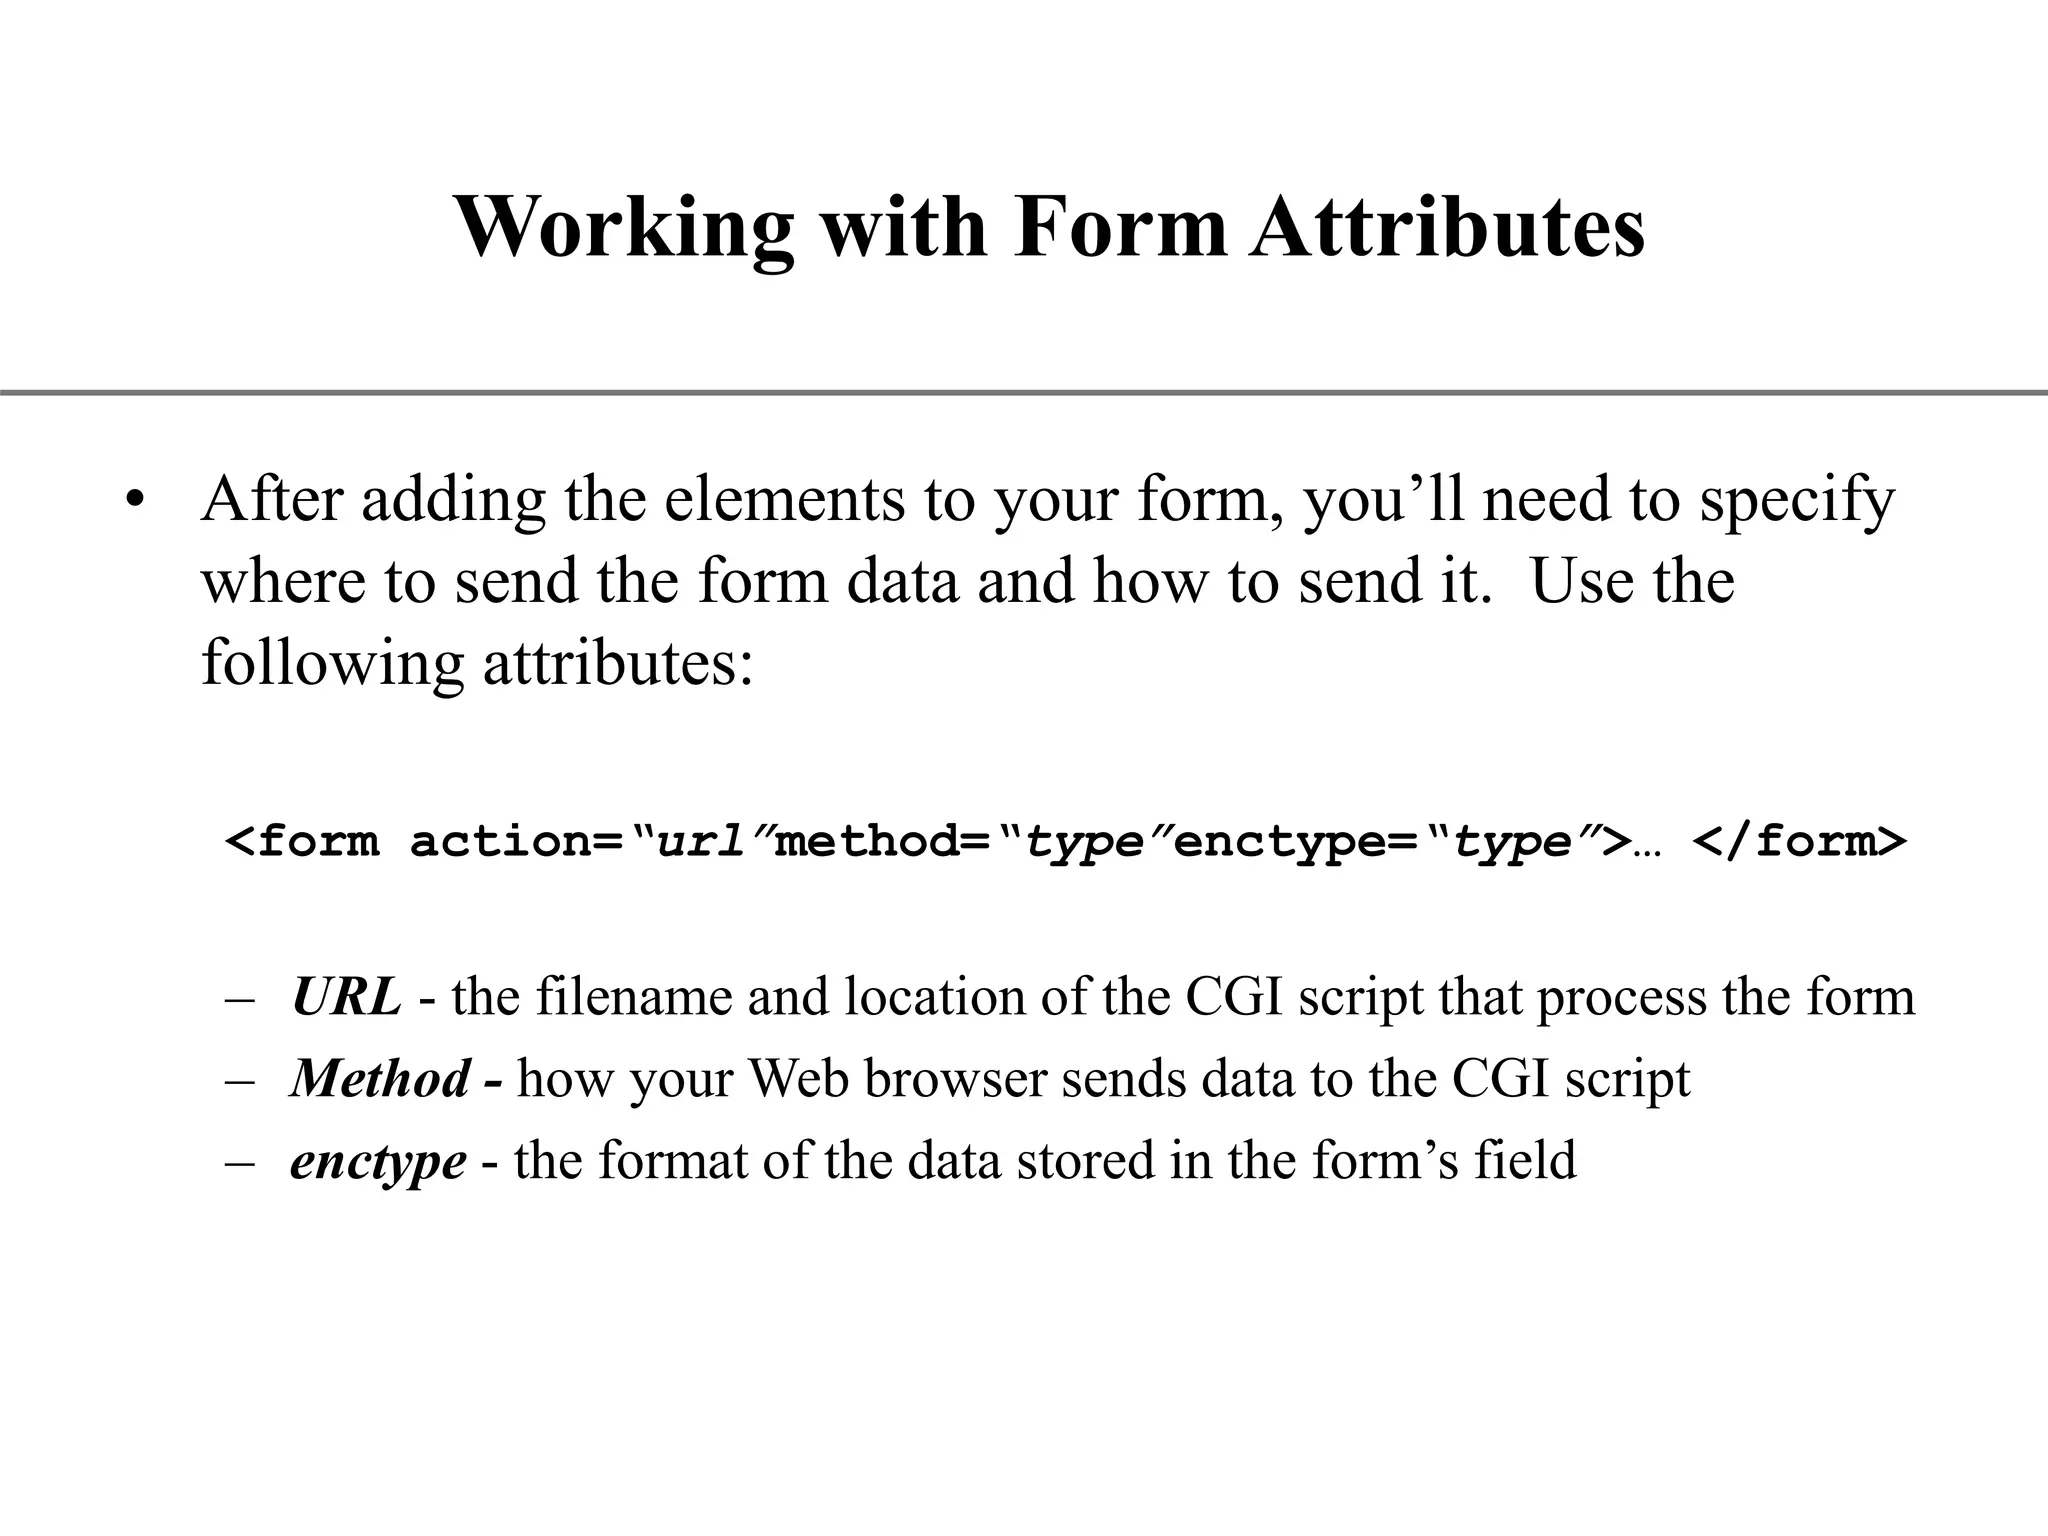
XP Tutorial 6: Creating Web Page Forms
XP An Example of a Form
XP The Interaction between a Web Page Form and a CGI Script This figure shows how a Web page form interacts with a CGI script.
XP Working with CGI Scripts • HTML supports tags for creating forms, however, it does not process the information. • Use CGI (Common Gateway Interface) script to process form information. • CGI script runs on the Web server and receives data from a form and uses it to perform a set of tasks. • Web page designers may not be able to create or edit CGI scripts. – Internet Service Providers (ISPs) and universities may provide CGI scripts that their customers and student can use on their Web sites, but which they cannot directly access or modify
XP CGI Scripts and Computer Languages • CGI scripts can be written in a variety of different computer languages. Some of the most commonly used languages are: – AppleScript – ASP – C/C++ – Perl – TCL – The UNIX shell – Visual Basic • The computer language used depends on the Web server.
XP Form Components and Elements First Name Address #1 Address #2 City Last Name Country State Zip Item Purchased Purchase Date Home Business Government Educational Institution Netware Banyan Vines Windows IBM Lan Server Comments?: Send Registration Cancel Serial Number Used For (check one) Network Operating System (check all that apply) Religious or Charitable Institution PC/NFS Input box drop-down list box radio buttons check boxes text area form button group box
XP Form Control Elements • Control elements : – text boxes for text and numerical entries – selection lists for long lists of options, usually appearing in a drop-down list box – radio buttons, also called option buttons, to select a single option from a predefined list – check boxes to specify an item as either present or absent – groups boxes to organize form elements – text areas for extended entries that can include several lines of text – buttons that can be clicked to start processing the form • Each control element in which the user can enter information is called a field.
XP The <form> Tag • A single page can include several different forms, but you cannot nest one form inside another. • The general syntax of the <form> tag is: <form attributes> form elements and layout tags </form> • A single Web page can contain multiple forms, the <form> tag includes the name attribute. • The name attribute identifies each form on the page. • The name attribute is also needed for programs that retrieve values from the form.
XP Adding the <form> Tag The <form> tag includes attributes that control how the form is processed, including information on what CGI script to use, how the data is to be transferred to the script, and so forth. This figure shows the form name “reg.”
XP Completed Registration Form contact information product information usage information comments buttons
XP Input Types Type Description type=”button” Display a button which can be clicked to perform an action from a script type=”checkbox” Display a check box type=”file” Display a browse button to locate and select a file type=”hidden” Create a hidden field, not viewable on the form type=”image” Display an inline image which can be clicked to perform an action from a script type=”password” Display a text box in which hides text entered by the user type=”radio” Display a radio (option) button type=”reset” Display a button which resets the form when clicked type=”submit” Display a button which submits the form when clicked type=”text” Display a text box in which displays text entered by the user
XP Working with Text Boxes • Text boxes are created using the <input> tag. • The general syntax is: <input type=“type” name=“name” id=“id”> – type specifies the type of input field – name and id attributes identifies the input field for the CGI script • To create a text box, you would enter the tag: <input type=“text”>
XP Creating a Text Box • To create a text box, use the following HTML code: <input name=“name” id=“id” value=“value” size=“value” maxlength=“value”> – name and id attributes identify the field – value - a default value to the text box – size - the width of the text box in number of characters – maxlength - the maximum number of characters allowed in the field
XP Name/Value Pairs sent from the Web Form to the CGI Script This figure shows when form data is sent to the CGI script, the script receives the name or id of each field in the form paired with whatever value the user entered in the field. The script then processes the data according to each name/value pair.
XP Text Boxes on the Form text box Text boxes are blank and do not contain any accompanying text, a text description needs to be inserted, such as “Last Name”, adjacent to each box so that the user knows what to enter. text description
XP Setting the Width of Text Boxes
XP Specify the Maximum Length for a Field no more than 5 characters are allowed in this text box This figure shows an example of limiting the width of the zip code field to five characters.
XP Setting a Default Value for a Field • When the same value is entered into a field, it may make sense to define a default value for a field. • Default values can save time and increase accuracy for users of a Web site. • To define a default value, use the following syntax: <input value=“value”> – value is the default text or number that is displayed in the field
XP Defining a Default Value for a Field default value If customers from countries other than the United States use this Web form, they can remove the default value by selecting the text and pressing the Delete key.
XP Value =“United States”
XP Creating a Password Field • A password field is a text box in which the characters typed by the user are displayed as bullets or asterisks i.e. ****. • The syntax for creating a Password field is: <input type=“password”> • Using a password field should not be confused with having a secure connection. • The password itself is not encrypted. • The password field only acts as a mask for a field entry as it is entered.
XP Form Labels & selection lists • HTML allows you to formally link a label with an associated text element for scripting purposes. • The syntax for creating a form label is: <label for=“id”>label text</label> – id is the value of the id attribute for a field on the form – label text is the text of the label – you must bind the label to the id attribute of the field and not the name attribute
XP Creating a Label for the fname Field value of the id attribute for the first name field This figure shows a label for the fname field.
XP Using a Selection List Your selection list might look slightly different depending on the browser and browser version.
XP Creating a Selection List • A selection list is a list box from which a user selects a particular value or set of values. • Selection lists are good to use when there is a fixed set of possible responses. • Selection lists help prevent spelling mistakes and erroneous entries. • A selection list is created using the <select> tag. • The <option> tag is used to specify individual selection items.
XP Creating a Selection List items in the selection list selection list field name
XP Selection Lists with Different Size Values size = "1" size = "4" size = "7" size = "9"
XP Working with Option Values • By default, a form sends the values that are displayed in the selection list to the CGI script. • Instead of sending an entire text string, an abbreviation or code can be sent to the CGI script. • Specify the value that is sent to the CGI script with the value attribute. • Use the selected attribute to specify which item in the selection is selected, or highlighted, when the form is displayed.
XP Working with Option Groups • The most recent releases of HTML allows you to organize selection lists into distinct groups called option groups. • The syntax for creating an option group is: <optgroup label=“label”> – label is the label assigned to the option group – the text for the label appears in the selection list above each group of items but is not a selectable item from the list
XP Option Groups a single option group option group label a single option group option group label Internet Explorer and Netscape versions prior to 6.0 display the selection list without the group labels.
XP Radio Buttons • Radio buttons display a list of choices from which a user makes a selection. – Only one radio button can be selected at a time. • The syntax to create a radio button is: <input type=“radio” name=“name” id=“id” value=“value”> – name - the field containing the radio button (required) – id - the specific option. Only required if you intend to use a field label with the radio button – value - the value sent to the CGI script, if that radio button is selected by the user
XP Creating Radio Buttons In this sample code, the value sent to the CGI script does not match the field label. If the user selects the Republican radio button, the value “gop” is sent to the CGI script paired with the field name “party.”
XP Creating a Group Box • A group box labels an entire collection of radio buttons. • A group box is a box placed around a set of fields that indicates that they belong to a common group. • The syntax for creating a group box is: <fieldset> <legend align=“align”>legend text</legend> collection of fields </fieldset>
XP Group Boxes for Radio Buttons and Check Boxes
XP Creating a Field Set • HTML and XHML allow you to organize option buttons into a group of fields called field sets. – Most browsers place a group box around a field set to indicate that the fields belong to a common group. <fieldset> fields </fieldset> Where fields are the individual fields within a set. • the <legend> tag is used to display a legend on the group box
XP Creating a Group Box and Legend start of group box group box legend resulting radio buttons and group box
XP Group Box Size • There is no attribute to control the size of a group box. • The box’s height will be large enough to accommodate the fields and labels in the field set. • The width is the width of whatever space remains on the Web page. • To set the width to a specific value use a table cell to place the group box and set the width of the cell. – group boxes cannot extend across table cells; all of the fields in the field set must be placed within a single cell
XP Working with Check Boxes • A check box is either selected or not • Check boxes are created using the following syntax: <input type=“checkbox” name=“name” id=“id” value=“value”> – name and id - the check box – the value - the value that is sent to the CGI script when the check box is selected • Check boxes are not selected by default. – to do this, add the checked attribute to the <input> tag – <input type =“checkbox” checked = “checked”>
XP Group Boxes for Radio Buttons and Check Boxes
XP Creating a Text Area resulting text area dimensions of text area default text area text
XP Comment Text Area
XP Creating a Form Button
XP Creating a Push Button • One type of button, called a push button, is created using the <input> tag as follows: <input type=“button” value=“text”> – text is the text that appears on the button • By themselves, push buttons perform no actions in the Web page. • To create an action, write a script or program that runs automatically when the button is clicked.
XP Creating Submit and Reset Buttons • A submit button is a button that submits the form to the CGI script for processing. • A reset button resets the form to its original (default) values. • The syntax for creating these two buttons is: <input type=“submit” value=“text”> <input type=“reset” value=“text”> – value attribute defines the text that appears on the button
XP Creating a Form Button The figure shows HTML tags for buttons that download a program, retrieves information, and resets the form to its original values.
XP Creating a File Button 1. User clicks the Browse button 2. Selects a file from the Choose File dialog box 3. The filename and location are automatically placed in the text box The figure shows an example of using the file button to return the location of a file named “report.doc.”
XP Working with Hidden Fields • A hidden field is added to the form but not displayed in the Web page. • Because the field is hidden, it can be placed anywhere between the opening and closing <form> tags. • The syntax for creating a hidden field is: <input type=“hidden” name=“name” value=“value> • Place all hidden fields in one location to make it easier to read and interpret the HTML code. • Include a comment describing the purpose of the field.
XP Adding a Hidden Field This figure shows an example of the hidden field code.
XP Working with Form Attributes • After adding the elements to your form, you’ll need to specify where to send the form data and how to send it. Use the following attributes: <form action=“url”method=“type”enctype=“type”>… </form> – URL - the filename and location of the CGI script that process the form – Method - how your Web browser sends data to the CGI script – enctype - the format of the data stored in the form’s field
XP Working with Form Attributes • The method attribute can have one of two values: – Post – Get • The get method is the default; – get appends the form data to the end of the URL specified in the action attribute. • The post method sends form data in a separate data stream, allowing the Web server to receive the data through “standard input”. – the “post” method is considered the preferred way of sending data to a Web server
XP Specifying Where and How to Send Form Data This figure shows the CGI script that processes the form is located at the URL http://www.langear.com/cgi/mailer (a fictional address) and uses the “post” method.
XP Form Values The Web browser presents a page, an example of which is shown in this figure, displaying the name of each field in the form and the value assigned to it. At the same time, the CGI script formats a mail message to be sent to the address you entered.
XP Using the “mailto” Action • Use the “mailto” action to send form information via e- mail without using a CGI script. • This action accesses the user’s own e-mail program and uses it to mail form information to a specified e-mail address, bypassing the need for using CGI scripts on a Web server. • The syntax of the “mailto” action is: <form action=“mailto:e-mail_address” method=“post” enctype=“text/plain”> – e-mail_address is the e-mail address of the recipient of the form
XP Using the “mailto” Action Continued • Not all browsers support the “mailto” action. – for example, versions of Internet Explorer earlier than 4.0 and Netscape Navigator 3.0 do not • Another concern is that messages sent via the “mailto” action are not encrypted for privacy. • The recipient’s email address is revealed to the user.
XP Mail Message Created Using the “mailto” Action This figure shows an e-mail message that the “mailto” action generated for a registration form. The format of the mail message may look different depending on the browser or e-mail software.
XP Specifying the Tab Order • Users navigate through a Web form using the Tab key. – the Tab key moves the cursor from one field to another in the order that the field tags are entered. • Add the tabindex attribute to any control element in the form to specify the tab order. • With each element assigned a tab index number, the cursor moves through the fields from the lowest index number to the highest. – for example, to assign the tab index number “1” to the fname field, enter the code: <input name=“fname” tabindex=“1”>
XP Specifying an Access Key • An access key is a single key that you type in conjunction with the Alt key for Windows users or the Command key for Macintosh users, to jump to one of the control elements in the form. • Add the accesskey attribute to any of the control elements to create an access key. • To create an access key for the lname field, enter the following code: <input name=“lname” accesskey=“1”> – if a user types Alt+l (or Command+1 for Macintosh users), the control element for the lname field is selected
XP 7 rows
XP <form> tag needed after <body> Three <Fieldset> with <legend> for group box <textarea> for “street field” Default value as “United States” needed for “Country” Checkbox for “Ship to Billing Address” field Radio button for Credit Card field “password” as input type” for card number field <select> and <option> for “expiration date” field Three form buttons at the bottom

3. HTML Forms.ppt

  • 1.
  • 2.
  • 3.
    XP The Interaction betweena Web Page Form and a CGI Script This figure shows how a Web page form interacts with a CGI script.
  • 4.
    XP Working with CGIScripts • HTML supports tags for creating forms, however, it does not process the information. • Use CGI (Common Gateway Interface) script to process form information. • CGI script runs on the Web server and receives data from a form and uses it to perform a set of tasks. • Web page designers may not be able to create or edit CGI scripts. – Internet Service Providers (ISPs) and universities may provide CGI scripts that their customers and student can use on their Web sites, but which they cannot directly access or modify
  • 5.
    XP CGI Scripts andComputer Languages • CGI scripts can be written in a variety of different computer languages. Some of the most commonly used languages are: – AppleScript – ASP – C/C++ – Perl – TCL – The UNIX shell – Visual Basic • The computer language used depends on the Web server.
  • 6.
    XP Form Components andElements First Name Address #1 Address #2 City Last Name Country State Zip Item Purchased Purchase Date Home Business Government Educational Institution Netware Banyan Vines Windows IBM Lan Server Comments?: Send Registration Cancel Serial Number Used For (check one) Network Operating System (check all that apply) Religious or Charitable Institution PC/NFS Input box drop-down list box radio buttons check boxes text area form button group box
  • 7.
    XP Form Control Elements •Control elements : – text boxes for text and numerical entries – selection lists for long lists of options, usually appearing in a drop-down list box – radio buttons, also called option buttons, to select a single option from a predefined list – check boxes to specify an item as either present or absent – groups boxes to organize form elements – text areas for extended entries that can include several lines of text – buttons that can be clicked to start processing the form • Each control element in which the user can enter information is called a field.
  • 8.
    XP The <form> Tag •A single page can include several different forms, but you cannot nest one form inside another. • The general syntax of the <form> tag is: <form attributes> form elements and layout tags </form> • A single Web page can contain multiple forms, the <form> tag includes the name attribute. • The name attribute identifies each form on the page. • The name attribute is also needed for programs that retrieve values from the form.
  • 9.
    XP Adding the <form>Tag The <form> tag includes attributes that control how the form is processed, including information on what CGI script to use, how the data is to be transferred to the script, and so forth. This figure shows the form name “reg.”
  • 10.
    XP Completed Registration Form contactinformation product information usage information comments buttons
  • 11.
    XP Input Types Type Description type=”button”Display a button which can be clicked to perform an action from a script type=”checkbox” Display a check box type=”file” Display a browse button to locate and select a file type=”hidden” Create a hidden field, not viewable on the form type=”image” Display an inline image which can be clicked to perform an action from a script type=”password” Display a text box in which hides text entered by the user type=”radio” Display a radio (option) button type=”reset” Display a button which resets the form when clicked type=”submit” Display a button which submits the form when clicked type=”text” Display a text box in which displays text entered by the user
  • 12.
    XP Working with TextBoxes • Text boxes are created using the <input> tag. • The general syntax is: <input type=“type” name=“name” id=“id”> – type specifies the type of input field – name and id attributes identifies the input field for the CGI script • To create a text box, you would enter the tag: <input type=“text”>
  • 13.
    XP Creating a TextBox • To create a text box, use the following HTML code: <input name=“name” id=“id” value=“value” size=“value” maxlength=“value”> – name and id attributes identify the field – value - a default value to the text box – size - the width of the text box in number of characters – maxlength - the maximum number of characters allowed in the field
  • 14.
    XP Name/Value Pairs sentfrom the Web Form to the CGI Script This figure shows when form data is sent to the CGI script, the script receives the name or id of each field in the form paired with whatever value the user entered in the field. The script then processes the data according to each name/value pair.
  • 15.
    XP Text Boxes onthe Form text box Text boxes are blank and do not contain any accompanying text, a text description needs to be inserted, such as “Last Name”, adjacent to each box so that the user knows what to enter. text description
  • 16.
    XP Setting the Widthof Text Boxes
  • 17.
    XP Specify the MaximumLength for a Field no more than 5 characters are allowed in this text box This figure shows an example of limiting the width of the zip code field to five characters.
  • 18.
    XP Setting a DefaultValue for a Field • When the same value is entered into a field, it may make sense to define a default value for a field. • Default values can save time and increase accuracy for users of a Web site. • To define a default value, use the following syntax: <input value=“value”> – value is the default text or number that is displayed in the field
  • 19.
    XP Defining a DefaultValue for a Field default value If customers from countries other than the United States use this Web form, they can remove the default value by selecting the text and pressing the Delete key.
  • 20.
  • 21.
    XP Creating a PasswordField • A password field is a text box in which the characters typed by the user are displayed as bullets or asterisks i.e. ****. • The syntax for creating a Password field is: <input type=“password”> • Using a password field should not be confused with having a secure connection. • The password itself is not encrypted. • The password field only acts as a mask for a field entry as it is entered.
  • 22.
    XP Form Labels &selection lists • HTML allows you to formally link a label with an associated text element for scripting purposes. • The syntax for creating a form label is: <label for=“id”>label text</label> – id is the value of the id attribute for a field on the form – label text is the text of the label – you must bind the label to the id attribute of the field and not the name attribute
  • 23.
    XP Creating a Labelfor the fname Field value of the id attribute for the first name field This figure shows a label for the fname field.
  • 24.
    XP Using a SelectionList Your selection list might look slightly different depending on the browser and browser version.
  • 25.
    XP Creating a SelectionList • A selection list is a list box from which a user selects a particular value or set of values. • Selection lists are good to use when there is a fixed set of possible responses. • Selection lists help prevent spelling mistakes and erroneous entries. • A selection list is created using the <select> tag. • The <option> tag is used to specify individual selection items.
  • 26.
    XP Creating a SelectionList items in the selection list selection list field name
  • 27.
    XP Selection Lists with DifferentSize Values size = "1" size = "4" size = "7" size = "9"
  • 28.
    XP Working with OptionValues • By default, a form sends the values that are displayed in the selection list to the CGI script. • Instead of sending an entire text string, an abbreviation or code can be sent to the CGI script. • Specify the value that is sent to the CGI script with the value attribute. • Use the selected attribute to specify which item in the selection is selected, or highlighted, when the form is displayed.
  • 29.
    XP Working with OptionGroups • The most recent releases of HTML allows you to organize selection lists into distinct groups called option groups. • The syntax for creating an option group is: <optgroup label=“label”> – label is the label assigned to the option group – the text for the label appears in the selection list above each group of items but is not a selectable item from the list
  • 30.
    XP Option Groups a single option group option grouplabel a single option group option group label Internet Explorer and Netscape versions prior to 6.0 display the selection list without the group labels.
  • 31.
    XP Radio Buttons • Radiobuttons display a list of choices from which a user makes a selection. – Only one radio button can be selected at a time. • The syntax to create a radio button is: <input type=“radio” name=“name” id=“id” value=“value”> – name - the field containing the radio button (required) – id - the specific option. Only required if you intend to use a field label with the radio button – value - the value sent to the CGI script, if that radio button is selected by the user
  • 32.
    XP Creating Radio Buttons Inthis sample code, the value sent to the CGI script does not match the field label. If the user selects the Republican radio button, the value “gop” is sent to the CGI script paired with the field name “party.”
  • 33.
    XP Creating a GroupBox • A group box labels an entire collection of radio buttons. • A group box is a box placed around a set of fields that indicates that they belong to a common group. • The syntax for creating a group box is: <fieldset> <legend align=“align”>legend text</legend> collection of fields </fieldset>
  • 34.
    XP Group Boxes forRadio Buttons and Check Boxes
  • 35.
    XP Creating a FieldSet • HTML and XHML allow you to organize option buttons into a group of fields called field sets. – Most browsers place a group box around a field set to indicate that the fields belong to a common group. <fieldset> fields </fieldset> Where fields are the individual fields within a set. • the <legend> tag is used to display a legend on the group box
  • 36.
    XP Creating a GroupBox and Legend start of group box group box legend resulting radio buttons and group box
  • 37.
    XP Group Box Size •There is no attribute to control the size of a group box. • The box’s height will be large enough to accommodate the fields and labels in the field set. • The width is the width of whatever space remains on the Web page. • To set the width to a specific value use a table cell to place the group box and set the width of the cell. – group boxes cannot extend across table cells; all of the fields in the field set must be placed within a single cell
  • 38.
    XP Working with CheckBoxes • A check box is either selected or not • Check boxes are created using the following syntax: <input type=“checkbox” name=“name” id=“id” value=“value”> – name and id - the check box – the value - the value that is sent to the CGI script when the check box is selected • Check boxes are not selected by default. – to do this, add the checked attribute to the <input> tag – <input type =“checkbox” checked = “checked”>
  • 39.
    XP Group Boxes forRadio Buttons and Check Boxes
  • 40.
    XP Creating a TextArea resulting text area dimensions of text area default text area text
  • 41.
  • 42.
  • 43.
    XP Creating a PushButton • One type of button, called a push button, is created using the <input> tag as follows: <input type=“button” value=“text”> – text is the text that appears on the button • By themselves, push buttons perform no actions in the Web page. • To create an action, write a script or program that runs automatically when the button is clicked.
  • 44.
    XP Creating Submit andReset Buttons • A submit button is a button that submits the form to the CGI script for processing. • A reset button resets the form to its original (default) values. • The syntax for creating these two buttons is: <input type=“submit” value=“text”> <input type=“reset” value=“text”> – value attribute defines the text that appears on the button
  • 45.
    XP Creating a FormButton The figure shows HTML tags for buttons that download a program, retrieves information, and resets the form to its original values.
  • 46.
    XP Creating a FileButton 1. User clicks the Browse button 2. Selects a file from the Choose File dialog box 3. The filename and location are automatically placed in the text box The figure shows an example of using the file button to return the location of a file named “report.doc.”
  • 47.
    XP Working with HiddenFields • A hidden field is added to the form but not displayed in the Web page. • Because the field is hidden, it can be placed anywhere between the opening and closing <form> tags. • The syntax for creating a hidden field is: <input type=“hidden” name=“name” value=“value> • Place all hidden fields in one location to make it easier to read and interpret the HTML code. • Include a comment describing the purpose of the field.
  • 48.
    XP Adding a HiddenField This figure shows an example of the hidden field code.
  • 49.
    XP Working with FormAttributes • After adding the elements to your form, you’ll need to specify where to send the form data and how to send it. Use the following attributes: <form action=“url”method=“type”enctype=“type”>… </form> – URL - the filename and location of the CGI script that process the form – Method - how your Web browser sends data to the CGI script – enctype - the format of the data stored in the form’s field
  • 50.
    XP Working with FormAttributes • The method attribute can have one of two values: – Post – Get • The get method is the default; – get appends the form data to the end of the URL specified in the action attribute. • The post method sends form data in a separate data stream, allowing the Web server to receive the data through “standard input”. – the “post” method is considered the preferred way of sending data to a Web server
  • 51.
    XP Specifying Where andHow to Send Form Data This figure shows the CGI script that processes the form is located at the URL http://www.langear.com/cgi/mailer (a fictional address) and uses the “post” method.
  • 52.
    XP Form Values The Webbrowser presents a page, an example of which is shown in this figure, displaying the name of each field in the form and the value assigned to it. At the same time, the CGI script formats a mail message to be sent to the address you entered.
  • 53.
    XP Using the “mailto”Action • Use the “mailto” action to send form information via e- mail without using a CGI script. • This action accesses the user’s own e-mail program and uses it to mail form information to a specified e-mail address, bypassing the need for using CGI scripts on a Web server. • The syntax of the “mailto” action is: <form action=“mailto:e-mail_address” method=“post” enctype=“text/plain”> – e-mail_address is the e-mail address of the recipient of the form
  • 54.
    XP Using the “mailto” ActionContinued • Not all browsers support the “mailto” action. – for example, versions of Internet Explorer earlier than 4.0 and Netscape Navigator 3.0 do not • Another concern is that messages sent via the “mailto” action are not encrypted for privacy. • The recipient’s email address is revealed to the user.
  • 55.
    XP Mail Message CreatedUsing the “mailto” Action This figure shows an e-mail message that the “mailto” action generated for a registration form. The format of the mail message may look different depending on the browser or e-mail software.
  • 56.
    XP Specifying the TabOrder • Users navigate through a Web form using the Tab key. – the Tab key moves the cursor from one field to another in the order that the field tags are entered. • Add the tabindex attribute to any control element in the form to specify the tab order. • With each element assigned a tab index number, the cursor moves through the fields from the lowest index number to the highest. – for example, to assign the tab index number “1” to the fname field, enter the code: <input name=“fname” tabindex=“1”>
  • 57.
    XP Specifying an AccessKey • An access key is a single key that you type in conjunction with the Alt key for Windows users or the Command key for Macintosh users, to jump to one of the control elements in the form. • Add the accesskey attribute to any of the control elements to create an access key. • To create an access key for the lname field, enter the following code: <input name=“lname” accesskey=“1”> – if a user types Alt+l (or Command+1 for Macintosh users), the control element for the lname field is selected
  • 58.
  • 59.
    XP <form> tag neededafter <body> Three <Fieldset> with <legend> for group box <textarea> for “street field” Default value as “United States” needed for “Country” Checkbox for “Ship to Billing Address” field Radio button for Credit Card field “password” as input type” for card number field <select> and <option> for “expiration date” field Three form buttons at the bottom