Conditional functions such as IFS have the potential to take your Excel formulas next level. With IFS, you can create conditions and nest different functions inside each other in a single formula. Alternatively, you can also use the IFS function on its own.
But what is the IFS function, and how does it differ from the ordinary IF function? Read on to find out what IFS is in Excel, and how you can use it.
What Is the IFS Function in Excel?
The IFS function in Excel takes in values and checks them against specified conditions. If the value meets the first condition, then the formula stops there and gives out an output. But, if the first condition isn't met, then the formula will keep on testing the conditions in sequence until a condition is met.
=IFS([Something is True1, Output if True1,Something is True2,Output if True2,Something is True3,Output if True3) If the value doesn't fit any of the conditions, then the formula returns an N/A error. However, you can fix this by entering a final condition such as TRUE and an output for that condition like "Value doesn't meet any of the conditions". The TRUE condition makes sure that any value meets at least the final condition, so that you don't get the N/A error.
How to Use the IFS Function in Excel
IFS is an upgraded version of the IF function in Excel. The syntax and the usage are similar, except that IFS is designed to take in multiple conditions. The IF function required nesting multiple IF functions to define multiple conditions, while the IFS can define it all with a single function.
The first parameter in IFS will be the condition, and the second parameter will be the output if that condition is met. The third parameter will be condition number 2, and the fourth parameter will be the output if condition number 2 is met.
The parameters are coupled this way, and you can enter up to 127 conditions in a single IFS function. You can, of course, also enter another function in the output and create compound nested formulas. If you've worked with IF and nested IF formulas, then using IFS will be a breeze for you. IFS is here to make things easier, so let it do that!
Single Condition IFS Function Example in Excel
Reading about the IFS function won't do you any good until you put it to practice. So let's get you started with an example. Despite the fact that the IFS function can take in multiple conditions, that doesn't mean that you can't use it for single-condition scenarios.
Let's write an IFS formula with a single condition, and even include some other functions in it to get the hang of things.
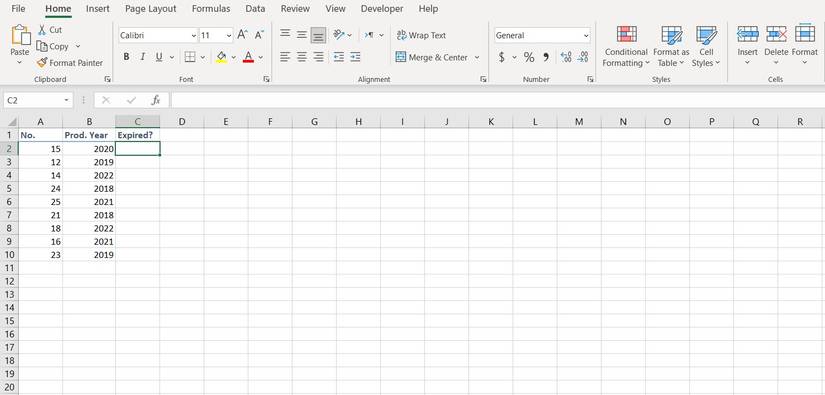
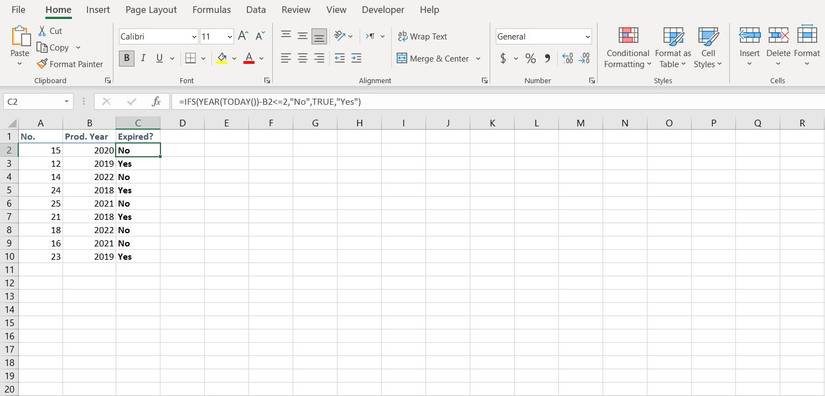
In this example, we have some products and their years of production. These imaginary products go bad two years after their production, so we're going to create a formula that determines whether the products are expired or not. Sure enough, we will be using the IFS function along with YEAR and TODAY functions.
The YEAR function outputs the year from a specific date. We're going to supply the YEAR function with today's date using the TODAY function, so that the output of YEAR(TODAY()) complex is going to the current year. Let's get started.
- Select the first cell where you want to output the results. We're going to use the first cell beneath the Expired column.
- In the formula bar, enter the formula below:
=IFS(YEAR(TODAY())-B2<=2,"No",TRUE,"Yes") - Press Enter.
Now you'll see whether the first product is expired or not. All you need to do from here is to grab the fill handle and drop it on the cells below. You can also replace YEARS(TODAY()) with the plain number of the current year, if you don't intend to use the formula in the future.
Multiple Condition IFS Function Example in Excel
Now let's get our hands on the real deal: IFS function with multiple conditions. For this purpose, we're going to use an example task that we previously used with nested IF statements.
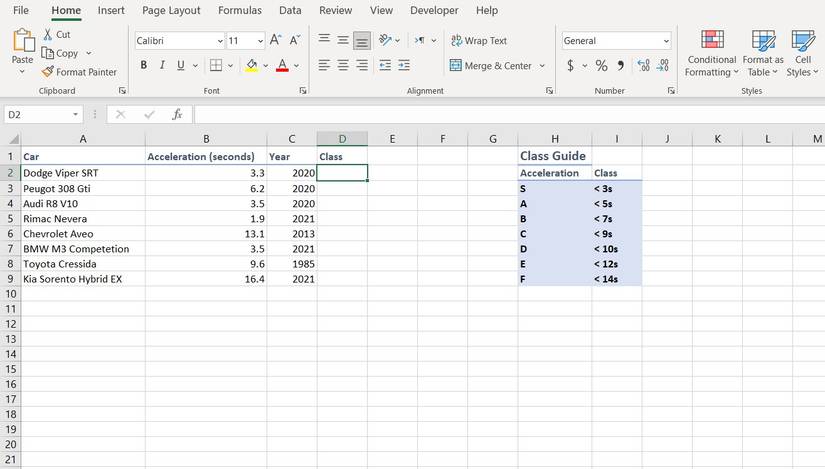
In this example, we have a table containing the name of some cars and their acceleration times. We also have a list that determines which class each car belongs to based on their 0-100 acceleration time. The goal is to create a formula that takes in the acceleration time of each car, and then outputs its class in the table.
There's also a class guide table to let you know how the classing system works. Ultimately, we're going to create a formula using IFS based on this class guide. The formula will take in the acceleration time, judge it, and then output the class. If the car takes over 14 seconds to accelerate, it will be deemed too slow.
This table is made up for the purpose of this article, so don't take it too seriously. With that, let's get started.
- Select the first cell where you want to display the output from the IFS function. In this example, that will be the first cell in the Class column.
- Type the formula below in the formula bar:
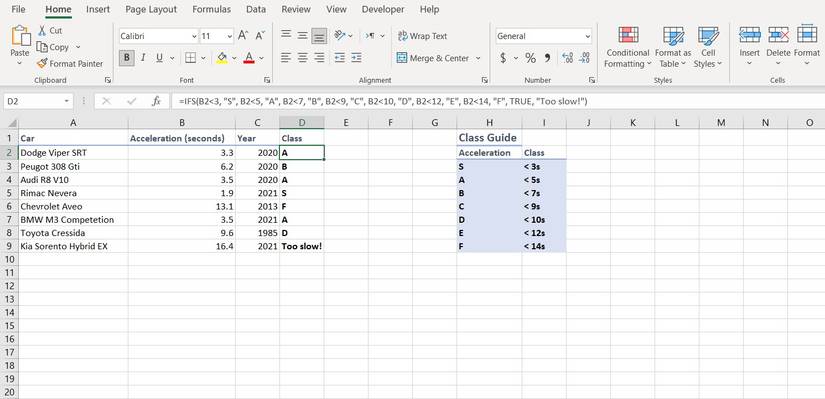
=IFS(B2<3, "S", B2<5, "A", B2<7, "B", B2<9, "C", B2<10, "D", B2<12, "E", B2<14, "F", TRUE, "Too slow!") - Press Enter.
Once you press Enter on your keyboard, you will instantly see the class for the first car. Now all you need to do is to grab the fill handle and drop it on the cells below to determine the class of those cars as well. You can even add some conditional formatting so that the class cells have different colors based on their value.
Excel Made Easier With IFS
IFS is similar to IF in essence, as both of these Excel functions take in values and test them against custom conditions. What IFS does better than IF, is multiple conditions. With the IF function, you would need to nest multiple functions inside each other to declare multiple conditions, whereas with IFS, you can do it in a single function.
Conditions are real game changers in Excel. You can fit in other functions in the IFS formula to create complex formulas that let you achieve crazy things in Excel. Now that you know about the IFS function, it's time to go on and explore the infinite possibilities this function brings!


