How to Implement Email Verification in Laravel?
In this post, I will show you how to implement email verification in laravel application. we will install laravel ui and then enable email verification in laravel project.
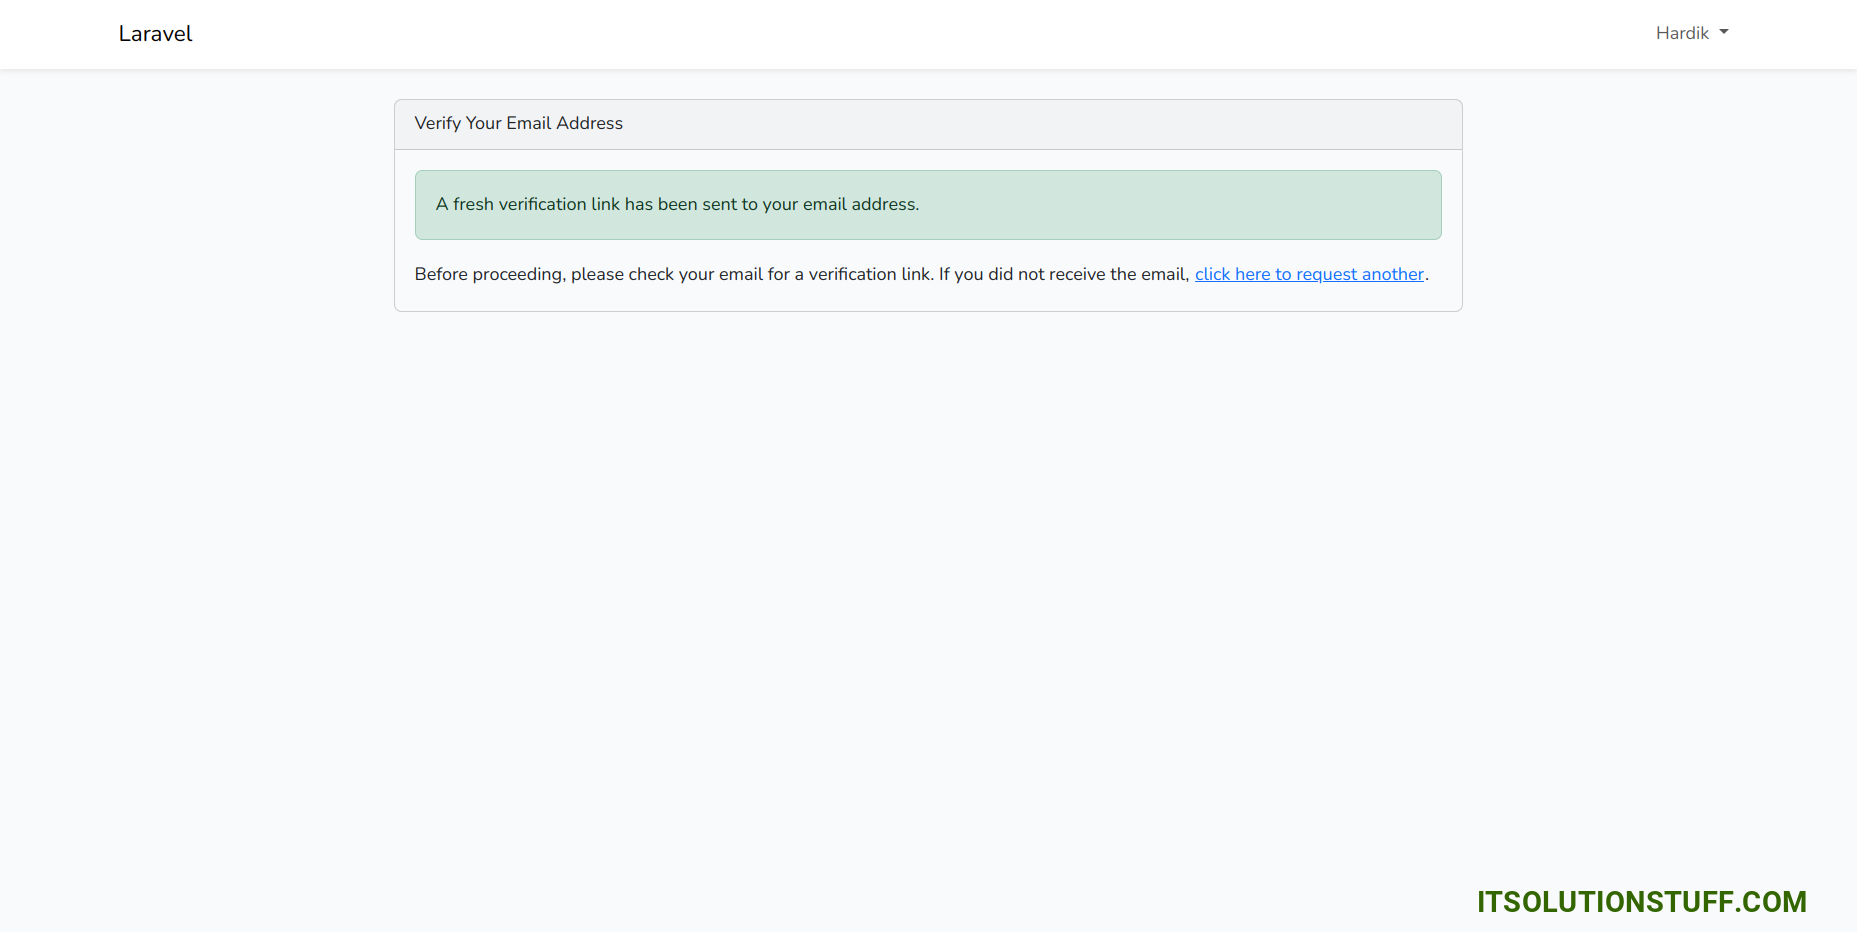
Laravel UI offers a basic setup for user authentication, including email verification. When a user registers, an email with a verification link is automatically sent. The user must verify their email to complete the process. We will also provide a page where they can request a resend verification email if needed. Follow these steps to set up the example.
Step 1: Install Laravel 11
This step is not required; however, if you have not created the Laravel app, then you may go ahead and execute the below command:
composer create-project laravel/laravel example-appStep 2: Create Auth using Scaffold
Now, in this step, we will create an auth scaffold command to generate login, register, and dashboard functionalities. So, run the following commands:
Laravel 11 UI Package:
composer require laravel/ui Generate Auth:
php artisan ui bootstrap --auth npm installnpm run buildStep 3: Update User Model
Now, we need to uncomment the Illuminate\Contracts\Auth\MustVerifyEmail namespace and use the MustVerifyEmail interface. Let’s do this in the User model file.
app/Models/User.php
<?php namespace App\Models; use Illuminate\Contracts\Auth\MustVerifyEmail; use Illuminate\Database\Eloquent\Factories\HasFactory; use Illuminate\Foundation\Auth\User as Authenticatable; use Illuminate\Notifications\Notifiable; class User extends Authenticatable implements MustVerifyEmail { /** @use HasFactory<\Database\Factories\UserFactory> */ use HasFactory, Notifiable; /** * The attributes that are mass assignable. * * @var array */ protected $fillable = [ 'name', 'email', 'password', ]; /** * The attributes that should be hidden for serialization. * * @var array */ protected $hidden = [ 'password', 'remember_token', ]; /** * Get the attributes that should be cast. * * @return array */ protected function casts(): array { return [ 'email_verified_at' => 'datetime', 'password' => 'hashed', ]; } } Step 4: Enable the Email Verify Route
Here, you need to enable the email verification routes. You also need to add middleware to home route. Let us update the route file.
app/Models/User.php
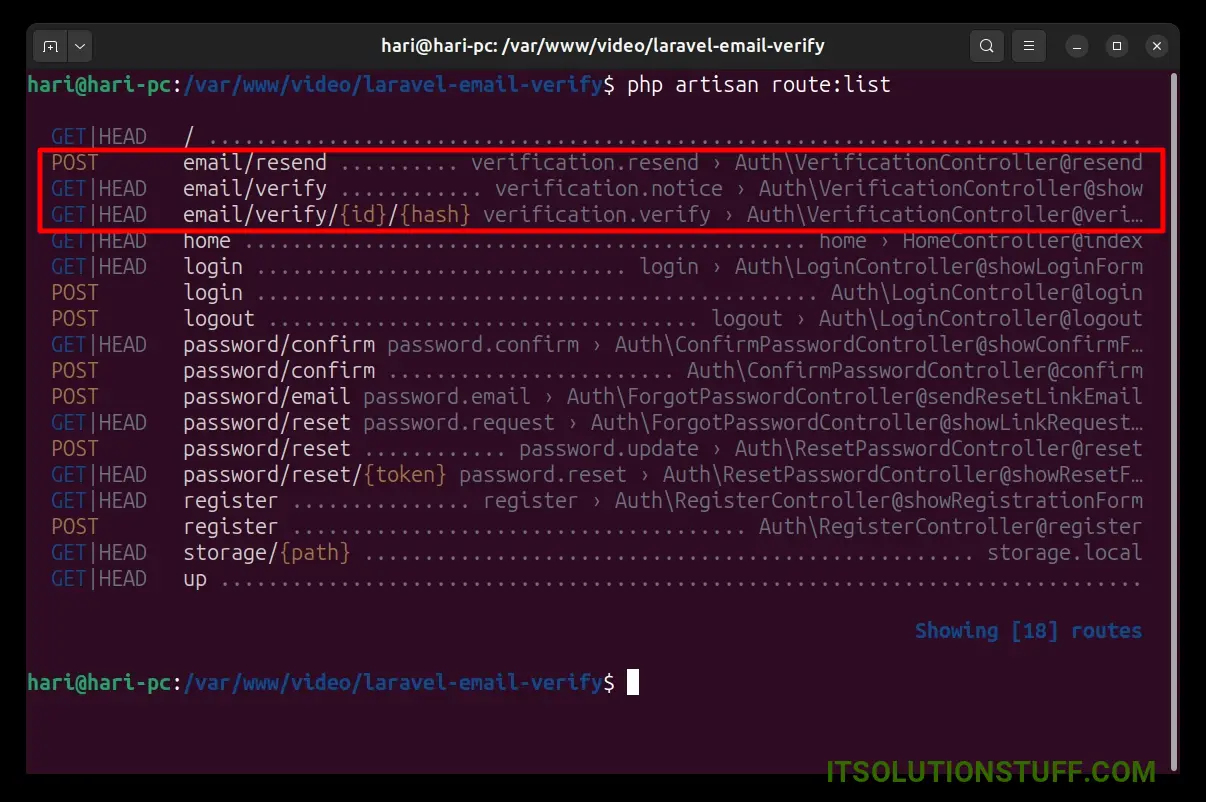
<?php use Illuminate\Support\Facades\Route; Route::get('/', function () { return view('welcome'); }); Auth::routes([ "verify" => true ]); Route::get('/home', [App\Http\Controllers\HomeController::class, 'index'])->name('home')->middleware("verified"); Now, you can see the route list as the below screenshot:
Step 5: Email Configuration
Here, you need to add your email settings in the .env file. If you're unsure how to configure Gmail SMTP, you can click here for instructions.
.env
MAIL_MAILER=smtp MAIL_HOST=smtp.gmail.com MAIL_PORT=465 MAIL_USERNAME=hardiksavani02@gmail.com MAIL_PASSWORD=... MAIL_ENCRYPTION=tls MAIL_FROM_ADDRESS="hardiksavani02@gmail.com" MAIL_FROM_NAME="${APP_NAME}"Run Laravel:
All the required steps have been done, now you have to type the given below command and hit enter to run the Laravel app:
php artisan serveNow, Go to your web browser, type the given URL and view the app output:
http://localhost:8000/Now, you have one admin user and you can register new normal user and check it.
I hope it can help you...

