🌐 Website • 💡 Getting Started • 👀 Demos


SVAR Svelte Gantt is a customizable, easy-to-use, and interactive Gantt chart component written in Svelte. Its intuitive interface allows users to add and manage tasks and dependencies directly on the timeline using drag-and-drop or via a simple task edit form.
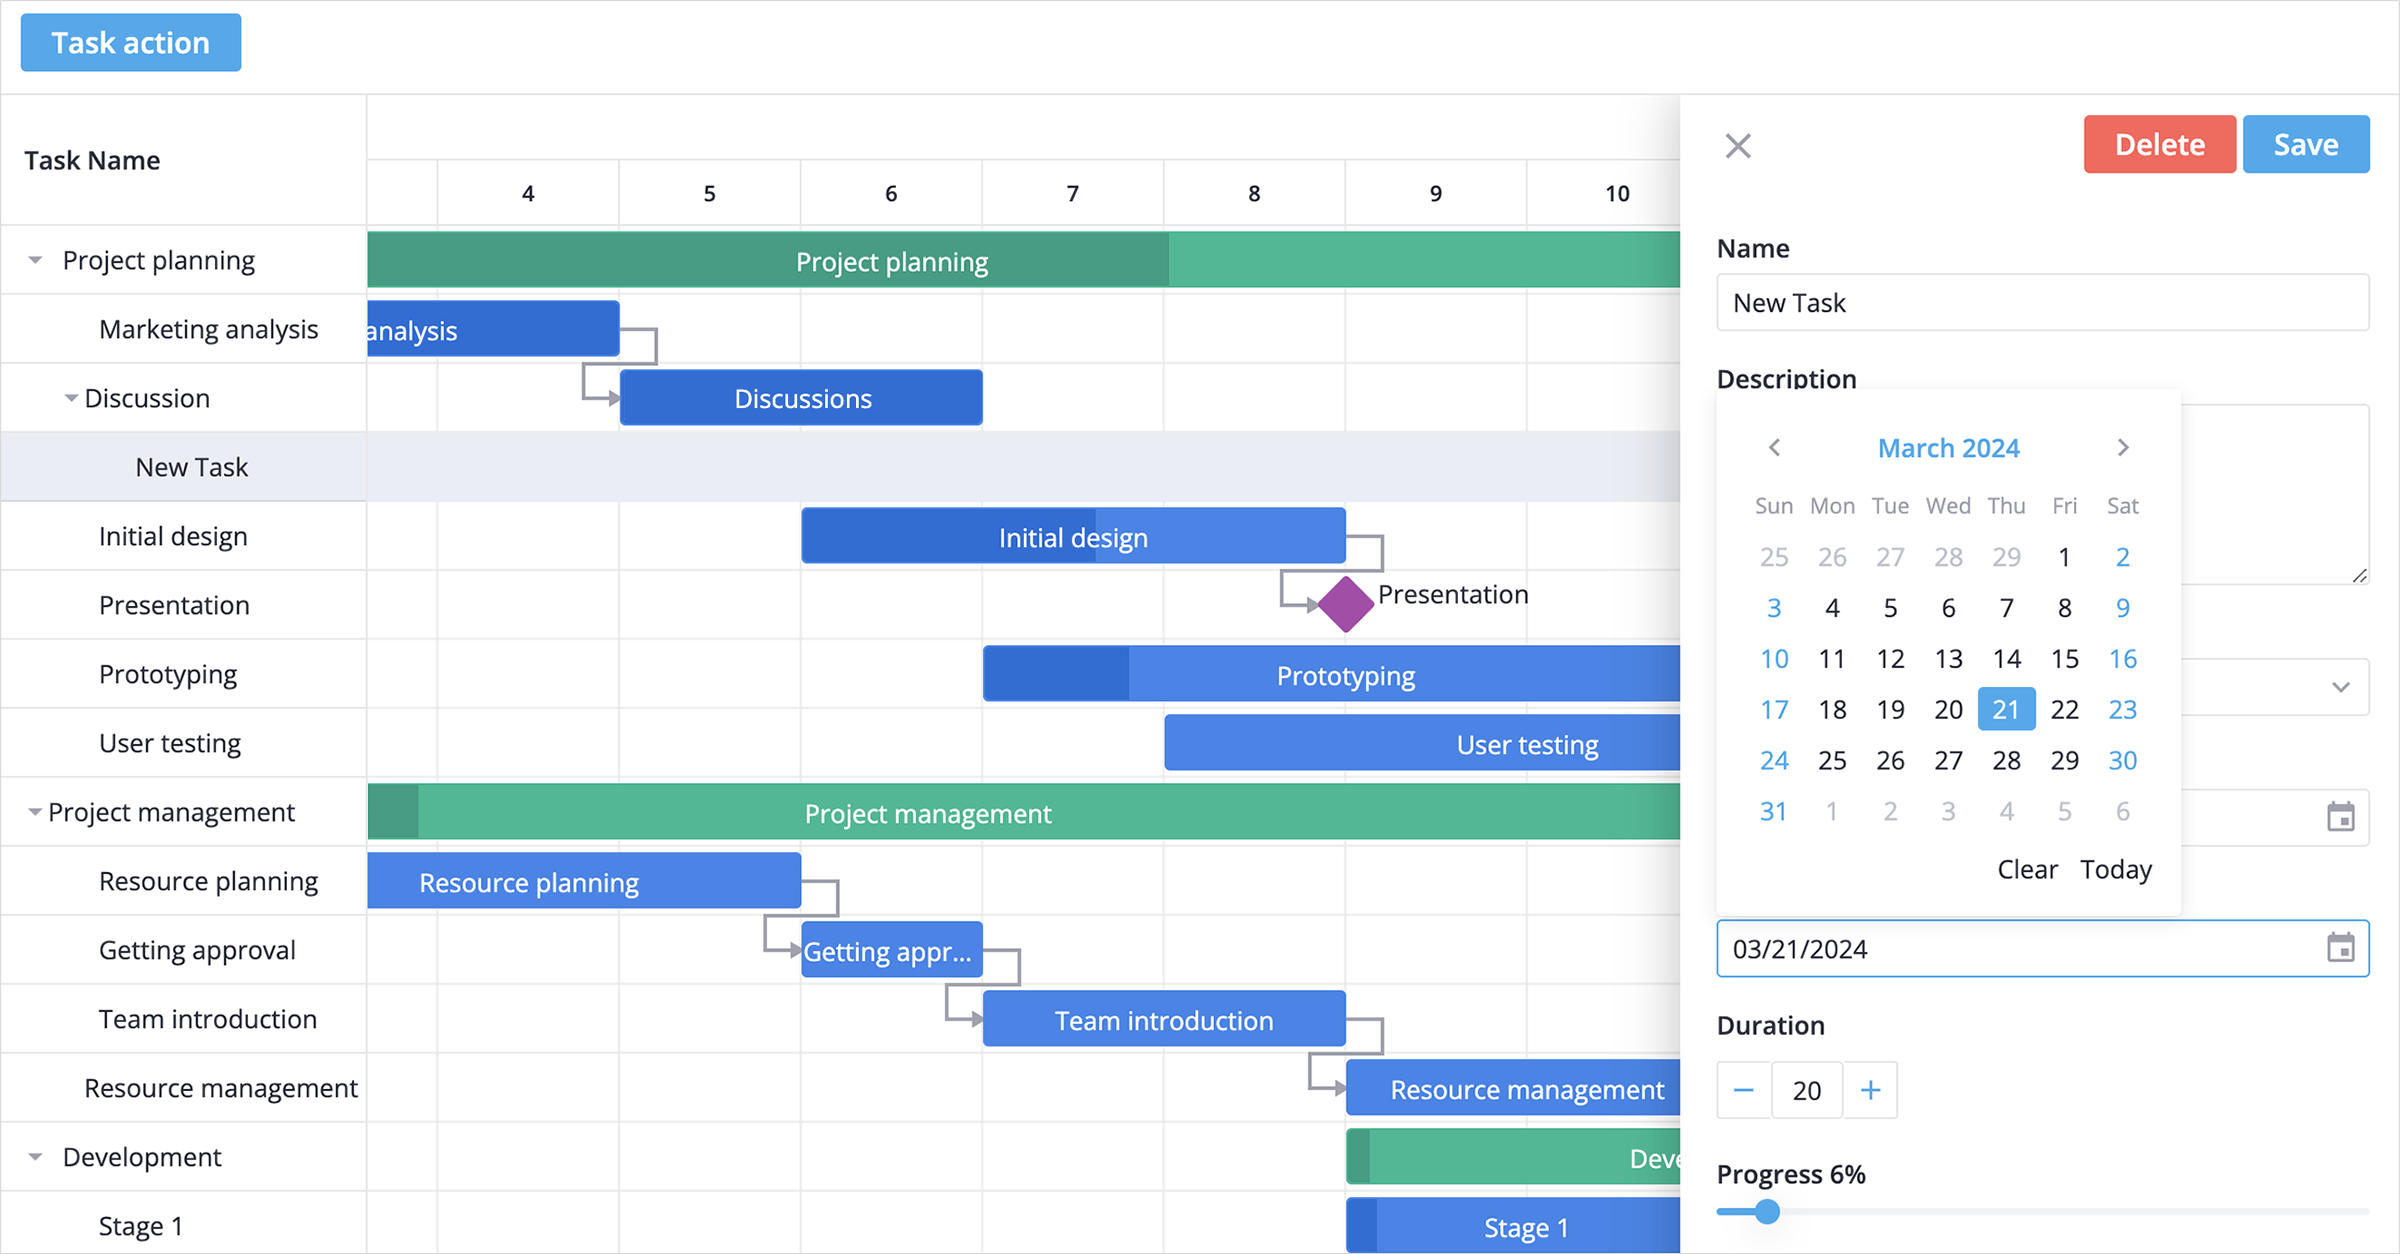
- Interactive drag-and-drop interface
- Intuitive and customizable task edit form
- Set task dependencies on the timeline or in a popup form
- Showing task progress on the taskbar
- Hierarchical view of sub tasks
- Reordering tasks in grid with drag-and-drop
- Configurable timeline (hours, days, weeks)
- Ability to use custom HTML in grid cells
- Toolbar and context menu
- Tooltips for taskbars
- Zooming with scroll
- Fast performance with large data sets
- Light and dark skins
- Full TypeScript support
There are two versions of the library: the 1.x version – designed to work with Svelte 4, and the 2.x version – created for Svelte 5.
To use the SVAR Gantt for Svelte 5, install it as follows:
npm install @svar-ui/svelte-gantt To use the SVAR Gantt for Svelte 4:
npm install wx-svelte-gantt@1.2.0 To use the widget, simply import the package and include the component in your Svelte file:
<script> import { Gantt } from "@svar-ui/svelte-gantt"; const tasks = [ { id: 1, start: new Date(2024, 3, 2), end: new Date(2024, 3, 17), text: "Project planning", progress: 30, parent: 0, type: "summary", open: true, details: "Outline the project's scope and resources.", }, ]; const links = []; const scales = [ { unit: "month", step: 1, format: "MMMM yyy" }, { unit: "day", step: 1, format: "d", css: dayStyle }, ]; </script> <Gantt {tasks} {links} {scales} />For further instructions, follow the detailed how-to-start guide.
Typically, you don't need to modify the code. However, if you wish to do so, follow these steps:
- Run
yarnto install dependencies. Note that this project is a monorepo usingyarnworkspaces, so npm will not work - Start the project in development mode with
yarn start
To run the test:
- Start the test examples with:
yarn start:tests
- In a separate console, run the end-to-end tests with:
yarn test:cypress
Post an Issue or use our community forum.