Python Virtual Environment
Last Updated : 07 Aug, 2025
A virtual environment is an isolated Python environment that allows you to manage dependencies for each project separately. It prevents conflicts between projects and avoids affecting the system-wide Python installation. Tools like venv or virtualenv are commonly used to create them.
Why do we need a Virtual Environment
- Avoid Dependency Conflicts: Different projects may require different versions of the same library (e.g., Django 4.0 vs 4.1).
- Isolate Project Environments: Keeps each project’s packages and settings separate from others and from the system Python.
- Simplifies Project Management: Makes it easier to manage and replicate project-specific setups.
- Prevents System Interference: Avoids accidentally modifying or breaking the global Python environment.
- Enables Reproducibility: Ensures consistent behavior across development, testing and deployment environments.
When and Where to use a Virtual Environment?
A virtual environment should be used for every Python project. By default, all Python projects share the same location to store packages. This can cause problems if two projects need different versions of the same package, like Django. A virtual environment solves this by creating a separate space for each project’s packages, so they don’t interfere with each other. It’s basically a folder with its own Python setup. Using a virtual environment helps avoid conflicts and keeps your projects clean and organized.
How to Create a Virtual Environment in Python
We use the virtualenv module to create isolated environments. It creates a folder with all necessary executables for the project.
Step 1: Installing virtualenv
$ pip install virtualenv
Step 2: Check Installation
$ virtualenv --version
Step 3: Create a Virtual Environment
$ virtualenv my_env
This creates a directory named my_env containing the isolated environment. To use a specific Python interpreter (e.g., Python 3):
$ virtualenv -p /usr/bin/python3 my_env
Activating a Virtual Environment in Python
Now after creating a virtual environment, you need to activate it. Remember to activate the relevant virtual environment every time you work on the project. This can be done using the following command:
1. On Windows
To activate virtual environment using windows command prompt change directory to your virtual env, Then use the below command
$ cd <envname>$ Scripts\activate
Note: source is a shell command designed for users running on Linux (or any Posix, but whatever, not Windows).
2. On Linux/macOS
$ source virtualenv_name/bin/activate
Once the virtual environment is activated, the name of your virtual environment will appear on the left side of the terminal.
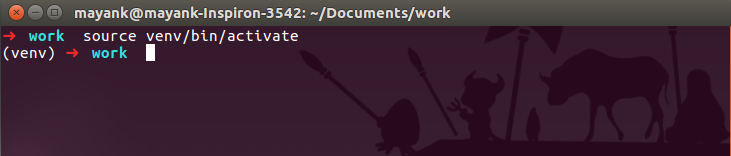
This will let you know that the virtual environment is currently active.
Installing Dependencies in Virtual Environment
Once your virtual environment (e.g., venv) is active, you can install project-specific dependencies inside it.
For example, to install Django 1.9:
(virtualenv_name)$ pip install Django==1.9
This installs Django 1.9 inside the virtualenv_name folder, keeping it isolated from the system Python.
Deactivate Python Virtual Environment
Once you are done with the work, you can deactivate the virtual environment by the following command:
(virtualenv_name)$ deactivate
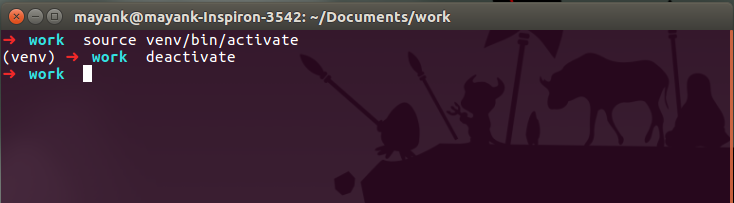
This returns you to the system’s default Python environment.
Related Posts
Explore
Python Fundamentals
Python Data Structures
Advanced Python
Data Science with Python
Web Development with Python
Python Practice
My Profile