In Kubernetes, namespaces provide a mechanism for isolating groups of resources within a single cluster. Within a Kubernetes Namespace, resources must have unique names, but across different Namespaces, you can have resources with the same name.
When you create a Kubernetes cluster, by default Kubernetes gives you 4 Namespaces out of the box:
- default
- kube-node-lease
- kube-public
- kube-system
Default Namespaces
Default Namespaces are the four Namespaces that are present by default in any Kubernetes Cluster. To see these in your Namespaces you can simply enter this command:
kubectl get namespaces
And you will see that we have 4 default namespaces:

Before learning about the 4 default Namespaces, let's first briefly discuss kubernetes dashboard namespace, which is a Namespace that comes built-in with Minikube.
kubernetes dashboard namespace:
"kubernetes dashboard namespace" is shipped automatically in Minikube. So it is specific to Minikube installation. We will not have this namespace in a standard Cluster.
1. kube-system
kube-system is the namespace that includes objects created by the Kubernetes system. The components that are deployed in this Namespace are the system processes - they are from Master managing processes or Kubectl etc. kube-system Namespace is not meant for our (developer's) use. so we do not have to create anything or modify anything in this namespace.
2. kube-public
kube-public contains the publicly accessible data. It has a config map that contains the Cluster information which is accessible even without authentication.
you can simply type:
kubectl cluster-info
You will get the data stored in kube-public namespace.

3. kube-node-lease
kube-node-lease Namespace is a new addition to Kubernetes. The purpose of this namespace is that it holds information about the heartbeats of Nodes. So each Node basically gets its own lease object in the Namespace. This object contains the information about that nodes availability.
4. default
default Namespace is the Namespace that we use in order to create the resources when we create a Namespace in the beginning.
Creating Namespaces
We can create a Namespace in two ways:
1. CLI Commands
Namespaces can be added to your Cluster by CLI commands. You can simply enter the following command to create a new Namespace:
kubectl create namespace my-ns
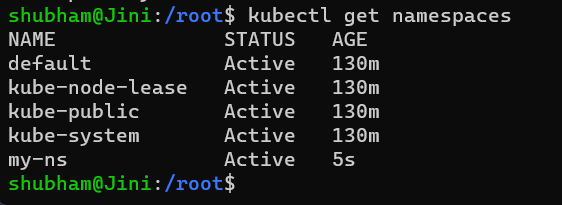
This will create a new Namespace called "my-ns". And we can simply checkout our namespaces by the following command:
kubectl get namespaces
We can see that the "my-ns" Namespace was created.
2. Configuration file
Another better way to create a Namespace is creating a Namespaces configuration file. You can call it a better way of creating Namespaces because you have a history in your Configuration File Repository of what resources you created in the Cluster. Here is how a sample Namespace configuration file would appear to be:
apiVersion: v1
kind: Namespace
metadata:
 name: development
 labels:
 name: development
Now you can apply this configuration file using the following command:
kubectl create -f [FILE_NAME]
Creating Components in the default Namespace
By default if you do not provide a Namespace to a component, then it creates them in a default namespace. So if we apply this config map component:
apiVersion: v1
kind: ConfigMap
metadata:
 name: my-configmap
data:
 db_url: my-service.database
If we apply this Config Map file:
kubectl apply -f my-config-map.yaml
And check the namespace it belongs to by this command, actually this command will list down all the Config Maps within the Namespace default:
kubectl get configmap -n default

And we can find our my-configmap in the list.
Or you can also check it by getting details about my-configmap using the following command:
kubectl get configmap -n default -o yaml
You will get a long output which will include these lines:

And here we can see the namespace to be default.
Creating Components in a new Namespace
There are two ways of creating components, we can either do it in the CLI or we configure it in the Configuration file itself:
1. Specifying Namespace in the CLI
This can be done by specifying the name of the Namespace while applying the Config Map:
kubectl apply -f my-config-map.yaml --namespace=my-
Note that we have already created my-ns in the previous sections. Otherwise it would give us an error.
2. Specifying Namespace in the Configuration file
We can simply specify which namespace we want the component to be a part of it's configuration file. For that we can simply take our my-configuration.yaml file and edit it. We are simply adding the line "namespace: my-ns"
apiVersion: v1
kind: ConfigMap
metadata:
 name: my-configmap
 namespace: my-ns
data:
 db_url: my-service.database
Now if we apply it:
kubectl apply -f my-config-map.yaml
and if we check out our Config Map:
kubectl get configmap -n my-ns -o yaml
We will get that same long output, but this would also include a line which says that the Namespace is now my-ns.

Changing the Active Namespace
The default namespace is our active namespace. In order to change the active namespace to any other namespace we can use kubens from kubectx. For that we will have to download kubectx by entering the following command
sudo snap install kubectx --classic
now if we enter the command
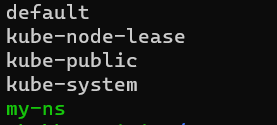
kubens
we will get the list of namespaces present and the active namespace will be highlighted in green:

and then simply use kubens for changing the active namespace.
kubens my-ns
Now the active namespace has been changed to kubens. This means that by default if we do not specify the namespace the components will be created in the my-ns namespace.
Explore
DevOps Basics
Version Control
CI & CD
Containerization
Orchestration
Infrastructure as Code (IaC)
Monitoring and Logging
Security in DevOps
My Profile