Create EC2 Instance in AWS (Amazon)
Last Updated : 01 Aug, 2025
Launching an EC2 instance in AWS allows you to set up a virtual server in the cloud within minutes. This virtual server can host your web apps, run software, or perform automated tasks all without needing a physical machine.
Here, you will learn how to create and configure an Amazon EC2 instance, exploring essential settings like OS selection, instance type, storage, networking, and security. By the end, you will be able to launch and connect to a secure, scalable cloud server.
Steps to Create EC2 Instance in AWS (Amazon)
Follow the below steps to create an EC2 instance in AWS (Amazon):
Step 1: Login and Navigate to EC2 Dashboard
- Log in to your AWS Management Console.
- From the Services menu, choose EC2 under the Compute section.
- Under Resources, click Instances (Running) to view running instances (if any).

Under Resources >> Click on "Instances running" -- It will show if any EC2 instances are running or not.
Step 2: Launch a New Instance
- Click Launch Instance.
- On the "Launch an Instance" page, enter a name for your instance (e.g.,
my-first-ec2-server). - You'll now configure your server settings.
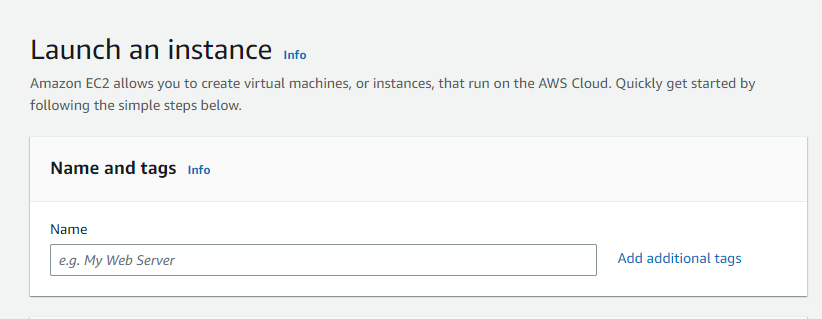 Naming instance
Step 3: Choose Amazon Machine Image
- Select an Amazon Machine Image (AMI), which is the OS for your server.
- For beginners, choose Amazon Linux 2, Ubuntu, or Windows, depending on your needs.
- AMIs come preconfigured with OS and some software like templates.
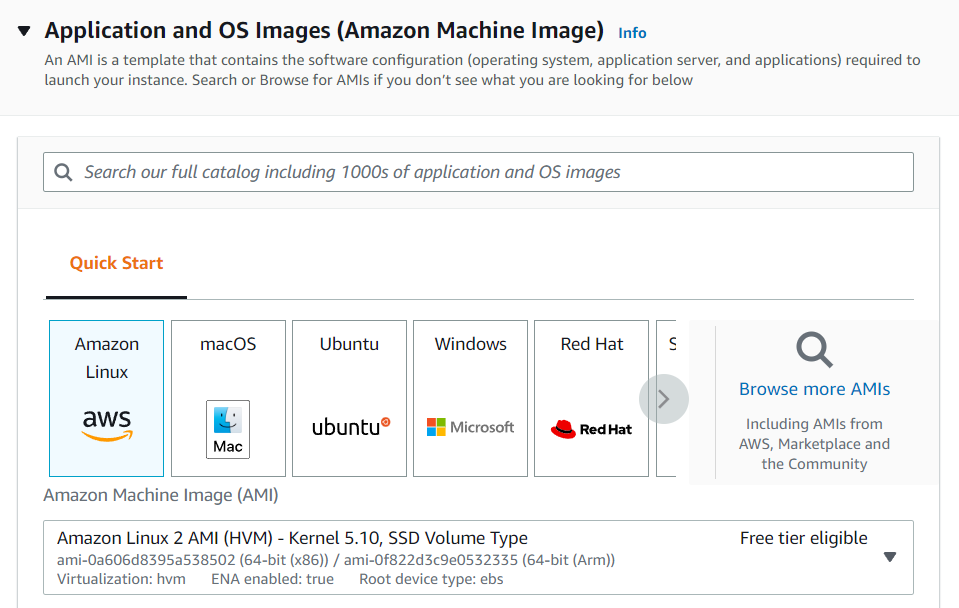 Selecting AMI
Step 4: Select Instance Type
- Select the instance type (defines CPU and memory).
- For Free Tier, choose
t2.micro — 1 vCPU and 1 GB RAM. - Avoid selecting higher types like
t2.small, t3.medium, etc., unless needed, as they may incur charges.
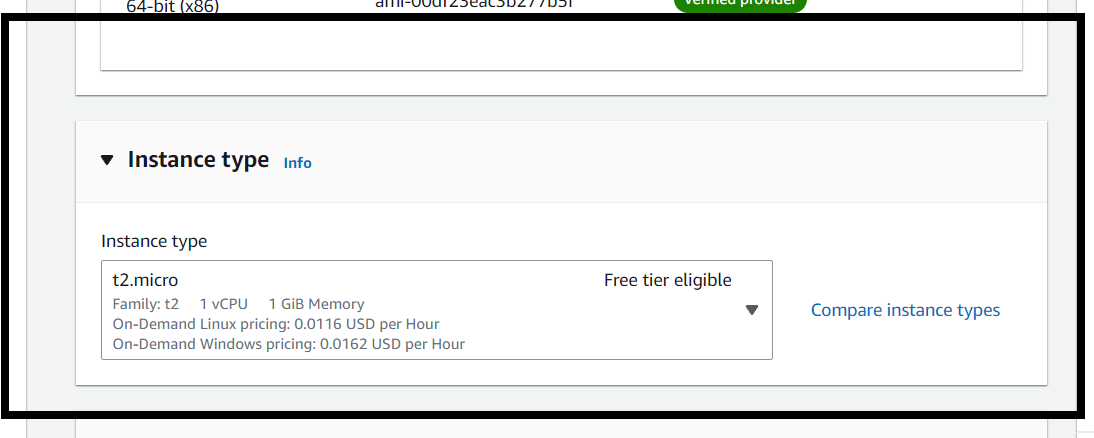 Select instance type
1. EC2 instances use SSH key pairs for secure access.
2. Click Create new key pair:
- Enter a name.
- Choose file format:
.pem for Linux/macOS or .ppk for Windows (for PuTTY). - Download the key file and save it securely (you won’t be able to download it again).
3. Select the created key pair from the dropdown.
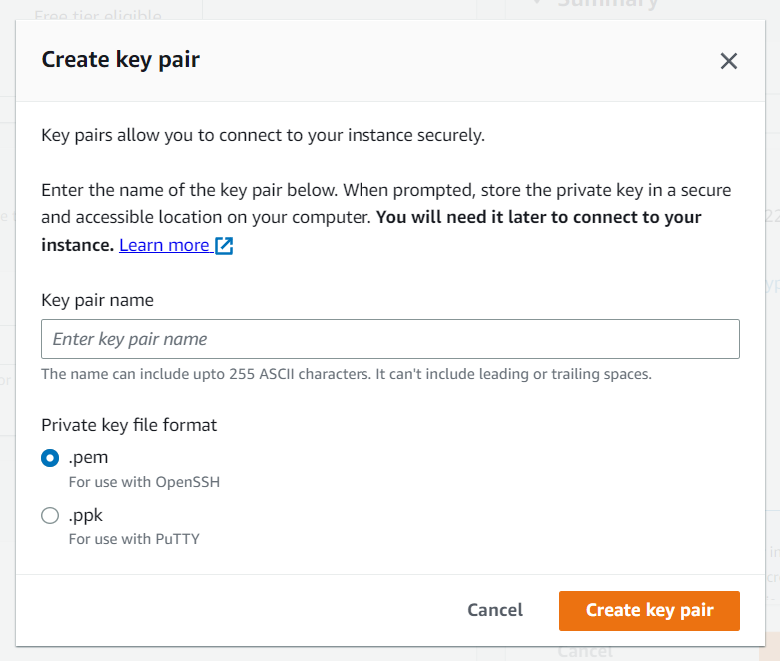 Creating key pair
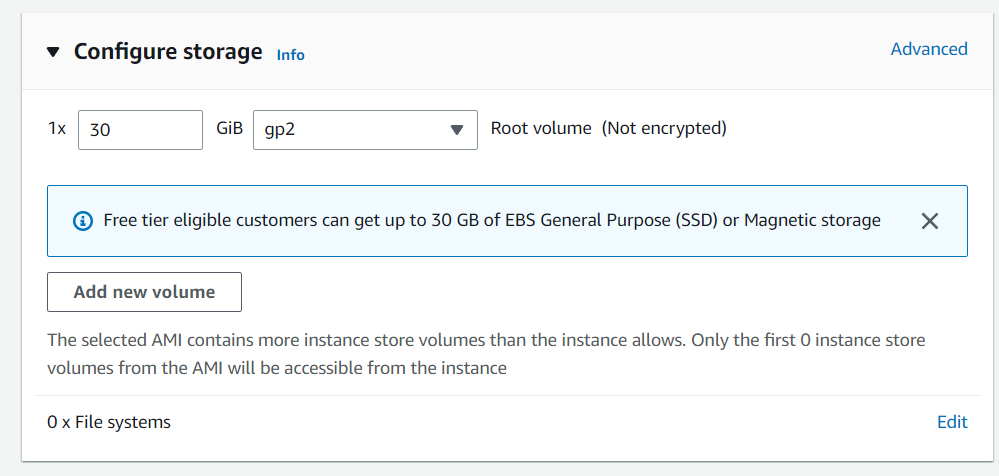
Step 6: Network and Storage Configuration
1. Network Settings: Use the default VPC and subnet unless you have specific networking needs.
2. Firewall (Security Group): Allow SSH (port 22) for Linux or RDP (port 3389) for Windows.
3. Storage Settings:
- Free Tier allows up to 30 GB of General Purpose SSD (gp2).
- Keep default (8 GB) or increase as needed.
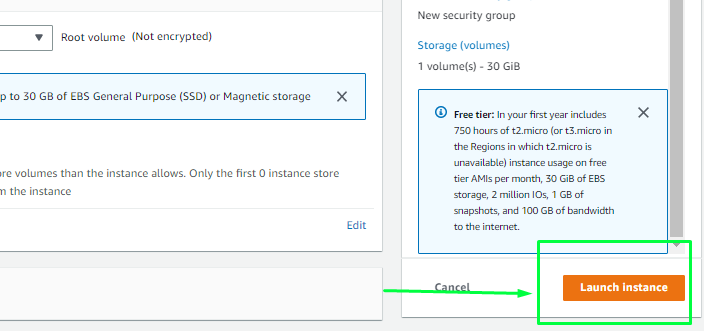
Step 7: Review and Launch
- Review all configurations to ensure they are Free Tier eligible.
- Click Launch Instance.
- You will see a confirmation page. Click View Instances to see your new server being initialized.
Steps to Connect Terminal Using SSH-Key
Once your instance is launched, secure access is essential. Follow the below steps to know how to connect using a terminal and your key pair.
Step 1: Locate Connection Details
Select the server to which you want to connect and click on the connect button at the top of that instance as shown in the image below.

Step 2: Copy the SSH Command
Copy the SSH key which is right following the example it will acct as a key-pair to connect to EC2-Instance.

Step 3: Use Terminal
Open the terminal and go to the folder where your .pem file is located and paste the key that you have copied in AWS and paste it in the terminal.

To know whether you connected to EC2-Instance perfectly or not you can check the IP-Address of the instance if the IP is displaying then you have connected successfully.
Explore
DevOps Basics
Version Control
CI & CD
Containerization
Orchestration
Infrastructure as Code (IaC)
Monitoring and Logging
Security in DevOps
My Profile