Creating Multiple Screen Applications in Android
Last Updated : 11 Jul, 2025
This article shows how to create an android application to move from one activity to another using the concept of Explicit Intents. Below are the steps for Creating a Simple Android Application to move from one activity to another activity.
Step By Step Implementation
Step 1: Create a New Project in Android Studio
To create a new project in Android Studio please refer to How to Create/Start a New Project in Android Studio.
The code for that has been given in both Java and Kotlin Programming Language for Android.
Step 2: Working with the First Activity
Next, go to the activity_first.xml file, which represents the UI of the project. Below is the code for the activity_first.xml file. Comments are added inside the code to understand the code in more detail.
activity_main.xml:
XML <?xml version="1.0" encoding="utf-8"?> <androidx.constraintlayout.widget.ConstraintLayout xmlns:android="http://schemas.android.com/apk/res/android" xmlns:app="http://schemas.android.com/apk/res-auto" xmlns:tools="http://schemas.android.com/tools" android:layout_width="match_parent" android:layout_height="match_parent" android:background="@color/white" tools:context=".FirstActivity"> <TextView android:id="@+id/textView" android:layout_width="wrap_content" android:layout_height="wrap_content" android:layout_marginBottom="24dp" android:text="First Activity" android:textSize="24sp" android:textStyle="bold" app:layout_constraintBottom_toTopOf="@+id/button" app:layout_constraintLeft_toLeftOf="parent" app:layout_constraintRight_toRightOf="parent" /> <Button android:id="@+id/button" android:layout_width="wrap_content" android:layout_height="wrap_content" android:backgroundTint="@color/green" android:text="Next" android:textSize="24sp" app:layout_constraintBottom_toBottomOf="parent" app:layout_constraintEnd_toEndOf="parent" app:layout_constraintStart_toStartOf="parent" app:layout_constraintTop_toTopOf="parent" /> </androidx.constraintlayout.widget.ConstraintLayout>
Go to the FirstActivity File and refer to the following code. Below is the code for the FirstActivity File. Comments are added inside the code to understand the code in more detail.
MainActivity File:
Java package org.geeksforgeeks.demo; import android.content.Intent; import android.os.Bundle; import android.widget.Button; import androidx.appcompat.app.AppCompatActivity; public class FirstActivity extends AppCompatActivity { // Declare Button object private Button nextActivityButton; @Override protected void onCreate(Bundle savedInstanceState) { super.onCreate(savedInstanceState); setContentView(R.layout.activity_first); // Initialize button using findViewById nextActivityButton = findViewById(R.id.button); // Set click listener for the button nextActivityButton.setOnClickListener(v -> { // Create Intent to start SecondActivity Intent intent = new Intent(FirstActivity.this, SecondActivity.class); // Start the activity startActivity(intent); }); } } package org.geeksforgeeks.demo import android.content.Intent import android.os.Bundle import android.widget.Button import androidx.appcompat.app.AppCompatActivity class FirstActivity : AppCompatActivity() { // Add button Move to Activity private lateinit var next_Activity_button: Button override fun onCreate(savedInstanceState: Bundle?) { super.onCreate(savedInstanceState) setContentView(R.layout.activity_first) // by ID we can use each component which id is assign in xml file // use findViewById() to get the Button next_Activity_button = findViewById(R.id.button) // Add_button add clicklistener next_Activity_button.setOnClickListener { // Intents are objects of the android.content.Intent type. Your code can send them to the Android system defining // the components you are targeting. Intent to start an activity called SecondActivity with the following code. val intent = Intent(this, SecondActivity::class.java) // start the activity connect to the specified class startActivity(intent) } } }
Step 3: Now we have to create another activity (SecondActivity) to move from one activity to another.
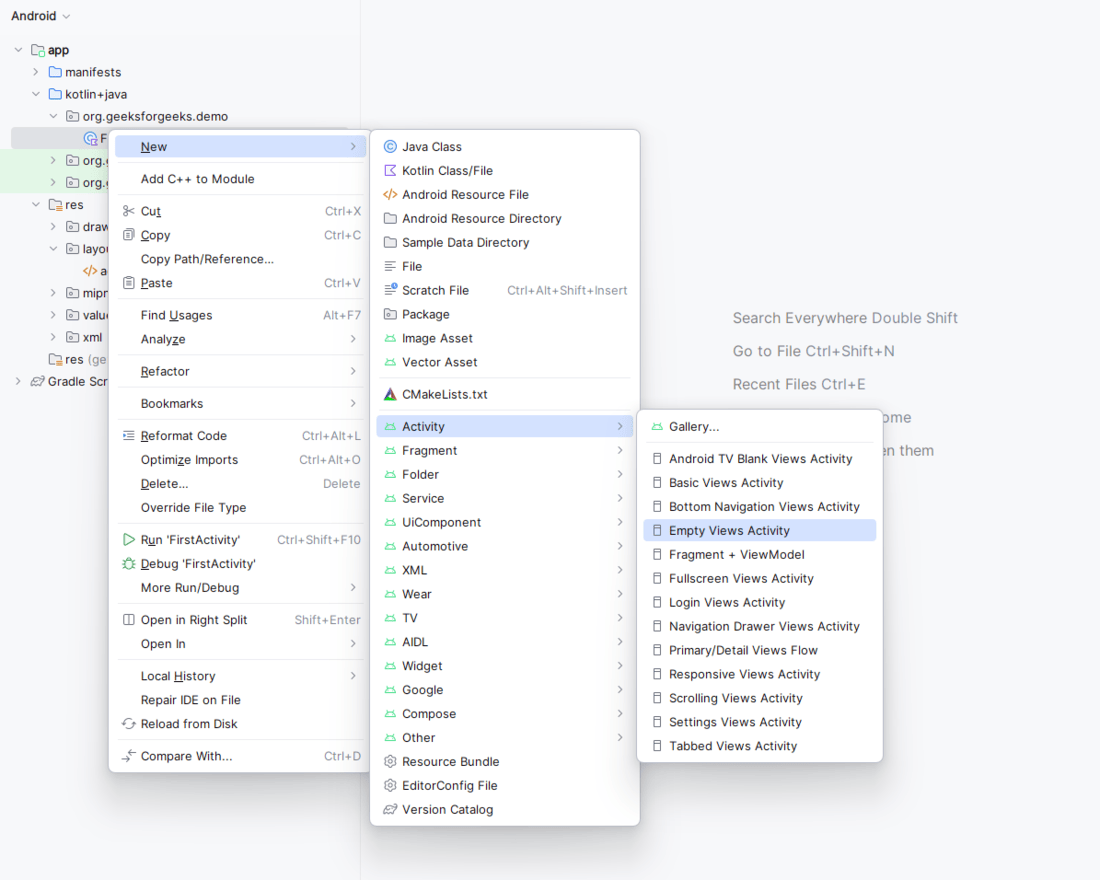
Create second activity by right clicking on the current activity and then New > Activity > Empty Views Activity.
Step 4: Working with the Second Activity
Next, go to the activity_second.xml file, which represents the UI of the project. Below is the code for the activity_second.xml file.
activity_second.xml:
XML <?xml version="1.0" encoding="utf-8"?> <androidx.constraintlayout.widget.ConstraintLayout xmlns:android="http://schemas.android.com/apk/res/android" xmlns:app="http://schemas.android.com/apk/res-auto" xmlns:tools="http://schemas.android.com/tools" android:id="@+id/main" android:layout_width="match_parent" android:layout_height="match_parent" android:background="@color/white" tools:context=".SecondActivity"> <TextView android:id="@+id/textView" android:layout_width="wrap_content" android:layout_height="wrap_content" android:layout_marginBottom="24dp" android:text="Second Activity" android:textSize="24sp" android:textStyle="bold" app:layout_constraintBottom_toTopOf="@+id/next_button" app:layout_constraintLeft_toLeftOf="parent" app:layout_constraintRight_toRightOf="parent" /> <Button android:id="@+id/prev_button" android:layout_width="wrap_content" android:layout_height="wrap_content" android:backgroundTint="@color/green" android:text="Previous" android:textSize="24sp" app:layout_constraintBottom_toBottomOf="parent" app:layout_constraintEnd_toStartOf="@+id/next_button" app:layout_constraintHorizontal_bias="0.5" app:layout_constraintStart_toStartOf="parent" app:layout_constraintTop_toTopOf="parent" /> <Button android:id="@+id/next_button" android:layout_width="wrap_content" android:layout_height="wrap_content" android:backgroundTint="@color/green" android:text="Next" android:textSize="24sp" app:layout_constraintBottom_toBottomOf="parent" app:layout_constraintEnd_toEndOf="parent" app:layout_constraintHorizontal_bias="0.5" app:layout_constraintStart_toEndOf="@+id/prev_button" app:layout_constraintTop_toTopOf="parent" /> </androidx.constraintlayout.widget.ConstraintLayout>
Go to the SecondActivity File and refer to the following code.
Below is the code for the SecondActivity File. Comments are added inside the code to understand the code in more detail.
SecondActivity File:
Java package org.geeksforgeeks.demo; import android.content.Intent; import android.os.Bundle; import android.widget.Button; import androidx.appcompat.app.AppCompatActivity; public class SecondActivity extends AppCompatActivity { // Define the global variables for buttons private Button nextButton; private Button previousButton; @Override protected void onCreate(Bundle savedInstanceState) { super.onCreate(savedInstanceState); setContentView(R.layout.activity_second); // Initialize buttons using findViewById nextButton = findViewById(R.id.next_button); previousButton = findViewById(R.id.prev_button); // Add click listener for next button nextButton.setOnClickListener(v -> { // Intent to start ThirdActivity Intent intent = new Intent(SecondActivity.this, ThirdActivity.class); // Start the activity startActivity(intent); }); // Add click listener for previous button previousButton.setOnClickListener(v -> { // Intent to start FirstActivity Intent intent = new Intent(SecondActivity.this, FirstActivity.class); // Start the activity startActivity(intent); }); } } package org.geeksforgeeks.demo import android.content.Intent import android.os.Bundle import android.widget.Button import androidx.activity.enableEdgeToEdge import androidx.appcompat.app.AppCompatActivity import androidx.core.view.ViewCompat import androidx.core.view.WindowInsetsCompat class SecondActivity : AppCompatActivity() { // define the global variable // Add button Move to next Activity and previous Activity private lateinit var next_button: Button private lateinit var previous_button: Button override fun onCreate(savedInstanceState: Bundle?) { super.onCreate(savedInstanceState) setContentView(R.layout.activity_second) // by ID we can use each component which id is assign in xml // file use findViewById() to get the both Button and textview next_button = findViewById(R.id.next_button) previous_button = findViewById(R.id.prev_button) // add click listener next_button.setOnClickListener { // Intents are objects of the android.content.Intent type. Your code can send them to the Android system defining // the components you are targeting. Intent to start an activity called ThirdActivity with the following code. val intent = Intent(this, ThirdActivity::class.java) // start the activity connect to the specified class startActivity(intent) } // add click listener previous_button.setOnClickListener { // Intents are objects of the android.content.Intent type. Your code can send them to the Android system defining // the components you are targeting. Intent to start an activity called FirstActivity with the following code val intent = Intent(this, FirstActivity::class.java) // start the activity connect to the specified class startActivity(intent) } } }
Now, we have to create third activity same as the second activity, and the path of this file is also the same as another.
Step 5: Working with the Third Activity
Next, go to the activity_third.xml file, which represents the UI of the project. Below is the code for the activity_third.xml file. Comments are added inside the code to understand the code in more detail.
activity_third.xml:
XML <?xml version="1.0" encoding="utf-8"?> <androidx.constraintlayout.widget.ConstraintLayout xmlns:android="http://schemas.android.com/apk/res/android" xmlns:app="http://schemas.android.com/apk/res-auto" xmlns:tools="http://schemas.android.com/tools" android:id="@+id/main" android:layout_width="match_parent" android:layout_height="match_parent" android:background="@color/white" tools:context=".ThirdActivity"> <TextView android:id="@+id/textView" android:layout_width="wrap_content" android:layout_height="wrap_content" android:layout_marginBottom="24dp" android:text="Third Activity" android:textSize="24sp" android:textStyle="bold" app:layout_constraintBottom_toTopOf="@+id/previous_button" app:layout_constraintLeft_toLeftOf="parent" app:layout_constraintRight_toRightOf="parent" /> <Button android:id="@+id/previous_button" android:layout_width="wrap_content" android:layout_height="wrap_content" android:backgroundTint="@color/green" android:text="Previous" android:textSize="24sp" app:layout_constraintBottom_toBottomOf="parent" app:layout_constraintEnd_toEndOf="parent" app:layout_constraintStart_toStartOf="parent" app:layout_constraintTop_toTopOf="parent" /> </androidx.constraintlayout.widget.ConstraintLayout>
Go to the ThirdActivity File and refer to the following code.
Below is the code for the ThirdActivity File. Comments are added inside the code to understand the code in more detail.
ThirdActivity File:
Java package org.geeksforgeeks.demo; import android.content.Intent; import android.os.Bundle; import android.widget.Button; import androidx.appcompat.app.AppCompatActivity; public class ThirdActivity extends AppCompatActivity { // Declare global variable for the button private Button previousButton; @Override protected void onCreate(Bundle savedInstanceState) { super.onCreate(savedInstanceState); setContentView(R.layout.activity_third); // Initialize button using findViewById previousButton = findViewById(R.id.previous_button); // Set click listener for the button previousButton.setOnClickListener(v -> { // Intent to navigate back to SecondActivity Intent intent = new Intent(ThirdActivity.this, SecondActivity.class); // Start the activity startActivity(intent); }); } } package org.geeksforgeeks.demo import android.content.Intent import android.os.Bundle import android.widget.Button import androidx.appcompat.app.AppCompatActivity class ThirdActivity : AppCompatActivity() { // define the global variable // Add button Move previous activity private lateinit var previous_button: Button override fun onCreate(savedInstanceState: Bundle?) { super.onCreate(savedInstanceState) setContentView(R.layout.activity_third) // by ID we can use each component which id is assign in xml // file use findViewById() to get the Button and textview. previous_button = findViewById(R.id.previous_button) // add click listener previous_button.setOnClickListener { // Intents are objects of the android.content.Intent type. Your code can send them to the Android system defining // the components you are targeting. Intent to start an activity called SecondActivity with the following code: val intent = Intent(this, SecondActivity::class.java) // start the activity connect to the specified class startActivity(intent) } } } Output: