You must update the metrics-server component before you update the Kubernetes version of a cluster to 1.12. To update the metrics-server component, perform the following steps: change the metric collector, switch the monitoring link, and update component settings.
Prerequisites
A Container Service for Kubernetes (ACK) dedicated cluster is created, and the Kubernetes version of the cluster is 1.12.6 or earlier.
Change the metric collector
Create a metrics-server.yaml file and copy the following content to the file. In the CLI, run the kubectl apply -f metrics-server.yaml command to change the metric collector from Heapster to metrics-server.
apiVersion: v1 kind: ServiceAccount metadata: name: admin namespace: kube-system --- apiVersion: rbac.authorization.k8s.io/v1beta1 kind: ClusterRoleBinding metadata: name: admin roleRef: apiGroup: rbac.authorization.k8s.io kind: ClusterRole name: cluster-admin subjects: - kind: ServiceAccount name: admin namespace: kube-system --- apiVersion: v1 kind: Service metadata: labels: task: monitoring # For use as a Cluster add-on (https://github.com/kubernetes/kubernetes/tree/master/cluster/addons) # If you are NOT using this as an addon, you should comment out this line. kubernetes.io/cluster-service: 'true' kubernetes.io/name: metrics-server name: heapster namespace: kube-system spec: ports: - port: 80 targetPort: 8082 selector: k8s-app: metrics-server --- apiVersion: v1 kind: Service metadata: name: metrics-server namespace: kube-system labels: kubernetes.io/name: metrics-server spec: selector: k8s-app: metrics-server ports: - port: 443 protocol: TCP targetPort: 443 --- apiVersion: apiregistration.k8s.io/v1beta1 kind: APIService metadata: name: v1beta1.metrics.k8s.io spec: service: name: metrics-server namespace: kube-system group: metrics.k8s.io version: v1beta1 insecureSkipTLSVerify: true groupPriorityMinimum: 100 versionPriority: 100 --- apiVersion: apps/v1 kind: Deployment metadata: name: metrics-server namespace: kube-system labels: k8s-app: metrics-server spec: selector: matchLabels: k8s-app: metrics-server template: metadata: name: metrics-server labels: k8s-app: metrics-server spec: serviceAccountName: admin containers: - name: metrics-server image: registry.##REGION##.aliyuncs.com/acs/metrics-server:v0.2.1-9dd9511-aliyun imagePullPolicy: Always command: - /metrics-server - '--source=kubernetes:https://kubernetes.default' - '--sink=socket:tcp://monitor.csk.##REGION##.aliyuncs.com:8093?clusterId=##CLUSTER_ID## &public=true'Replace ##REGION## and ##CLUSTER_ID## with the region (such as cn-hangzhou) and ID of the selected cluster, respectively.
Switch the monitoring link
Log on to the ACK console. In the left-side navigation pane, click Clusters.
On the Clusters page, click the name of the cluster that you want to manage and choose in the left-side navigation pane.
Find the master nodes in the cluster. Click the ID of a master node to go to the Instance Details page.
In the Basic Information section, click Connect.
The Enter VNC Password dialog box appears. Enter the VNC password and click OK. After you log on to the instance, run the following command:
sed -i 's/--horizontal-pod-autoscaler-use-rest-clients=false/--horizontal-pod-autoscaler-use-rest-clients=true/' /etc/kubernetes/manifests/kube-controller-manager.yaml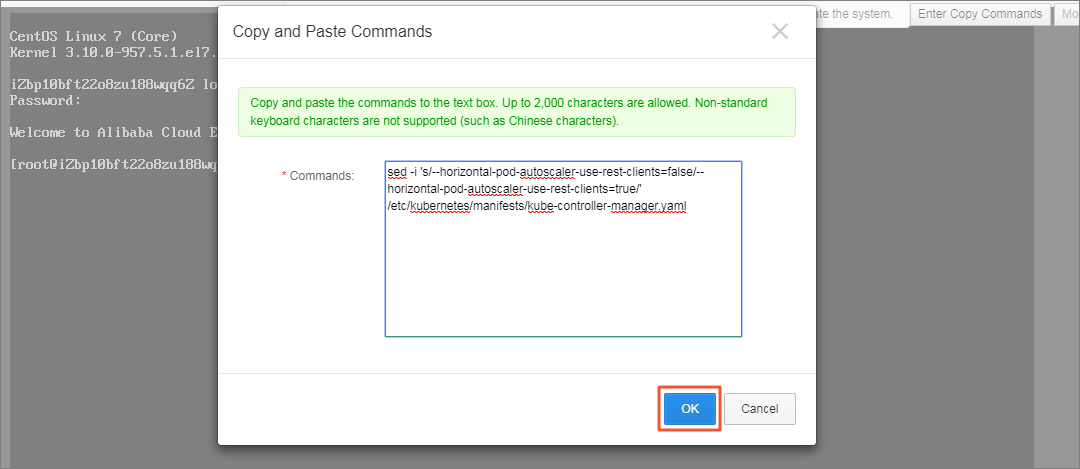
Repeat the preceding steps to switch the monitoring link for the other master nodes.
After the command is executed, the kubelet updates the controller manager.
Update component settings
Log on to the ACK console. In the left-side navigation pane, click Clusters.
On the Clusters page, click the name of the cluster that you want to manage and choose in the left-side navigation pane.
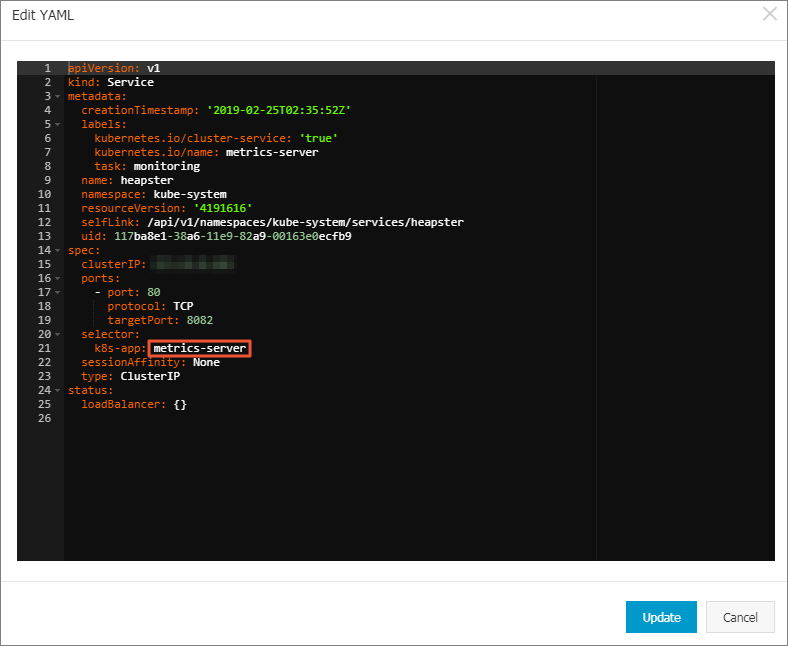
Select the kube-system namespace. Find the heapster Service and click View in YAML in the Actions column of the Service.
In the dialog box that appears, set the value of the k8s-app field to metrics-server. Click Update.
In the left-side navigation pane of the details page, choose .
On the Deployments tab, select the kube-system namespace.
Select Heapster-related components such as heapster and monitoring-influxdb. In the Actions column, choose .
In the dialog box that appears, click OK.
NoteTo delete the monitoring-influxdb component, in the Delete monitoring-influxdb dialog box, select Delete the associated monitoring-influxdb Service and click OK.
Check the link status.
It requires about three minutes to initialize the link.
In the left-side navigation pane, choose . On the Pods page, if the CPU and memory usage are normal, it indicates that the link is switched.
NoteIf the CPU and memory usage of all components are zero, it indicates that an error has occurred.