Thinking about migrating your WordPress site to WordPress.com?
Our expert team can do the moving for you, while your live site remains unaffected – at no cost and with 50% off your first year on our Business plan.
The migration process typically takes 2-3 business days. Once it’s complete, we’ll guide you through connecting your domain and getting your new site up and running. To get started, just drop in your site details and pick the “Do it for me” option during the migration setup below. We’ll take it from there!
You can import an entire WordPress site, including plugins, themes, and users, using the All-in-One WP Migration plugin. Follow the steps in this guide to import an exact copy of your website to WordPress.com.
This option is suitable for self-hosted WordPress sites if you have already tried the recommended option to migrate a website to WordPress.com and did not get the desired result. You can also use this plugin method to import a local/staging site or to transfer an existing WordPress.com staging site to a live WordPress.com site.
To follow the steps in this guide, you will need:
- Your source site: a WordPress site (includes sites on WordPress.org or WordPress.com) with less than 2GB in size (to use the free version) OR the Unlimited extension from All-in-One WP Migration for no size limitations.
- Your destination site: a WordPress.com website with our Business or Commerce plan.
- All incompatible plugins deactivated on the self-hosted site.
If the admin account on the site you’re importing from has a different email address than your WordPress.com account, you will not be able to access the site after completing the migration. To avoid this, ensure that the admin user on the site you’re migrating from uses the same email address as your WordPress.com account.
If the self-hosted site you’re migrating from has the Jetpack plugin installed, disconnect Jetpack on the source site to avoid an identity crisis.
If you are using All-in-One to migrate content from a WordPress.com hosted site to another WordPress.com hosted site, such as a staging site to production, you cannot disconnect Jetpack. Instead, after the migration is complete, please contact support for our help to review the Jetpack connection post-migration.
Special characters are replaced with a question mark (�) when the database encoding of the source site is different from the database encoding of the destination site. WordPress.com defaults to using Latin-1 encoding, while your source site is using a different character set, most likely UTF-8.
To resolve the issue, you can contact support. We will convert your destination site to UTF-8 for you, resetting your destination site’s database and content. Then, you can migrate your source site to the destination site again.
Alternatively, if you’re comfortable with changing the database encoding of your source site, you can convert your source site to Latin1 and then re-run the migration. Our team can assist with your site migration but cannot help with changes to the database encoding on your source site.
- Install and activate the All-in-One WP Migration and Backup plugin on the source site.
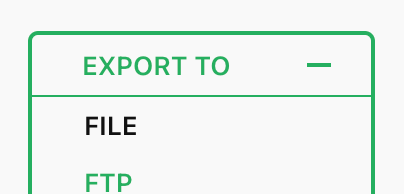
- In the site’s dashboard, navigate to All-in-One WP Migration → Export.
- If you’re using the same domain name on the new WordPress.com site, you don’t need to use the find and replace feature at All-in-One WP Migration → Export.
- If you are changing domain names as part of the migration, you’ll want to first enter your current domain name in the Find field and your new domain name in the Replace with field.
- Click “Export to” and choose the File option. The other methods listed here will cost money, whereas the File option is included with the free version of All-in-One WP Migration.
- Wait for the file to finish preparing.
- Click the download option to save the file to your computer. The file will be in a
.wpressformat.
- On your WordPress.com site, install and activate the All-in-One WP Migration and Backup plugin.
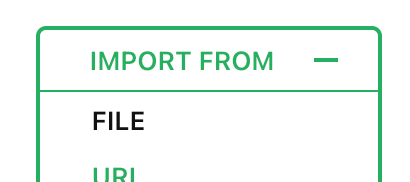
- In the site’s dashboard, navigate to All-in-One WP Migration → Import.
- Click “Import from” and choose the “File” option:
- Select the
.wpressfile from your computer that you downloaded earlier. - Wait for the upload to complete. Depending on the size of the site, this can take a while.
- Once the upload finishes, click “Proceed” to confirm that you wish to overwrite the existing WordPress.com site.
⚠️
By importing a site using this method, the entire contents of the WordPress.com site will be erased and replaced with the site that you import.
Once you complete the above steps, take a few minutes to review your new WordPress.com site. Make sure you’re able to access tools and plugins in your WordPress.com dashboard and that your new site has the features and functionality you need from the source site. Deactivate any incompatible plugins on the imported site.
If anything isn’t working as expected, please send us a message to let us know that you have just completed a migration using the All-in-One WP Migration plugin. We will review your site to ensure the migration went smoothly.