毎度、ググっても出てこない小ネタを取り扱っております。
本記事は個人的な見解であり、筆者の所属するいかなる団体にも関係ございません。
0. はじめに
今年(2021年)、私はJetsonでK3Sな一年でした。
締めくくりとして、JetsonでK3Sを動かしてMinIOを動かすというのをやってみたいと思います。
(2021年中に終わらないかも) [終わりませんでしたw]
Standaloneで動かします。
その為、インストールしたホストが失われるとデータが消失します。
ご注意ください。
1. Jetsonのセットアップ
JetsonはSDカードにインストールするだけなのでスキップします。
利用したJetpackは、4.6です
2. K3Sをインストール
K3Sをインストールするには、k3supを使います。
なので、まずはk3supをインストールします。
$ curl -sLS https://get.k3sup.dev | sh $ sudo install k3sup-arm64 /usr/local/bin/k3sup 公式には
sudo install k3sup /usr/local/bin/k3sup
となっていますが、armではk3sup-arm64がダウンロードされるので変更しています。
3. k3sをインストール
3-1. インストール
k3supをつかって、k3sをインストールします。
$ k3sup install --local --user=$USER --local-path ./kubeconfig インストールログは以下の通りです。
k3supでk3sのインストールログ
k3sup install --local Running: k3sup install 2021/12/31 18:33:48 127.0.0.1 Executing: curl -sfL https://get.k3s.io | INSTALL_K3S_EXEC='server --tls-san 127.0.0.1' INSTALL_K3S_CHANNEL='stable' sh - [INFO] Finding release for channel stable [INFO] Using v1.22.5+k3s1 as release [INFO] Downloading hash https://github.com/k3s-io/k3s/releases/download/v1.22.5+k3s1/sha256sum-arm64.txt [INFO] Downloading binary https://github.com/k3s-io/k3s/releases/download/v1.22.5+k3s1/k3s-arm64 [INFO] Verifying binary download [INFO] Installing k3s to /usr/local/bin/k3s [INFO] Skipping installation of SELinux RPM [INFO] Skipping /usr/local/bin/kubectl symlink to k3s, already exists [INFO] Skipping /usr/local/bin/crictl symlink to k3s, already exists [INFO] Skipping /usr/local/bin/ctr symlink to k3s, command exists in PATH at /usr/bin/ctr [INFO] Creating killall script /usr/local/bin/k3s-killall.sh [INFO] Creating uninstall script /usr/local/bin/k3s-uninstall.sh [INFO] env: Creating environment file /etc/systemd/system/k3s.service.env [INFO] systemd: Creating service file /etc/systemd/system/k3s.service [INFO] systemd: Enabling k3s unit Created symlink /etc/systemd/system/multi-user.target.wants/k3s.service → /etc/systemd/system/k3s.service. [INFO] systemd: Starting k3s stderr: "Created symlink /etc/systemd/system/multi-user.target.wants/k3s.service → /etc/systemd/system/k3s.service.\n"stdout: "[INFO] Finding release for channel stable\n[INFO] Using v1.22.5+k3s1 as release\n[INFO] Downloading hash https://github.com/k3s-io/k3s/releases/download/v1.22.5+k3s1/sha256sum-arm64.txt\n[INFO] Downloading binary https://github.com/k3s-io/k3s/releases/download/v1.22.5+k3s1/k3s-arm64\n[INFO] Verifying binary download\n[INFO] Installing k3s to /usr/local/bin/k3s\n[INFO] Skipping installation of SELinux RPM\n[INFO] Skipping /usr/local/bin/kubectl symlink to k3s, already exists\n[INFO] Skipping /usr/local/bin/crictl symlink to k3s, already exists\n[INFO] Skipping /usr/local/bin/ctr symlink to k3s, command exists in PATH at /usr/bin/ctr\n[INFO] Creating killall script /usr/local/bin/k3s-killall.sh\n[INFO] Creating uninstall script /usr/local/bin/k3s-uninstall.sh\n[INFO] env: Creating environment file /etc/systemd/system/k3s.service.env\n[INFO] systemd: Creating service file /etc/systemd/system/k3s.service\n[INFO] systemd: Enabling k3s unit\n[INFO] systemd: Starting k3s\n"Saving file to: /home/hoge/kubeconfig # Test your cluster with: export KUBECONFIG=/home/hoge/kubeconfig kubectl config set-context default kubectl get node -o wide 3-2. テストする
インストールできているはずなので、接続テストしてみます。
export KUBECONFIG=/home/hoge/kubeconfig kubectl config set-context default kubectl get node -o wide 実行結果
$ export KUBECONFIG=/home/hoge/kubeconfig $ kubectl config set-context default Context "default" modified. $ kubectl get node -o wide NAME STATUS ROLES AGE VERSION INTERNAL-IP EXTERNAL-IP OS-IMAGE KERNEL-VERSION CONTAINER-RUNTIME desktop Ready control-plane,master 14d v1.22.5+k3s1 192.168.99.123 <none> Ubuntu 18.04.6 LTS 4.9.253-tegra containerd://1.5.8-k3s1 問題ないので先に進みます。
4. Kubernetesの各種アプリをインストールします。
kubectlとhelmコマンドをインストールしますが、バージョンアップを楽にするためにsnapでインストールします。
4-1. Kubectlのインストール
sudo snap install kubectl --classic 4-2. helmのインストール
sudo snap install helm --classic 5. MinIOをインストール
5-1. MinIOリポジトリをhelmで追加
helm repo add minio https://charts.min.io/ 追加されたか確認
$ helm repo list NAME URL miniohttps://charts.min.io/ helm search repo minio -l helm search repo 実行結果
$ helm search repo minio -l NAME CHART VERSION APP VERSION DESCRIPTION minio/minio 3.4.4 RELEASE.2021-12-29T06-49-06Z Multi-Cloud Object Storage minio/minio 3.4.3 RELEASE.2021-12-20T22-07-16Z Multi-Cloud Object Storage minio/minio 3.4.2 RELEASE.2021-12-20T22-07-16Z Multi-Cloud Object Storage minio/minio 3.4.1 RELEASE.2021-12-10T23-03-39Z Multi-Cloud Object Storage minio/minio 3.4.0 RELEASE.2021-12-18T04-42-33Z Multi-Cloud Object Storage minio/minio 3.3.4 RELEASE.2021-12-10T23-03-39Z Multi-Cloud Object Storage minio/minio 3.3.3 RELEASE.2021-12-10T23-03-39Z Multi-Cloud Object Storage minio/minio 3.3.2 RELEASE.2021-12-10T23-03-39Z Multi-Cloud Object Storage minio/minio 3.3.1 RELEASE.2021-11-24T23-19-33Z Multi-Cloud Object Storage minio/minio 3.3.0 RELEASE.2021-11-24T23-19-33Z Multi-Cloud Object Storage minio/minio 3.2.0 RELEASE.2021-10-13T00-23-17Z Multi-Cloud Object Storage minio/minio 3.1.9 RELEASE.2021-10-10T16-53-30Z Multi-Cloud Object Storage minio/minio 3.1.8 RELEASE.2021-10-06T23-36-31Z Multi-Cloud Object Storage minio/minio 3.1.7 RELEASE.2021-10-02T16-31-05Z Multi-Cloud Object Storage minio/minio 3.1.6 RELEASE.2021-09-18T18-09-59Z Multi-Cloud Object Storage minio/minio 3.1.5 RELEASE.2021-09-18T18-09-59Z Multi-Cloud Object Storage minio/minio 3.1.4 RELEASE.2021-09-18T18-09-59Z Multi-Cloud Object Storage minio/minio 3.1.3 RELEASE.2021-09-09T21-37-07Z Multi-Cloud Object Storage minio/minio 3.1.2 RELEASE.2021-09-09T21-37-07Z Multi-Cloud Object Storage minio/minio 3.1.1 RELEASE.2021-09-09T21-37-07Z Multi-Cloud Object Storage minio/minio 3.1.0 RELEASE.2021-09-09T21-37-07Z Multi-Cloud Object Storage minio/minio 3.0.2 RELEASE.2021-09-03T03-56-13Z Multi-Cloud Object Storage minio/minio 3.0.1 RELEASE.2021-08-31T05-46-54Z Multi-Cloud Object Storage minio/minio 3.0.0 RELEASE.2021-08-31T05-46-54Z Multi-Cloud Object Storage minio/minio 2.0.1 RELEASE.2021-08-31T05-46-54Z Multi-Cloud Object Storage minio/minio 2.0.0 RELEASE.2021-08-25T00-41-18Z Multi-Cloud Object Storage minio/minio 1.0.5 RELEASE.2021-08-25T00-41-18Z Multi-Cloud Object Storage minio/minio 1.0.4 RELEASE.2021-08-25T00-41-18Z Multi-Cloud Object Storage minio/minio 1.0.3 RELEASE.2021-08-20T18-32-01Z Multi-Cloud Object Storage minio/minio 1.0.2 RELEASE.2021-08-20T18-32-01Z High Performance, Kubernetes Native Object Storage minio/minio 1.0.1 RELEASE.2021-08-20T18-32-01Z High Performance, Kubernetes Native Object Storage minio/minio 1.0.0 RELEASE.2021-08-17T20-53-08Z High Performance, Kubernetes Native Object Storage 現在、Helmでデプロイされているものを確認
$ export KUBECONFIG=/home/hoge/kubeconfig $ helm list -A NAME NAMESPACE REVISION UPDATED STATUS CHART APP VERSION traefik kube-system 2 2021-12-31 09:34:39.667360093 +0000 UTC deployed traefik-10.3.001 2.5.0 traefik-crd kube-system 3 2021-12-31 09:34:36.982613767 +0000 UTC deployed traefik-crd-10.3.001 K3Sでは、デフォルトでtraefikがHelmインストールされています。
このtraefikは、K3Sで使われるIngressです
5-3. helmのvaluesを確認
helmで指定できる値を確認
helm show values minio/minio helm のManifest
$ helm show values minio/minio ## Provide a name in place of minio for `app:` labels ## nameOverride: "" ## Provide a name to substitute for the full names of resources ## fullnameOverride: "" ## set kubernetes cluster domain where minio is running ## clusterDomain: cluster.local ## Set default image, imageTag, and imagePullPolicy. mode is used to indicate the ## image: repository: quay.io/minio/minio tag: RELEASE.2021-12-29T06-49-06Z pullPolicy: IfNotPresent imagePullSecrets: [] # - name: "image-pull-secret" ## Set default image, imageTag, and imagePullPolicy for the `mc` (the minio ## client used to create a default bucket). ## mcImage: repository: quay.io/minio/mc tag: RELEASE.2021-12-29T06-52-55Z pullPolicy: IfNotPresent ## minio mode, i.e. standalone or distributed or gateway. mode: distributed ## other supported values are "standalone", "gateway" ## Additional labels to include with deployment or statefulset additionalLabels: [] ## Additional annotations to include with deployment or statefulset additionalAnnotations: [] ## Additional arguments to pass to minio binary extraArgs: [] ## Port number for MinIO S3 API Access minioAPIPort: "9000" ## Port number for MinIO Browser COnsole Access minioConsolePort: "9001" ## Update strategy for Deployments DeploymentUpdate: type: RollingUpdate maxUnavailable: 0 maxSurge: 100% ## Update strategy for StatefulSets StatefulSetUpdate: updateStrategy: RollingUpdate ## Pod priority settings ## ref: https://kubernetes.io/docs/concepts/configuration/pod-priority-preemption/ ## priorityClassName: "" ## Set default rootUser, rootPassword ## AccessKey and secretKey is generated when not set ## Distributed MinIO ref: https://docs.minio.io/docs/distributed-minio-quickstart-guide ## rootUser: "" rootPassword: "" ## Use existing Secret that store following variables: ## ## | Chart var | .data.<key> in Secret | ## |:----------------------|:-------------------------| ## | rootUser | rootUser | ## | rootPassword | rootPassword | ## ## All mentioned variables will be ignored in values file. ## .data.rootUser and .data.rootPassword are mandatory, ## others depend on enabled status of corresponding sections. existingSecret: "" ## Directory on the MinIO pof certsPath: "/etc/minio/certs/" configPathmc: "/etc/minio/mc/" ## Path where PV would be mounted on the MinIO Pod mountPath: "/export" ## Override the root directory which the minio server should serve from. ## If left empty, it defaults to the value of {{ .Values.mountPath }} ## If defined, it must be a sub-directory of the path specified in {{ .Values.mountPath }} ## bucketRoot: "" # Number of drives attached to a node drivesPerNode: 1 # Number of MinIO containers running replicas: 16 # Number of expanded MinIO clusters pools: 1 # Deploy if 'mode == gateway' - 4 replicas. gateway: type: "nas" # currently only "nas,gcs" are supported. replicas: 4 gcs: serviceAccountFile: "" # credential JSON file of service account key (not required if using existing secret) projectId: "" # Google cloud project id required ## TLS Settings for MinIO tls: enabled: false ## Create a secret with private.key and public.crt files and pass that here. Ref: https://github.com/minio/minio/tree/master/docs/tls/kubernetes#2-create-kubernetes-secret certSecret: "" publicCrt: public.crt privateKey: private.key ## Trusted Certificates Settings for MinIO. Ref: https://docs.minio.io/docs/how-to-secure-access-to-minio-server-with-tls#install-certificates-from-third-party-cas ## Bundle multiple trusted certificates into one secret and pass that here. Ref: https://github.com/minio/minio/tree/master/docs/tls/kubernetes#2-create-kubernetes-secret ## When using self-signed certificates, remember to include MinIO's own certificate in the bundle with key public.crt. ## If certSecret is left empty and tls is enabled, this chart installs the public certificate from .Values.tls.certSecret. trustedCertsSecret: "" ## Enable persistence using Persistent Volume Claims ## ref: http://kubernetes.io/docs/user-guide/persistent-volumes/ ## persistence: enabled: true annotations: {} ## A manually managed Persistent Volume and Claim ## Requires persistence.enabled: true ## If defined, PVC must be created manually before volume will be bound existingClaim: "" ## minio data Persistent Volume Storage Class ## If defined, storageClassName: <storageClass> ## If set to "-", storageClassName: "", which disables dynamic provisioning ## If undefined (the default) or set to null, no storageClassName spec is ## set, choosing the default provisioner. (gp2 on AWS, standard on ## GKE, AWS & OpenStack) ## ## Storage class of PV to bind. By default it looks for standard storage class. ## If the PV uses a different storage class, specify that here. storageClass: "" VolumeName: "" accessMode: ReadWriteOnce size: 500Gi ## If subPath is set mount a sub folder of a volume instead of the root of the volume. ## This is especially handy for volume plugins that don't natively support sub mounting (like glusterfs). ## subPath: "" ## Expose the MinIO service to be accessed from outside the cluster (LoadBalancer service). ## or access it from within the cluster (ClusterIP service). Set the service type and the port to serve it. ## ref: http://kubernetes.io/docs/user-guide/services/ ## service: type: ClusterIP clusterIP: ~ ## Make sure to match it to minioAPIPort port: "9000" nodePort: 32000 ## Configure Ingress based on the documentation here: https://kubernetes.io/docs/concepts/services-networking/ingress/ ## ingress: enabled: false # ingressClassName: "" labels: {} # node-role.kubernetes.io/ingress: platform annotations: {} # kubernetes.io/ingress.class: nginx # kubernetes.io/tls-acme: "true" # kubernetes.io/ingress.allow-http: "false" # kubernetes.io/ingress.global-static-ip-name: "" # nginx.ingress.kubernetes.io/secure-backends: "true" # nginx.ingress.kubernetes.io/backend-protocol: "HTTPS" # nginx.ingress.kubernetes.io/whitelist-source-range: 0.0.0.0/0 path: / hosts: - minio-example.local tls: [] # - secretName: chart-example-tls # hosts: # - chart-example.local consoleService: type: ClusterIP clusterIP: ~ ## Make sure to match it to minioConsolePort port: "9001" nodePort: 32001 consoleIngress: enabled: false # ingressClassName: "" labels: {} # node-role.kubernetes.io/ingress: platform annotations: {} # kubernetes.io/ingress.class: nginx # kubernetes.io/tls-acme: "true" # kubernetes.io/ingress.allow-http: "false" # kubernetes.io/ingress.global-static-ip-name: "" # nginx.ingress.kubernetes.io/secure-backends: "true" # nginx.ingress.kubernetes.io/backend-protocol: "HTTPS" # nginx.ingress.kubernetes.io/whitelist-source-range: 0.0.0.0/0 path: / hosts: - console.minio-example.local tls: [] # - secretName: chart-example-tls # hosts: # - chart-example.local ## Node labels for pod assignment ## Ref: https://kubernetes.io/docs/user-guide/node-selection/ ## nodeSelector: {} tolerations: [] affinity: {} ## Add stateful containers to have security context, if enabled MinIO will run as this ## user and group NOTE: securityContext is only enabled if persistence.enabled=true securityContext: enabled: true runAsUser: 1000 runAsGroup: 1000 fsGroup: 1000 # Additational pod annotations podAnnotations: {} # Additional pod labels podLabels: {} ## Configure resource requests and limits ## ref: http://kubernetes.io/docs/user-guide/compute-resources/ ## resources: requests: memory: 16Gi ## List of users to be created after minio install ## users: ## Username, password and policy to be assigned to the user ## Default policies are [readonly|readwrite|writeonly|consoleAdmin|diagnostics] ## Add new policies as explained here https://docs.min.io/docs/minio-multi-user-quickstart-guide.html ## NOTE: this will fail if LDAP is enabled in your MinIO deployment ## make sure to disable this if you are using LDAP. - accessKey: console secretKey: console123 policy: consoleAdmin ## Additional Annotations for the Kubernetes Job makeUserJob makeUserJob: podAnnotations: annotations: securityContext: enabled: false runAsUser: 1000 runAsGroup: 1000 fsGroup: 1000 resources: requests: memory: 128Mi nodeSelector: {} tolerations: [] affinity: {} ## List of buckets to be created after minio install ## buckets: # # Name of the bucket # - name: bucket1 # # Policy to be set on the # # bucket [none|download|upload|public] # policy: none # # Purge if bucket exists already # purge: false # # set versioning for # # bucket [true|false] # versioning: false # - name: bucket2 # policy: none # purge: false # versioning: true ## Additional Annotations for the Kubernetes Job makeBucketJob makeBucketJob: podAnnotations: annotations: securityContext: enabled: false runAsUser: 1000 runAsGroup: 1000 fsGroup: 1000 resources: requests: memory: 128Mi nodeSelector: {} tolerations: [] affinity: {} ## Use this field to add environment variables relevant to MinIO server. These fields will be passed on to MinIO container(s) ## when Chart is deployed environment: ## Please refer for comprehensive list https://docs.min.io/minio/baremetal/reference/minio-server/minio-server.html ## MINIO_SUBNET_LICENSE: "License key obtained from https://subnet.min.io" ## MINIO_BROWSER: "off" networkPolicy: enabled: false allowExternal: true ## PodDisruptionBudget settings ## ref: https://kubernetes.io/docs/concepts/workloads/pods/disruptions/ ## podDisruptionBudget: enabled: false maxUnavailable: 1 ## Specify the service account to use for the MinIO pods. If 'create' is set to 'false' ## and 'name' is left unspecified, the account 'default' will be used. serviceAccount: create: true ## The name of the service account to use. If 'create' is 'true', a service account with that name ## will be created. name: "minio-sa" metrics: serviceMonitor: enabled: false public: true additionalLabels: {} relabelConfigs: {} # namespace: monitoring # interval: 30s # scrapeTimeout: 10s ## ETCD settings: https://github.com/minio/minio/blob/master/docs/sts/etcd.md ## Define endpoints to enable this section. etcd: endpoints: [] pathPrefix: "" corednsPathPrefix: "" clientCert: "" clientCertKey: "" 5-2. MinIOをインストール
以下のコマンドでminioをインストールします。
注意点は以下の通りです。
- MinIOを1台で動かすスタンドアロンモードなので、
mode=standaloneにします。 -
rootUserとrootPasswordでrootユーザーのパスワードを指定します。 - Ingressを使うので
service.typeをClusterIPに設定します。 -
persistence.sizeはMinIOの上限データ容量です。 -
persistence.storageClassは、K3Sのデフォルトストレージクラスのlocal-pathにします。 -
resources.requests.memoryは、MinioのPodのメモリー容量です。 - サービスアクセスにIngressを使うので
ingress.enabledをtrueにします。 - サービスアクセスのIngressのhost名を
ingress.hosts[0]で指定します。 - コンソールアクセスにもIngressを使うので
consoleIngress.enabledをtrueにします。 - コンソールアクセスのIngressのHost名を
consoleIngress.hosts[0]で指定します。
StandaloneモードでDisk数が1個なので以下の機能を使うことができません。
- バージョニング
- オブジェクトロック
- バケットクオータ
パスワードには十分複雑な文字列を利用してください。
helm install minio \ --namespace minio --create-namespace \ --set rootUser=minio \ --set rootPassword=minio#123! \ --set mode=standalone \ --set service.type=ClusterIP \ --set persistence.size=50Gi \ --set persistence.storageClass=local-path \ --set resources.requests.memory=1Gi \ --set ingress.enabled=true \ --set ingress.hosts[0]=minio.192.168.99.123.sslip.io \ --set consoleIngress.enabled=true \ --set consoleIngress.hosts[0]=minio-console.192.168.99.123.sslip.io \ minio/minio 6. MinIOへ接続
6-1. MinIOコンソールへアクセス
コンソールへアクセスするには、https://minio-console.192.168.99.123.sslip.io/ へアクセスします。IPアドレスは、K3Sを動かしているJetsonのIPアドレスに変更してください。
UsernameとPasswordにrootUserとrootPasswordで指定した値を入力してログインします。
6-1-1. テスト用バケットの作成
テスト用のバケット(bucket-1)を作っておきます
「Buckets>「Create a Bucket」をクリックし、「Bucket Name」にbucket-1を指定して「Create Bucket」をクリックします。
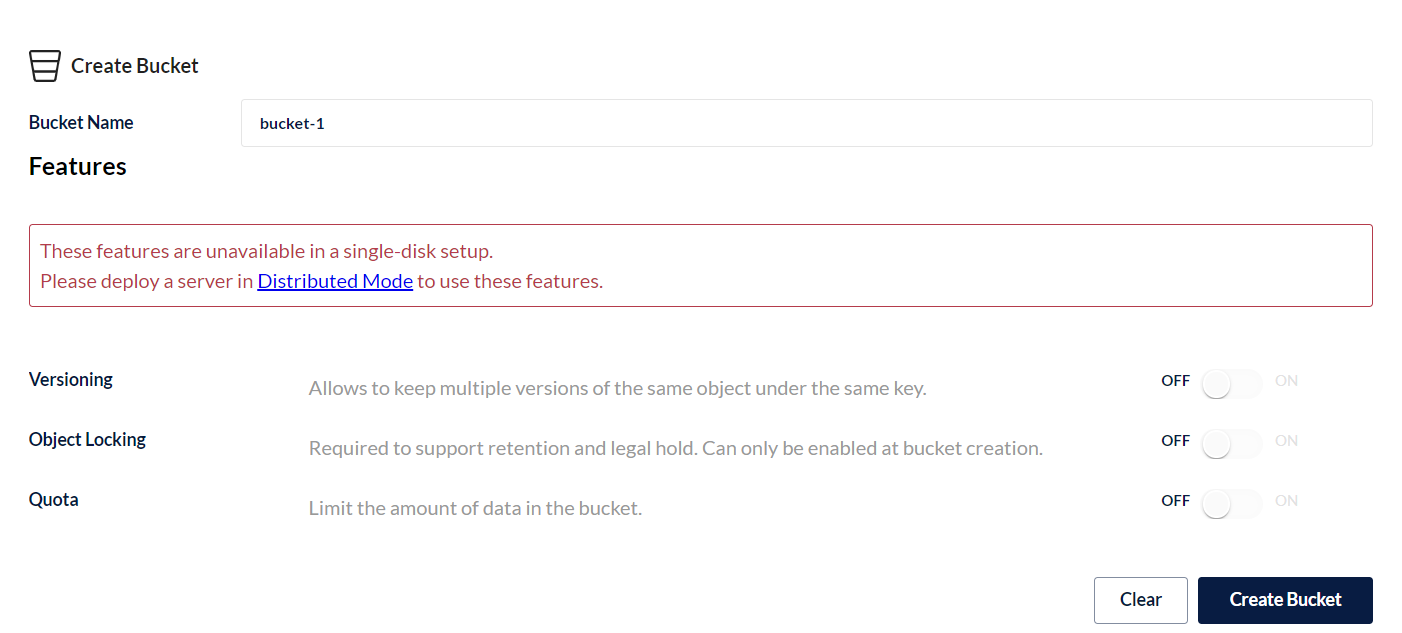
bucket-1ができました。

7. MinioをCLIから使う
7-1. Minio Clientをインストール
CLIコンソールでMinIOのバケットへファイルを転送します。
その為に、Minio Client(mc)をダウンロードします。
JetsonはARMなのでArm64版のmcをダウンロードします。
wget https://dl.min.io/client/mc/release/linux-arm64/mc chmod +x ./mc その他のバイナリーについては以下からダウンロードしてください。
https://dl.min.io/client/mc/release/
- バージョン確認
$ ./mc --version mc version RELEASE.2021-12-29T06-52-55Z 7-2. Minio Clientの設定
設定方法は2つありますが、.mc/config.jsonを利用します。
./mc alias set k3s-minio https://minio.192.168.99.123.sslip.io minio minio123 --insecure SSL/TLSが自己証明書なので、--insecureを付けておきます。
mcコマンドがあるディレクトリで実行します。
設定された確認する
./mc ls k3s-minio --insecure 確認結果
./mc ls k3s-minio --insecure [2022-01-01 17:40:39 JST] 0B bucket-1/ 7-4. ファイルをアップロード
適当なファイルを生成して、ファイルをアップロードする
$ touch test.txt $ ./mc cp ./test.txt k3s-minio/bucket-1/ --insecure $ ./mc ls k3s-minio/bucket-1/ --insecure [2022-01-02 19:42:53 JST] 0B test.txt 8. まとめ
Jetson NanoにK3Sをインストールして、MinIOをインストールし、Ingressでサーバーを公開してみました。