Introduction
This page describes how to convert your Stack Exchange posts to your own website, hosted for free on GitHub Pages.
Converting posts in Stack Exchange MarkDown format isn’t as easy as simply copying them over to GitHub Pages. The python program stack-to-blog.py is used to convert Stack Exchange posts to GitHub Pages Posts. The bash script refresh.sh is used to pull your GitHub Repo, run stack-to-blog.py and push the results back to your website.
This video shows:
- What the GitHub Pages repo looks likes before running
refresh.shbash script - Running
refresh.shscript in terminal window - GitHub Pages is rebuilt in a few minutes
- View a converted Stack Exchange Post
- Look at the original post
- Return to GitHub Pages and notice the table of Contents and Navigation Bars that have been inserted because post qualifies as a long answer.
Table of Contents
- Introduction
- Pippim Website Directory Tree
- Clone Pippim Website Locally
- Convert Stack Exchange to GitHub Pages
- Stack Exchange Data Explorer
- Run
refresh.shBash Script - Setting
stack-to-blog.pyOptions stack-to-blog.pyProgram Overviewstack-to-blog.pyDetailed Conversion
Pippim Website Directory Tree
The website tree is not displayed in real time. Contents are taken from the file _includes/website_tree.txt which is manually uploaded from time to time. The file contents can be generated using the Linux tree command. See the refresh.sh bash script for an example 🔗.
The Pippim website tree is displayed below:
NOTE: Directory level depth is suppressed for
/assets/img/iconssubdirectory through/assets/img/stack/subdirectory. This keeps the number of lines down. Similarly, the_postsdirectory contains 1,218 posts which are not displayed above.
Clone Pippim Website Locally
These are the Linux instructions for cloning the Pippim website to your local drive.
sudo apt update && sudo apt install git cd ~ git clone https://github.com/pippim/pippim.github.io.git website2 cp -ar ~/website2 ~/website NOTE:
~/websiteis your working directory and~/website2is a mirror copy of the website needed to publish changes withrefresh.shbash script.
Convert Stack Exchange to GitHub Pages

Converting thousands of Stack Exchange Q&A in markdown format isn’t as easy as simply copying them over to GitHub Pages. The python program stack-to-blog.py was used to convert Stack Exchange posts to GitHub Pages Posts. The full stack-to-blog.py program can be accessed on the Pippim Website repo 🔗.
The program automatically:
- Creates Jekyll front matter on posts and front matter totals for site.
- Selects Stack Exchange Posts based on meeting minimum criteria such as up-votes or accepted answer status.
- If self-answered question, the answer is included and not the question.
- If self-answered question, the accepted answer alone doesn’t qualify. Votes from other are the qualifier.
- Initial testing allows selecting small set of random record numbers to convert.
- Converts Stack Exchange Markdown formats to GitHub Pages Kramdown Markdown format.
- Creates hyperlinks to original Answer in Stack Exchange and Kramdown in GitHub Pages.
- Creates search word to URL indices excluding 50% of words like “a”, “the”, etc. to save space.
- Selectively inserts Table of Contents based on minimum criteria settings.
- Selectively inserts Section Navigation Buttons for: Top (Top of Page), ToS (Top of Section), ToC (Table of Contents) and Skip (Skip section).
- Selectively inserts “Copy Code Block to System Clipboard” button based on lines of code.
- Creates HTML with “Top Ten Answers” with the most votes.
- Creates powerful nested expandable/collapsible detail/summary HTML for many thousands of tags by post.
- Remaps hyperlinks in Stack Exchange Posts to Pippim website posts if they were converted.
- Fixes old broken
#headerStack Exchange Markdown. - Converts
< block quoteStack Exchange Markdown into what works in Jekyll Kramdown. - Convert Stack Exchange
<!-- language -->tags to fenced code block language. - When no fenced code block language is provided, uses shebang language first (if available).
- Converts older four-space indented code blocks to fenced code blocks.
- Converts Stack Exchange Hyperlinks where the website post title is implied and not explicit.
- Prints list of self-answered questions that were not accepted after the mandatory two day wait period.
- Prints list of Rouge Syntax Highlighting languages not supported in fenced code blocks.
- Prints summary totals when finished.
Stack Exchange Data Explorer
The Stack Exchange Data Explorer retrieves all your posts from the Stack Exchange (SE) network into a CSV file (up to 10 MB) for downloading.
To download your SE posts you will need to:
- Click the link below
- Log in to the SE Data Explorer
- Search for the query: “All my posts on the SE network”
- Enter your network ID for the query parameter. E.G. 4775729
- After a few minutes, when the query completes, download the Query Results.
Each of these steps is described in detail in the following sections.
First Step is to Log In
The first step in converting Stack Exchange posts to Pippim website posts is to run a Stack Exchange Data Explorer Query 🔗. After clicking the link you are presented with the Log In screen:
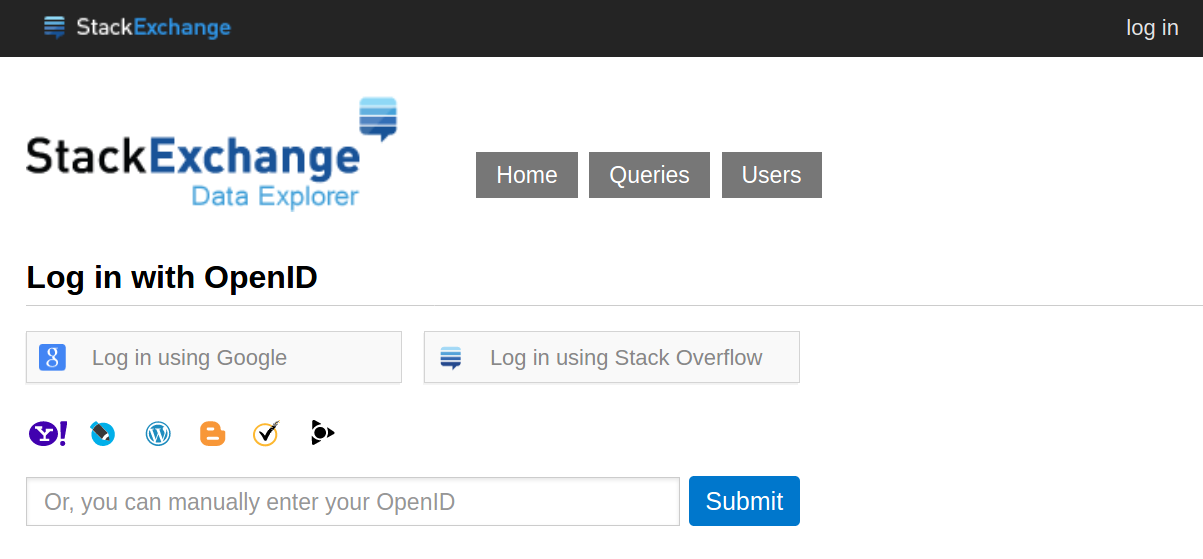
Click the log in button at the top right of the screen. Then you can log in using Google or Stack Overflow. I use the latter since Google already knows too much about us :)

Search For Query
After logging in, the top of the window provides a search bar to find a query. Enter; “All my posts on the SE network” or copy with the button below and, paste into the search bar.
All my posts on the SE network After keying (or pasting) the above into the search bar, press Enter and a list of queries appears:
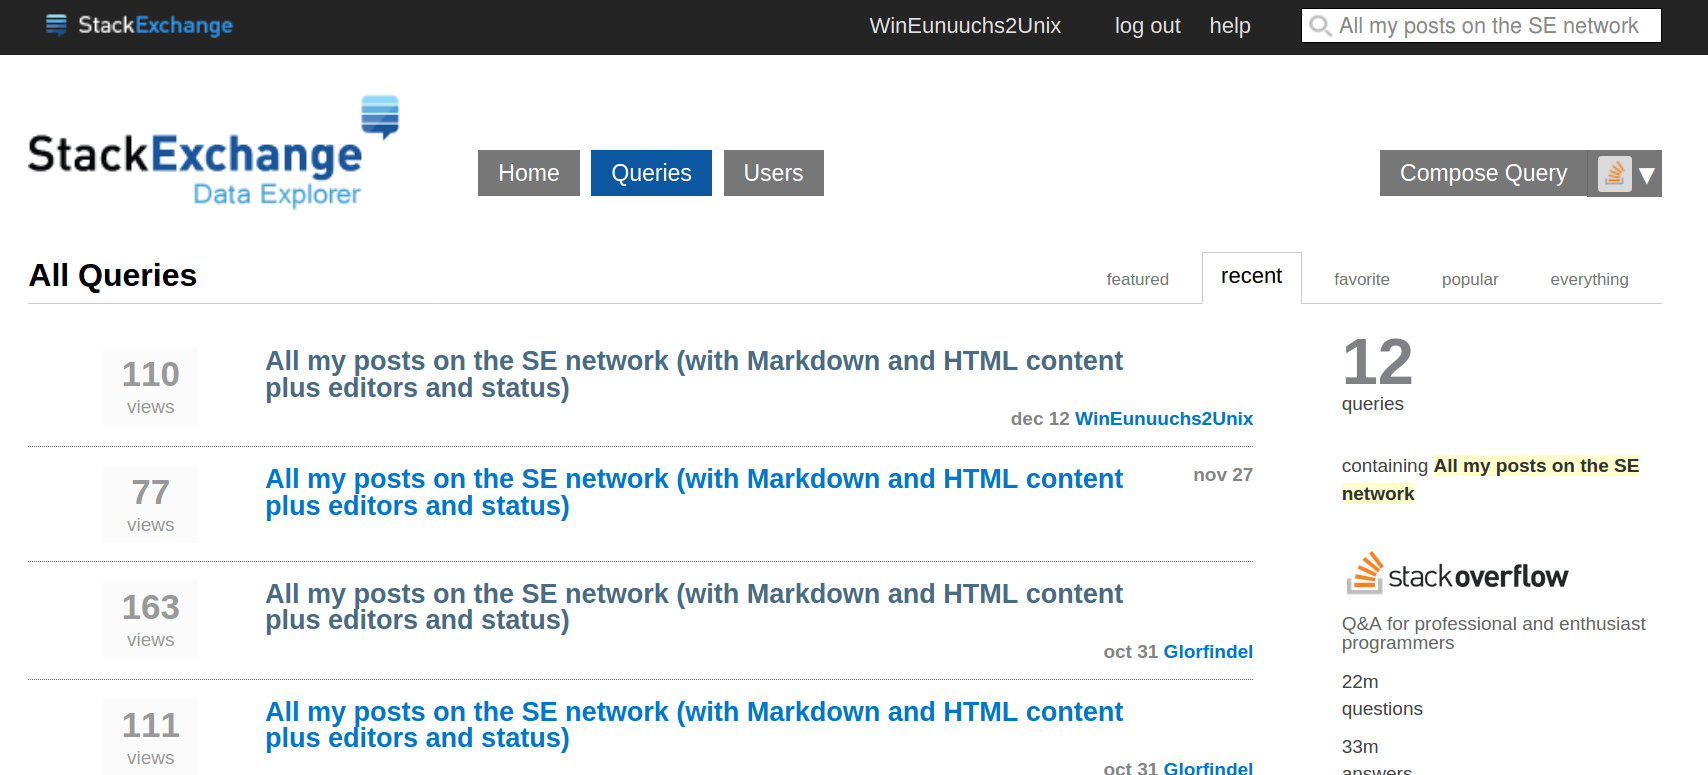
For our purposes, select the version from December 12, 2021. In the above screenshot it is the first entry on the list. If you have revised the query select your revised version.
Specify Parameters
At the bottom of the window you need to specify your parameters. Fill in your SE network account ID number which in our case is 4775729.
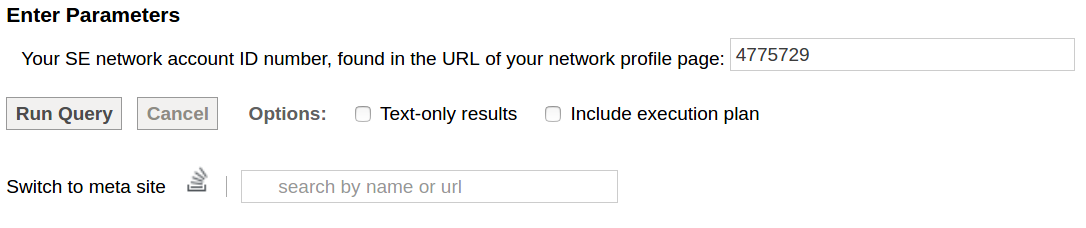
Then click the Run Query button and wait a few minutes. Or a few seconds if you have just run the query and the results have been cached.
Download Query Results
When the Query finishes, the resulting rows are displayed in the browser window. At the top of the first results’ row you will see the button on the right.
The button will download all your questions and answers from Stack Exchange to your local storage in CSV (Comma Separated Values) format.
Click the Download CSV button to initiate the download process.
Download Confirmation Pop-Up Window
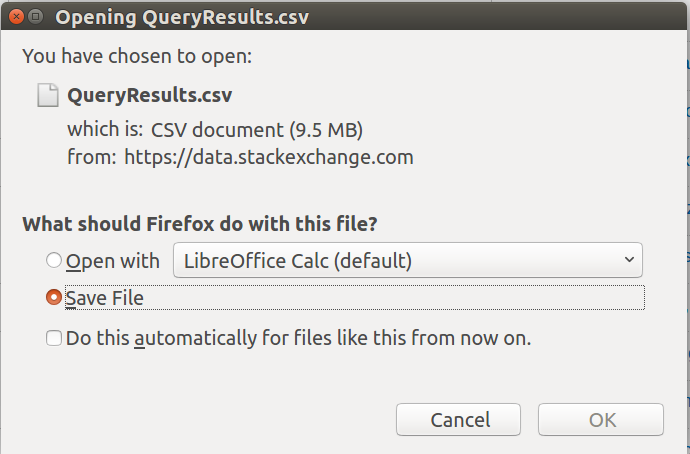
The download process utilizes a confirmation pop-up window as shown on the left.
Note: your confirmation pop-up window will look different depending on your Operating System and Platform. However, the window contents will be similar if not identical.
Ensure the Save File radio button is selected and then click the OK button.
In a moment the query results are downloaded into a file named: ~/Downloads/QueryResults.csv. Note that ~ is a shortcut to your home directory name.
Stack Exchange Data Explorer Important Notes
Weekly Update: When you add or revise a post in Stack Exchange the data is not available for a query until the following Sunday at 3am UTC.
Automated Process: A cron job or GitHub Actions can theoretically run the query every Monday morning but that has not been created. You will need to log in and complete the steps documented above.
After downloading the CSV file, you can view it in ~/Downloads/QueryResults.csv with Excel or LibreOffice Calc.
If you add or subtract columns to the query, you have to change the CSV fields in the sede/stack-to-blog.py python program.
Many thanks to the Stack Exchange Data Explorer Query’s Modifier 🔗.
Run refresh.sh Bash Script
The refresh.sh bash script will both pull and push your GitHub Repo (Repository). The script will update your blog posts using Stack Exchange posts inbetween the pull and push.
You can view the refresh.sh script here 🔗.
In addition to updating your Stack Exchange posts into the Pippim website, refresh.sh will:
- Sanity checks to ensure the directories
~/website(Working / Development version of your website) and~/website2(Your GitHub Repo production version stored locally) exist - If you don’t pass a parameter, initializes commit message to
"Refresh website on: $now" - Generate a list of Rouge Syntax Highlighting Languages supported
- Move
~/Downloads/QueryResults.csvto the~/website/sededirectory - Run
~/website/stack-to-blog.pypython program - Update the latest development copies of
refresh.sh,stack-to-blog.pyandrouge_languages.txtto the productionsede/directory on GitHub. - Update Top Ten Answers stored in
_includes/posts_by_vote.html - Update Posts by Tag stored in
_includes/posts_by_tag.html - Generate a fresh
treelisting stored in_includes/website_tree.txt - Update Site-Wide Front Matter stored in
_config.yml - Update search word files
search_url.json,search_include.jsonandsearch_exclude.jsonstored in the/assets/json/directory on website. - Compares the Pippim website changes made to Cayman Theme. Watch this output to know when Cayman Theme has changed.
After downloading the query results, the next steps require you to open a terminal and type the following after then command prompt ($):
me@host:~$ cd ~/website/sede me@host:~/website/sede$ refresh.sh === COMMIT MESSAGE set to: 'Refresh website on: Sun Jan 9 10:02:38 MST 2022' === PULLING: ~/website2 changes to github.com Already up-to-date. === RETRIEVING: Rouge Syntax Highlighting Languages list === RUNNING: ~/website/sede/stack-to-blog.py // =============================/ T O T A L S \============================== \\ Run-time options: RANDOM_LIMIT: None | PRINT_RANDOM: False | NAV_FORCE_TOC: True NAV_BAR_MIN: 3 | NAV_WORD_MIN: 700 | COPY_LINE_MIN: 20 Totals written to: '../_config.yml' (relative to /sede directory) accepted_count: 464 | total_votes: 7,230 | total_views: 53,496,745 question_count: 298 | answer_count: 2,147 | save_blog_count: 1,123 blog_question_count: 50 | blog_answer_count: 1,073 | blog_accepted_count: 491 total_self_answer: 108 | total_self_accept: 55 | Self Needing Accept: 53 total_headers: 1,625 | total_header_spaces: 386 | total_quote_spaces: 1,552 total_lines: 53,432 | total_paragraphs: 15,243 | total_words: 309,819 total_pre_codes: 0 | total_alternate_h1: 0 | total_alternate_h2: 56 total_code_blocks: 2,302 | total_block_lines: 3,234 | total_clipboards: 282 total_code_indents:2,074 | total_indent_lines: 21,270 | total_half_links: 389 total_tail_links: 110 | total_bad_half_links: 1 | Half Links Changed: 388 total_no_links: 279 | total_full_links: 260 | total_bad_full_links 104 total_pseudo_tags: 646 | total_copy_lines: 16,841 | total_toc: 27 # total_tag_names: 731 | total_force_end: 961 | total_nav_bar: 59 all_tag_counts: 3,478 | # tag_posts: 3,478 | # total_tag_letters: 31 total_header_levels: [592, 816, 215, 2, 0, 0] === UPDATING: ~/website2/_posts/ and /_includes/ === UPDATING: Configuration file: ~/website2/_config.yml [main 15c1121] Refresh website on: Sun Jan 9 10:02:38 MST 2022 1125 files changed, 1206 insertions(+), 1132 deletions(-) === PUSHING: ~/website2 changes to github.com Counting objects: 1136, done. Delta compression using up to 8 threads. Compressing objects: 100% (1136/1136), done. Writing objects: 100% (1136/1136), 157.82 KiB | 0 bytes/s, done. Total 1136 (delta 1058), reused 0 (delta 0) remote: Resolving deltas: 100% (1058/1058), completed with 1057 local objects. To https://github.com/pippim/pippim.github.io b6f2604..15c1121 main -> main === COMPARE: Cayman Theme original to modified version 0a1,5 > /* Github Pages Jekyll Cayman Theme. Make code block font size larger. Copied from: > * https://github.com/pages-themes/cayman/blob/master/_sass/jekyll-theme-cayman.scss > * Source code version: January 2021 > */ > 223c228 < font-size: 0.9rem; --- > font-size: 96%; // Change 0.9rem to 96% for proper size in headings 238a244,248 > > /** Code Block scroll bar From: > ** https://stackoverflow.com/a/38490989/6929343 **/ > max-height: 400px; > overflow-y: auto; 277a288 > The refresh.sh bash script needs a local copy of your website is in your home directory with the name website (used for development). Another local copy is required in your home directory with the name website2 (production clone) . You can generate a local copy with the git pull 🔗 command.
The two website directory setup allows you to use website for development and website2 to mirror the production version which is pulled and pushed from/to GitHub Pages.
Setting stack-to-blog.py Options
The heart of the refresh.sh bash script is the python program called stack-to-blog.py. You can set many options in the program. It’s a good idea to set the record limit to 10 or so for your first few trials.
You can view the stack-to-blog.py script here 🔗.
Review the subsections below for fine-tuning your Stack Exchange to Jekyll Blog Post conversion. They are:
- Random Record Limit Option
- Stack Exchange Post Selection Criteria
- Jekyll Front Matter Options
- TOC and Navigation Buttons
- Copy Code Block Options
- Posts by Tag HTML Options
- Exclude Stack Exchange Sites Options
Random Record Limit Option
During initial testing phase you will want to utilize the random record limit feature. This provides two Benefits:
- Limiting the number of blogs generated to your local Storage.
- Returning different blogs at random each time the Program is run
Here is the relevant section of code where you can change the RANDCOM_LIMIT:
RANDOM_LIMIT = 10 # On initial trials limit the number of blog posts PRINT_RANDOM = True # Print out matching random recordS found Initially you will want to have PRINT_RANDOM set to True. when you decide to “pull the trigger” and want all your Stack Exchange posts converted to your website blog posts, just change RANDOM_LIMIT to a large number like 10000 (ten thousand). Also set PRINT_RANDOM to False. The program finishes a lot faster without printing 10’s of thousands of lines to your screen.
Stack Exchange Post Selection Criteria
Although most of the focus is on converting SE Answers to blog posts, you can convert SE Questions to blog posts as well. There is special processing when you have written both the question and an answer. That is called a self-answered question.
Considerations for self-answered questions:
- Questions are never converted to a blog post only the answers.
- If the question has enough up-votes it doesn’t matter because only the answer up-votes count.
The stack-to-blog.py program defaults are to convert:
- Questions with 2 or more up-votes (see note above on self-answered questions).
- Answers with 2 or more up-votes.
- Answers that have been accepted, regardless of voting.
Here is the relevant code:
QUESTIONS_QUALIFIER = True # Convert questions to blog posts VOTE_QUALIFIER = 2 # Posts need at least 2 votes to qualify ACCEPTED_QUALIFIER = True # All accepted answers are uploaded PRINT_COLUMN_NAMES = False # Print QueryResults first row to terminal PRINT_NOT_ACCEPTED = False # Print self answered questions not accepted If you change QUESTION_QUALIFIER to False, then questions will not be converted to blog posts. If they are self-answered questions though, the answer may still be converted.
When the program finishes, it can print a list of all self-answered questions that were not accepted. This usually happens after the two-day mandatory waiting period you forgot to accept your own answer. If you choose to print the answers not accepted, copy the URLs from the terminal list to your browser address bar. Then accept the answers in Stack Exchange or, delete the answer and question if they have low votes.

Jekyll Front Matter Options
Jekyll front matter is required by GitHub Pages at the top of every blog post.
At the very minimum, the front matter must contain two lines. One line must be the label layout:, followed by the variable post. The other line must be the label title:, followed by a variable with the Title of the Blog Post.
Pippim adds a lot more front matter. Making it more powerful in searching for blog posts. The program stack-to-blog.py creates this front matter when it converts Stack Exchange posts.
When you view a blog post on the website, the extra front matter is displayed at the top of the post with a More/Less details button.
Control Jekyll Front Matter in stack-to-blog.py
This python code shows how Jekyll front matter 🔗 is controlled inside stack-to-blog.py:
FRONT_SITE = "site: " # EG "site: Ask Ubuntu" FRONT_POST_ID = None # EG "post_id: 1104017" FRONT_URL = "stack_url: " # EG "stack_url: https://askubuntu.com/q/1104017" # If selected you MUST select FRONT_SITE & FRONT_TYPE too FRONT_LINK = None # EG "post_link: https://askubuntu.com/q/1104017|How can I # send mobile text message from terminal?" FRONT_TYPE = "type: " # EG "type: Question" FRONT_TITLE = "title: " # Always appears in front matter! FRONT_HTML = None # This will NEVER be put into front matter FRONT_MARKDOWN = None # This will NEVER be put into front matter FRONT_TAGS = "tags: " # EG "tags: command-line bash sms" FRONT_CREATED = "created_date: " # EG "created_date: 2020-01-15 15:21:55" FRONT_LAST_EDIT = "edit_date: " # EG "edit_date: 2020-05-27 17:27:45" or nil FRONT_EDITED_BY = None # EG "edit_user: Community (-1)" or blank FRONT_SCORE = "votes: " # EG "votes: 64" or blank/nil FRONT_FAVORITES = "favorites: " # EG "favorites: 33" or blank/nil FRONT_VIEWS = "views: " # EG "views: 72,056" or blank/nil FRONT_ANSWERS = None # EG "answers: 3" or blank/nil FRONT_ACCEPTED = "accepted: " # EG "accepted: Accepted" or blank/nil FRONT_CW = None # EG "community: CW" or blank/nil FRONT_CLOSED = None # EG "closed: Closed" or blank/nil # Extra front matter generated by `stack-to-blog.py` actions: FRONT_LAYOUT = "layout: post" # "layout:" MUST be used but "post" can be changed to whatever your site uses FRONT_UPLOADED = "uploaded: " # Date & Time this program was run FRONT_GIT_URL = "git_md_url: " # GitHub Markdown URL FRONT_TOC = "toc: " # Table of Contents? "true" or "false" FRONT_NAV_BAR = "navigation: " # Section navigation bar? "true" or "false" FRONT_CLIPBOARD = "clipboard: " # Copy to clipboard button used? "true" or "false" When a global constant name (FRONT_xxx) is set to = None, no front matter is written.
Post Front Matter Stored in Post File
Based on the global variable settings above, the following front matter would be generated:
--- layout: post title: How can I send mobile text message from terminal? site: Ask Ubuntu stack_url: https://askubuntu.com/q/1104018 type: Answer tags: command-line bash windows-subsystem-for-linux sms created_date: 2018-12-23 13:55:49 edit_date: 2020-06-12 14:37:07 votes: 60 favorites: views: 72,429 accepted: Accepted uploaded: 2021-11-15 19:56:38 git_md_url: https://github.com/pippim/pippim.github.io/blob/main/_posts/2018/2018-12-23-How-can-I-send-mobile-text-message-from-terminal^.md toc: false navigation: false clipboard: false --- Post Front Matter Displayed on Post Website Page
The “More” or “Less” button lets you choose between more or less front matter. This is how front matter is displayed on your website page:
The short version (Less), begins with Views: 1,901 generated from the front matter label views: This is followed by Votes: 6 generated from the label votes:.
Next the “✅ Solution” text is controlled by the front matter label accepted:. The text only appears when accepted: contains the value “Accepted”. When accepted: has no value (it’s blank / nil / empty) then no checkmark or text appears.
The Tags: are controlled by the front matter variable tags: and can also include pseudo-tags. In this example the eyesome and multi-timer keywords were found in the answer and are pseudo-tag which have been added to tags: front matter.
You control pseudo-tags in the following code snippet in stack-to-blog.py:
# If question or answer contains one of these "pseudo tags" then jekyll front matter # will have tag added as if it were really on the question. Essentially you # are tagging your answers and adding them to OP's question tags. PSEUDO_TAGS = ["conky", "cpuf", "eyesome", "grub", "iconic", "multi-timer", 'vnstat', 'yad'] The unity. bash, scripts and system-tray tags come from the original Stack Exchange question tags.
Next you see one of the most powerful features of Pippim’s automated blog pages:
🔍 See Original Answer on Ask Ubuntu 🔗
This Stack Exchange post link is generated by three front matter variables:
- The link itself is provided by
stack_url: - The word Answer is controlled by
type: - Ask Ubuntu is controlled by the
site:front matter variable.
The long version (More) has many fields useful for designing your website.
The View markdown on GitHub Pages button is helpful to see how stack_to_blog.py converted the markdown from Stack Exchange Post to GitHub Pages Jekyll Post.
If you want to change how front matter is displayed on your website blog post page, edit the files _includes/post.html and assets/js/post_fm.html.
The Highlight Formatting is defined in assets/css/style.scss:
// Yellow highlighter pen mark { // total new style: https://www.abeautifulsite.net/posts/a-clever-way-to-style-the-mark-element/ background: linear-gradient(-100deg, hsla(48,92%,75%,.3), hsla(48,92%,75%,.7) 95%, hsla(48,92%,75%,.1)); border-radius: 1rem 0; padding: .2rem .5rem .2rem .5rem; } Site-Wide Front Matter Options
A number of Site-Wide Front Matter variables are made available when stack-to-blog.py runs and is published in your _config.yml file:
theme: jekyll-theme-cayman # The title: appears frequently on my pages. It's your company / personal name title: Pippim description: Free Open-Source Software for the World. Free of Ads Too! # Link to content on the repo code_url: https://github.com/pippim/pippim.github.io/blob/main # Following site-wide values automatically set by sede/refresh.sh script views: "53,134,690 " views_human: 53.1 million refreshed: 2022-01-04 16:54:10 questions: "297 " answers: "2,145 " accepted: "464 " post_count: "1,123 " question_count: "50 " answer_count: "1,073 " accepted_count: "491 " You can use these variables in your website. For example the following code: …
> As of {{ site.refreshed | date: "%B %e, %Y" }}, {{ site.title }} answers have over **{{ site.views_human }} views!** …would be display as:
As of October 19, 2025, Pippim answers have over 75.6 million views!
Another example is to link back to the original Markdown with the following code: …
{% assign repo_url = psge.url | prepend: site.code_url | replace: ".html", ".md" %} > **repo_url:** {{ repo_url }} …would be display as:
repo_url: https://github.com/pippim/pippim.github.io/blob/main/programs/stack.md
You can turn off Site-Wide Front Matter by setting the configuration filename to None as documented in the stack-to-blog.py program:
# See: /website/sede/refresh.sh for how file is updated on GitHub Pages # If not desired, set `CONFIG_YML = None` CONFIG_YML = "../_config.yml" - WARNING: Turning off Site-Wide Front Matter would require extensive revisions to many places where the
75,620,915Front Matter Liquid tag and othersite.tags are used. It is recommended, at least initially, that you do not turn this option off.
TOC and Navigation Buttons
The TOC (Table of Contents) and Navigation Bar Buttons (which navigate between sections) you create for blog posts are identical to the TOC and Navigation Bars you see on this page.
The criteria for when and how the TOC and navigation buttons appear are similar. The python global variables for both are show below:
''' Table of Contents (TOC) options. ''' # If TOC is never wanted, set to None CONTENTS = "{% include toc.md %}" TOC_HDR_MIN = 6 # Number of Headers required to qualify TOC insert TOC_WORD_MIN = 1000 # Minimum 1,000 words for TOC TOC_LOC = 2 # Insert TOC as 2nd header (Don't go below 2!) NAV_BAR_OPT = 4 # Insert Navigation Bar into markdown? ''' 0 = No navigation bar 1 = single line. EG <a id=... </div> 2 = two lines. EG <a id= then new line then with <div>...</div> 3 = Option 2 plus empty (blank) line above for readability 4 = Option 3 plus empty (blank) line above for even more readability 5 = Option 4 plus comment for ultimate readability Note: Markdown compresses all blank lines into a single blank line between paragraphs. HTML code inserted simply counts as another blank line to be compressed into a single blank line. ''' NAV_BAR_LEVEL = 2 # Only for "#" or "##". Not for "###", "####", etc. NAV_FORCE_TOC = True # Put TOC to navigation bar regardless of "#" NAV_BAR_MIN = 3 # Minimum number of # & ## headers required NAV_WORD_MIN = 700 # Minimum 700 words for navigation button bar NAV_LAST_WORDS = 200 # Minimum of 200 words since last navigation bar to # qualify for a new bar. An image counts as 1,000 words. NAV_LAST_LINES = 13 # Minimum of 13 lines since last navigation bar. Note # TOC is 1 line and automatically counts as minimum. # If question or answer contains one of these "pseudo tags" then jekyll front matter # will have tag added as if it were really on the question. Essentially you # are tagging your answers and adding them to OP's question tags. PSEUDO_TAGS = ["conky", "cpuf", "eyesome", "grub", "iconic", "multi-timer", 'vnstat', 'yad'] Note: The global variable PSEDUO_TAGS is described in its own section.
The global variable TOC_HDR_MIN = 6 means a minimum number of six header lines (markdown lines beginning with #, ##, ###, etc.) are required before the TOC is inserted. Additionally, a minimum of 1000 words are required as defined by the global variable TOC_WORD_MIN = 1000. TOC_LOC = 2 means the TOC is inserted before the second header line.
For the navigation button bar, NAV_BAR_LEVEL = 2 means only the first two header levels (# & ##) will receive a navigation bar. This means third and following header levels (###, ####, etc.) will not receive Navigation Bars. NAV_WORD_MIN = 700 means a blog post with a minimum of 700 words qualifies for Navigation Bars.
NAV_LAST_WORDS = 200 and NAV_LAST_LINES = 13 means if at least 200 words or 13 lines have passed since the last header with a Navigation Bar then the following header will also receive a Navigation Bar. Too little distance between Navigation Bars will clutter the web page with little purpose. Note that a picture is literally worth a thousand words as the code below illustrates:
words = 0 for i in range(last_nav_index, line_index + 1): ln = lines[i] word_list = ln.split() count = len(word_list) words += count if "[![" in ln: words += 1000 Copy Code Block Options
The copy to clipboard button will appear at the top of code blocks. It isn’t automatically inserted on all code blocks because it takes up space on your website. If only a few lines appear in a code block, the user can easily highlight with mouse and use Ctrl + C to copy to clipboard.
''' Copy code block contents to clipboard options. ''' # If Copy button is never wanted, set to None COPY_TO_CLIPBOARD = None COPY_LINE_MIN = 20 # Number of lines required to qualify for button The global variable COPY_LINE_MIN specifies how many code block lines are required before a Copy button is presented. The default is 20 lines.
Posts by Tag HTML Options
TAG_MIN_GROUP = 10 # Minimum index page group of posts sorted by Tag Name TAG_MAX_GROUP = 20 # Maximum index page group of posts sorted by Tag Name # Unfortunately for the time-being the letter groups must be hand-crafted. # To assist with hand-crafting print out new_groups[] in gen_post_by_tag_groups() TAG_LETTERS = [('.', '9'), ('a', 'a'), ('b', 'b'), ('c', 'c'), ('d', 'd'), ('e', 'f'), ('g', 'g'), ('h', 'k'), ('l', 'l'), ('m', 'o'), ('p', 'r'), ('s', 's'), ('t', 't'), ('u', 'v'), ('w', 'z')] POST_BY_TAG_HTML = "../_includes/posts_by_tag.html" # relative to sede directory TOP_POSTS_HTML = "../_includes/posts_by_vote.html" # relative to sede directory TOP_POSTS_INCLUDE = 10 # Top 10 posts will appear top_posts = [] # List of tuples [(views, title, our_url]) # See: /website/sede/refresh.sh for how file is updated on GitHub Pages CONFIG_YML = "../_config.yml" The TAG_MIN_GROUP and TAG_MAX_GROUP global constants are averaged together to create an internal global variable called TAG_AVG_GROUP. Using above settings the TAG_AVG_GROUP value is 15.
These variables create HTML that looks like this:
Site Search Words
A different kind of site search engine is provided. Instead of using “AND” between words it uses “OR” between words. Also “fluff” words are excluded to save space and time. Example “fluff” words are “What”, “Who”, “the”, “a”, etc.
A weighting system is provided to give a word more importance depending on where it appears:
TITLE_SEARCH_POINTS = 10.0 # ws.parse(row[TITLE], TITLE_SEARCH_POINTS) TAG_SEARCH_POINTS = 5.0 # ws.parse(tags, TAG_SEARCH_POINTS) # ws.parse(line, WORD_SEARCH_POINTS[current_header_level]) # List depending on: Line H1 H2 H3 H4 H5 H6 WORD_SEARCH_POINTS = [0.5, 2.0, 1.5, 1.0, 0.75, 0.5, 0.5] # All saved posts are indexed for searching but, add files below too: EXTRA_SEARCH_FILES = ['../about.md', '../answers.md', '../hrb.md', '../programs/hyperlink.md', '../index.md', '../programs/mserve.md', '../programs/mt.md', '../programs.md', '../programs/stack.md', '../programs/tcm.md', '../programs/tim-ta.md'] Using the above global variable values the following points are awarded when the word appears in:
- Title - 10.0 points
- Tags - 5.0 points
- Regular Line - 0.5 points
- Heading 1 Line - 2.0 points
- Heading 2 Line - 1.5 points
- Heading 3 Line - 1.0 points
- Heading 4 Line - 0.75 points
- Heading 5 Line - 0.5 points
- Heading 6+ Line - 0.5 points (includes heading 6 and all above it)
All posts are automatically added to the site search engine. But you can add specific markdown files to be included as well. Place these in the EXTRA_SEARCH_FILES list.
Exclude Stack Exchange Sites Options
There may be non-Black & White websites you’ve posted on. Likely you will want to exclude these “grey area” websites from the Stack Exchange website data conversion.
Add these “grey area” websites to the following list:
''' SE Sites to exclude from our website ''' EXCLUDE_SITES = ["English Language & Usage", "Politics", "Unix & Linux Meta", "Meta Stack Exchange", "Sports", "Meta Stack Overflow", "Medical Sciences", "Ask Ubuntu Meta"] Then at the bottom of the set_ss_save_blog function you will see:
def set_ss_save_blog(r): """ First pass is done creating all the entries. This is second pass to check if self answered question and if blog should be saved. Also updates totals. Code taken from check_save_blog() Returns: True/False - if blog should be saved """ (... SNPPED ...) ''' Exclude specific SE sites ''' for exclude in EXCLUDE_SITES: if r[SITE] == exclude: save = False break stack-to-blog.py Program Overview
The stack-to-blog.py program uses a two pass technique. The first pass does some formatting but mostly counts occurrences of key markdown elements.
The second pass does most of the formatting and repeats some of the same counting in order to insert HTML codes in the correct places.
Initialization
At the top of stack-to-blog.py global variable constants are defined. Later on they are read in the initialization section.
The initialization section in stack-to-blog.py can be found by searching for:
''' MAIN LOOP to process All query records ========================================================================== - Match criteria for answer up votes or accepted check mark - Check if in fenced code block (``` bash) for example. If not then: - Reformat '#Header 1' to '# Header 1'. Same for "##H2" to "## H2", etc. - Count number of '#' header lines - Count number of lines, paragraphs and number of words. - Tally counts at header levels [H1, H2, H3, H4, H5 and H6] - Add two spaces after "< Block Quote" lines - Second pass to insert '{% include toc.md %}' at paragraph # (TOC_LOC) - Anytime a TOC is inserted, following header_index [] entries and bump index number up by 1 - Insert Navigation Bar Buttons: HTML anchors for #hdr1, #hdr2. etc. Then apply "<a href" links for: Top, ToS, ToC and, Skip (Top of Page, Top of Section, Table of Contents and, Skip section). - If RANDOM_LIMIT is used then only output matching random_rec_nos [] ''' -
Just above the MAIN LOOP is the initialization section
-
The first step is to “sanity check” the configuration options
-
The Rouge Syntax Highlighting Languages supported are read in.
-
All
PSEUDO_TAGSare initialized intotag_nameslist as if they have already been found in a blog post. -
The
QueryResults.csvfile is read into a list callrows. -
Then the main program outer loop reads each
rowinrows. Most of the front matter is set at the top of the outer loop point. -
Next, two passes are done on each row as described below.
Pass 1
Each row has Stack Exchange Markdown which is converted into a list call lines. Each line in lines is read in a new loop and analyzed by the following functions:
line = check_code_block(line) # Turn off formatting when in code block line = check_code_indent(line) # Reformat code indent to fenced code block line = header_space(line) # #Header, Alt-H1, Alt-H2. Set header_levels line = block_quote(line) # Formatting for block quotes line = check_half_links(line) # SE uses [https://…] instead of [Post Title] line = check_tail_links(line) # Change [x]: https://… from SE to Jekyll line = check_full_links(line) # Change [Name](https://…) from SE to Jekyll check_pseudo_tags(line) # Check if pseudo tag(s) should be added line = one_time_change(line) # One Time Changes lines[line_index] = line # Update any changes to original new_lines.append(line) # Modified version of original lines # Check if we need to include copy to clipboard command command = check_copy_code(line_index) if command: insert_clipboard = True # Will set Jekyll front matter = true # prepend command + \n to ``` bash line new_lines[code_block_index] = \ command + "\n" + new_lines[code_block_index] After Pass 1 loop completes, the modified lines are reread and massaged back into the original lines list:
lines = [] for line in new_lines: # Split \n inserted by check_code_indent() sub_lines = line.split('\n') if len(sub_lines) > 1: for sub_line in sub_lines: lines.append(sub_line) else: lines.append(line) Also, after Pass 1 completes, the following bit of code decides whether TOC and/or navigation buttons are going to be used in the blog post:
insert_toc = False if CONTENTS is not None: if header_count >= TOC_HDR_MIN and word_count >= TOC_WORD_MIN: insert_toc = True total_toc += 1 print('total_toc: ', total_toc, blog_filename) insert_nav_bar = False if NAV_BAR_OPT > 0: qualifier = sum(header_levels[:NAV_BAR_LEVEL]) if qualifier >= NAV_BAR_MIN and word_count >= TOC_WORD_MIN: insert_nav_bar = True total_nav_bar += 1 The heading level list of total counts created in Pass 1 are checked to see if post qualifies for TOC or Navigation Bar. Then every line from the lines list is read again and the steps below are done in Pass 2.
Pass 2
At the start of the pass 2 loop, some counts from Pass 1 are reset to zero so they are not doubled up when header_space(line) is called again.
The bottom of the Pass 2 loop does the key job of adding a new markdown line to the blog post file in memory. Here is what Pass 2 does as it loops through every line in the lines list:
check_code_block(line) # Turn off formatting when in code block # Did this post qualify for adding navigation bar? # Save header levels counts we have now to "old_" old_header_levels = list(header_levels) line = header_space(line) # #Header, Alt-H1, Alt-H2. Set header_levels if insert_nav_bar: sum1 = sum(old_header_levels[:NAV_BAR_LEVEL]) sum2 = sum(header_levels[:NAV_BAR_LEVEL]) # For next qualifying header level insert HTML for navigation bar. if sum1 != sum2: # First check if at TOC_LOC and insert TOC if needed if insert_toc: if sum2 == TOC_LOC: new_md += navigation_bar() if NAV_BAR_OPT <= 3: # If Option "4" a blank line already inserted before us new_md += "\n" new_md += CONTENTS + "\n" new_md += "\n" # When 4 a blank line already inserted before us last_nav_id += 1 toc_inserted = True # Not necessary but is consistent if sum2 >= TOC_LOC: sum2 += 1 # All heading levels after TOC are 1 greater if check_last_navigation_bar(): new_md += navigation_bar() elif insert_toc: # No navigation bar, but we still need TOC at header count if header_count == TOC_LOC and toc_inserted is False: if NAV_BAR_OPT <= 3: # If Option "4" a blank line already inserted before us new_md += "\n" new_md += CONTENTS + "\n" new_md += "\n" toc_inserted = True # Prevents regeneration next line read # print('toc only:', blog_filename) new_md += line + '\n' When Pass 2 loop over every line in the lines finishes, the blog post footer section is written.
Finally, depending on the random record limit, the file is saved to local storage or, simply discarded if it is not to be saved.
Then the next row from rows is read and pass 1 starts over again.
stack-to-blog.py Detailed Conversion
A lot of work has gone into converting Stack Exchange posts to GitHub Pages Jekyll posts. Here are the key steps the stack-to-blog.py python program performs:
-
Navigation bar buttons (Top, ToS, ToC and Skip) are added by putting HTML code into the markdown files. Then HTML code controls jumping to id tags when a button is clicked. Here’s an easy-to-read example of the HTML code:
# Introduction Welcome to Pippim. A collection of questions and answers about... <a id="hdr2"></a> <div class="hdr-bar"> <a href="#">Top</a> <a href="#hdr1">ToS</a> <a href="#hdr2">ToC</a> <a href="#hdr3">Skip</a> </div> ## Get in touch Get in touch with pippim by sending an email. You can also... -
In the markdown file that
stack-to-blog.pycreates, the HTML id tag and navigation bar buttons aren’t as easy to read but accomplish the same task:<a id="hdr2"></a> <div class="hdr-bar"> <a href="#">Top</a> <a href="#hdr1">ToS</a> <a href="#hdr2">ToC</a> <a href="#hdr3">Skip</a></div> ## Get in touch -
Two extra spaces are added between HTML elements for readability and some extra spacing between buttons. A blank line is added before the HTML id tag and after the HTML button bar for readability. Because the markdown interpreter condenses multiple blank lines into a single blank line, the HTML code has no effect on line spacing.
-
If you would like to modify the button properties (position, color, size, hover, etc), the header button bar (
hdr-bar) and individual buttons (hdr-btn) are defined in filenameassets/css/style.scss:.hdr-bar { display: block; position: relative; width: 100%; height: .5rem; // Add bit extra for button box height text-align: right; // Don't use "float: right;" that renders backwards &:before { content: ""; display: block; } } /* here! from: https://stackoverflow.com/a/71213971/6929343 */ .hdr-btn, .hdr-bar > a { display: inline-block; position: relative; color: $header-bg-color; // Cayman green padding: 5px 15px; // vertical, horizontal padding around button text font-size:0.75em; // 75% of normal font for button text margin-left: 10px; // Now that right aligned, switch margin side // From: https://stackoverflow.com/questions/65297617 background: linear-gradient(transparent,rgba(0, 0, 0, 0.4)) top/100% 800%; background-color:#F0FFF0; // Honeydew &:hover { background-position:bottom; color:#F0FFF0; } } - Block quotes are defined in Stack Exchange like this:
> line 1 > line 25.1. If they were not modified they would display on GitHub Pages Markdown as:
line 1 line 2
5.2. Pippim appends two spaces to the end of block quotes in Stack Exhange answers so they render properly:
line 1
line 2 -
Note: When parsing inside a fenced code block like
``` bashor an indented code block (demarcated by four leading spaces), no special processing is done for block quotes discussed above, for# Headerlines discussed below or, for hyperlinks discussed further below. -
Older Markdown format on Stack Exchange posts where
#Headerwas permitted are converted to# Header. -
The alternate H1 Markdown format “
Header 1” line followed by a “==” line are converted to “# Header 1”. The alternate H2 markdown format “Header 2” line followed by a “--” line are converted to “## Header 2”. Trailing “==” and “–” lines are converted to blank lines. -
Stack Exchange post tags are formatted as:
<Tag1><Tag2><Tag3>. For GitHub, they are converted to:tags: Tag1 Tag2 Tag3. -
The Stack Exchange title is set up as the Jekyll front matter title with the front matter variable
title:. The blog filename is created based on the title. Optional front matter can be specified such as for URL, Votes, Last Edit Date, etc. based on the Stack Exchange post. -
The Stack Exchange command for
<!-- language-all: lang-bash -->(and all other languages) are converted to suitable``` bashfenced code blocks for GitHub Pages Markdown / Jekyll / Kramdown / Rouge lanuguage syntax highlighting. The fenced code block, for example``` bashtakes precedence though. After than the “shebang”, for example#!/bin/bashtakes precedence for code block syntax highlighting. -
For larger code blocks, where the default is 15 lines or more, a button is provided to copy the fenced code block to the system clipboard.
-
Stack Exchange allows leading 4 spaces for a code block. These don’t work well to support the Kramdown Rouge formatting in GitHub Pages. Therefore they are converted to fenced code blocks
``` bashor``` pythondepending on the “shebang” or<!-- language...comment. -
Stack Exchange Markdown can dynamically look-up the link name within SE sties. GitHub Pages does not support this feature. For example, if
[https://askubuntu.com/q/123456/how-can-i?][1]is found without a link name, it is converted to[How Can I?][1]. - When a post contains a link to a Stack Exchange post which is also saved on the Pippim website, that link is converted to internal links. This minimizes clicks away from the Pippim website and presents the post in the same uncluttered format the Pippim website provides.
The full stack-to-blog.py program can be accessed on the Pippim Website repo 🔗.
Jekyll Blog Post Filename
The filename for a Jekyll blog post resides in the _posts/ directory and requires strict formatting:
- Begins with date in
YYYY-MM-DD-format. - Next comes the title which has spaces replaced with
-. - Any special characters (
#$%^&+;,=?/'<>()[]") in the title are converted to underscore (_). - The extension
.mdis added to the filename. - If
OUTPUT_BY_YEAR_DIR=Trueis set then/YYYY/is prepended to the filename. Required when there are more than 1,000 posts. - Lastly, the
OUTPUT_DIRsetting is prepended to the filename.
These global constants are defined at the top of stack-to-blog.py:
OUTPUT_DIR = "../_posts/" # Must match G-H Pages / Jekyll name OUTPUT_BY_YEAR_DIR = True # When more than 1,000 posts set to True for GitHub Given the settings above, a post with the date January 11, 2022 and the title *“How can I copy files?”, would be saved as:
_posts/2022/2022-01-11-How-can-I-copy-files_.md Note that the ../ in the OUTPUT_DIR constant is only to navigate from /sede directory where stack-to-blog.py is run from. The /_posts directory is in the root directory of the website.
Here is the create_blog_filename(r) python functions which create the blog post’s filename:
def create_blog_filename(r): """ Return blog filename. TODO: Fix 404 from site search https://pippim.github.io/2018/08/01/ How-to-use-_xrandr---gamma_-for-Gnome-_Night-Light_-like-usage_.html Works with tags: https://pippim.github.io/2018/08/01/ How-to-use-_xrandr-gamma_-for-Gnome-_Night-Light_-like-usage_.html Real full title: How to use "xrandr --gamma" for Gnome "Night Light"-like usage? NB: For some reason '--gamma' is being changed to 'gamma'. Replace all spaces in title with "-" Prepend "/YYYY/" to post filename as required. The filename needs to be sanitized for URL. There is no direct citation but this link is close: - https://github.com/AndyGlew/Test-GitHub-stuff/wiki/ Special-characters-in-GitHub-wiki-page-names-GFMarkdown GitHub allows: '"', "'", "`". "(", ")", "<", ">", "[", "]", "{", "}", "~", ":", "_", "-", "!", "^", "*", ".", "\", "|", " " Unicode division symbol: "∕" GitHub converts: "#" to "%23" "$" to "%24" "%" to "%25" "&" to "%26" "+" to "%2B" ";" to "%3B" "," to "%2C" "=" to "%3D" "?" to "%3F" "@" to "%40" "`" to "%60" "{" to "%7B" "}" to "%7D" "▶️" to " ▶%EF%B8%8F" HTML breaks references in links when using: "'", '"', '<', '>', '(', ')', '[', ']' Jekyll converts: "^" to "" (null) ":" to "" (null) Pippim uses ' | ' to split hyperlink and title so disallow. """ global total_special_chars_in_titles, total_unicode_in_titles sub_dir = make_output_year_dir(r[CREATED]) # little is just a cute abbreviation for "list title" little = list(r[TITLE]) for i, lit in enumerate(little): if lit == " ": little[i] = "-" elif lit in "`#$%^&+;:,=?/'<>()[]{}|\\": little[i] = "_" total_special_chars_in_titles += 1 elif lit in '"': little[i] = "_" total_special_chars_in_titles += 1 elif len(lit) > 1: little[i] = "u" total_unicode_in_titles += 1 elif len(little) != len(r[TITLE]): fatal_error('Should be a unicode here?') fn = ''.join(little) # Convert little list back to string while "--" in fn: fn = fn.replace('--', '-') base_fn = sub_dir + r[CREATED].split()[0] + '-' + fn blog_fn = OUTPUT_DIR + base_fn + ".md" blog_fn = blog_fn.replace('//', '/') return base_fn, blog_fn def make_output_year_dir(post_date): """ Store posts by year to overcome GitHub limit of 1,000 files per directory when OUTPUT_BY_YEAR is set to True. Then "/_posts/2022-01-14-How-can-I-do-that?.md" becomes: "/_posts/2022/2022-01-14-How-can-I-do-that?.md". """ if OUTPUT_BY_YEAR_DIR is None or False or OUTPUT_BY_YEAR_DIR == "": return "" # Will be concatenated into string making up blog_filename # Does target directory exist? new_sub = "/" + post_date[0:4] + "/" prefix = OUTPUT_DIR + new_sub prefix = prefix.replace('//', '/') if not os.path.isdir(prefix): try: os.makedirs(prefix) print('Created directory:', prefix) except OSError as error: print(error) fatal_error('Could not make directory path:' + prefix) return new_sub Pseudo Tags
Pseudo tags are created in front matter when a keyword is found in an answer. If that keyword is not a tag for the question already then it is added as a tag in front matter. Normally in Stack Exchange tags are only defined for the question. However, you might want to use tags that highlight your answer. That is what “Pseudo Tags” are for.
Let’s say for example you include a lot of Conky displays in your answers to illustrate how a given solution works. A sort of “POC” (Proof of Concept). Now you’d like all your answers that used Conky to be an available Tag that can be searched on. You would use the keyword “conky” (all lower-case or mixed-case doesn’t matter as a pseudo tag.
In the stack-to-blog.py python program they are defined in the check_pseudo_tags(ln) function like this:
""" Check if pseudo-tag should be inserted based on keywords list. If line is empty it means it's a paragraph. Note if line ends in two spaces it forces a new line but not a paragraph break. Also note if three lines were written in a row they would be merged into one paragraph. FUTURE?: The paragraph number indicates where to insert TOC. Count number of words. Check if word qualifies as a pseudo tag. """ global total_paragraphs, paragraph_count, total_words, word_count global pseudo_tag_count, total_pseudo_tags, pseudo_tag_names if len(ln) == 0: total_paragraphs += 1 # For all posts paragraph_count += 1 # For current post ''' Add to word counts ''' word_list = ln.split() count = len(word_list) word_count += count total_words += count ''' Add to pseudo-tags - SE tags (and ours) are always in lower case ''' for pseudo in PSEUDO_TAGS: tag_search = pseudo.lower() for word in word_list: found = word.lower() if found.startswith('`') and found.endswith('`'): # `program_name` becomes program_name found = found[1:-1] if tag_search == found: pseudo_tag_count += 1 total_pseudo_tags += 1 # A pseudo-tag isn't added if it's already in question tags if tag_search not in pseudo_tag_names: if tag_search not in tags: # Pseudo-tag names added for this post's list pseudo_tag_names.append(tag_search) Stack Exchange <!-- language Tags
When Stack Exchange uses <!-- language-all it is converted to appropriate format for GitHub using this multi-purpose check_code_block(ln) function:
""" If line starts with ``` we are now in code block. If already in code block and line begins with ``` then we are now out of code block. Set default syntax language when none on code block. SE standard: <!-- language: bash --> <!-- language-all: lang-bash --> """ global in_code_block, total_code_blocks, language_used, language_forced ''' Code blocks may be indented so left strip spaces before test NOTE: This test must be done BEFORE check_code_indent() test. To end code block you must use ```. TODO: count number of backticks that initiate a code block. For example ```` (4) can start a code block then if ``` (3) appears it doesn't terminate code block but is interpreted literally as backticks. EG This is an example of using fenced code backticks: ```` ``` html <element code>Stuff stuff stuff</element code> ``` ```` ''' global total_bad_rouge if in_code_indent: return ln if ln.startswith("<!-- language"): # Get "bash" inside of <!-- language-all: lang-bash --> # Store as language_used for inside of code block. language_used = ln.split(": ")[1] # Strip off " -->" at end of string language_used = language_used[:-4] if language_used.startswith("lang-"): # Strip off "lang-" at start of string language_used = language_used[5:] if language_used == "none": # "none" is best set as "text" for universal recognition language_used = "text" #print('language_used:', language_used, 'length:', len(language_used)) return "" # Former "<!-- language" line is now an empty line if ln.lstrip()[0:3] == "```": # Add language if not used already if in_code_block is False: total_code_blocks += 1 # Total for all posts in_code_block = True # Code block has begun this_language = language_used # Check next line for shebang she_language = check_shebang() if she_language: this_language = she_language # TODO: Figure out language used # Need to change "vba" to "basic" # See: https://askubuntu.com/q/1021152 if ln[-1] == "`" or ln[-1] == " ": ln += " " + this_language language_forced += 1 # Check if 'this_language' is valid. if this_language not in rouge_languages and this_language != '': bad_languages.append((this_language, row[LINK])) total_bad_rouge += 1 # Need to change "vba" to "basic" else: in_code_block = False # Code block has ended return ln NOTE: This function also provides support for inserting the “Copy to Clipboard” button.
Stack Exchange four space indented code block
Stack Exchange can use four spaces ( ) to signify a code block. When this happens, the language is lost to GitHub Pages markdown. Therefore they are converted to a ``` fenced code block with a suitable language tag. The following code is used:
def check_code_indent(ln): """ If line starts with " " we are now in code indent. If already in code indent and line does NOT begin with " " then we are now out of code block. """ global in_code_indent, total_code_indents ''' Code blocks may be indented which are called "in_code_indent" here. If line begins with four spaces consider it entering a code indent. TODO: code indents immediately following a ul (unordered list) or li (list item) are not considered a code indent. Neither are code indents following another code indent. To end code indent you must use line with no leading space. For many ways of SE code blocks see: https://medium.com/analytics-vidhya/5-ways-to-embed-code-in-stack-overflow-8d9f38edf02c ''' if in_code_block: return ln if ln[:4] == " ": # Add language if not used already if in_code_indent is False: total_code_indents += 1 # Total for all posts in_code_indent = True # Code indent has begun # Check next line for shebang # #!/bin/sh (shell) # #!/bin/bash # #!/bin/.... (python anywhere in line) this_language = language_used she_language = check_shebang() if she_language: this_language = she_language # print('BEFORE ln:', ln) ln = "``` " + this_language + "\n" + ln[4:] # print('AFTER ln:', ln) else: ln = ln[4:] # Remove first four characters # print('ln:', ln) elif in_code_indent: # Because code indents can have empty spacing lines # However if line after this is regular text we do want to # end now stripped_line = ln.strip() if stripped_line == "": # This is an empty line, allowed in indented code block if indented_code_block_ahead(): # Another indented code block line immediately coming up # EG: https://askubuntu.com/q/1164186 #percent_complete_close() #print(row[LINK]) return ln # Return empty line in_code_indent = False # Code indent has ended with null line ln += "```\n" # Add extra ending fenced code block return ln def indented_code_block_ahead(): """ We are checking indented code block and found line that doesn't begin with four spaces. Look ahead to see if a regular markdown line is next up. If so we will end our code block now. Return True if another indented code block line is in our future else return False. """ next_index = line_index + 1 while True: if next_index >= line_count - 1: # Hit end of post without finding another indented code block return False next_line = lines[next_index].rstrip() if next_line[0:4] == " ": # next_line is an indented code block return True if len(next_line) >= 1: # next_line is not indented code block return False # next_line is empty which is allowed for indented code block next_index += 1 Copy Code Block to Clipboard
The default is to provide a button to copy a fenced code block to the system clipboard when there are 20 lines or more. It doesn’t make sense to take up extra space with a copy button when the user can easily select a line or two with their mouse and use Right Click + Copy.
IMPORTANT: Stack Exchange allows indenting four spaces to define a code block. These are converted to a fenced code block and the four leading spaces are removed. Language syntax highlighting tag is added based on “shebang”. If shebang is not available or not recognized the previous <!-- Langage tag is used. The following example:
#!/bin/bash exit 0 is converted to:
``` bash #!/bin/bash exit 0 ``` Old Code No Longer Used
NOTE: There is a new copy code block function and below functions are no longer used.
The check_copy_code() function below keeps track of where code blocks begin, how many lines are in the code block and what liquid command (if any) is inserted before the code block.
def check_copy_code(this_index): """ Check to insert copy to clipboard include. If already in code block and line begins with ``` then we are now out of code block. Set default syntax language when none on code block. SE standard: <!-- language: bash --> <!-- language-all: lang-bash --> """ global total_block_lines, total_indent_lines global old_in_code_block, code_block_index global lines, line_count, line_index global total_clipboards, total_copy_lines inserted_command = "" if in_code_block is True or in_code_indent is True: if in_code_block: total_block_lines += 1 else: total_indent_lines += 1 # old_in_code_block repurposed for old_in_code_indent as well if old_in_code_block is False: # Set index for start of code block or code indent code_block_index = this_index # print('Start code block:', lines[this_index]) elif old_in_code_block is True: # Just ended code block or code indent, how many lines? code_block_line_count = this_index - code_block_index # Sanity check, lines[index] must contain fenced code block ``` code = lines[code_block_index] # print(' End code block:', lines[this_index]) if code[0:3] == "```": # Copy to clipboard only supported when fenced code # block is NOT indented if COPY_TO_CLIPBOARD is not None and \ code_block_line_count >= COPY_LINE_MIN: inserted_command = COPY_TO_CLIPBOARD total_clipboards += 1 total_copy_lines += code_block_line_count else: # The lines[index] fenced code block ``` isn't left justified. # Probably within list item and copy to clipboard doesn't work. print('Unable to decipher code block:', code) if in_code_block or in_code_indent: old_in_code_block = True else: old_in_code_block = False return inserted_command Copy Code Block CSS
The rouge-code-block and copy-rouge-button classes are kept in assets/css/style.scss:
// Copy Rouge Code Block to system clipboard .rouge-code-block { position: relative; } .copy-rouge-button{ position: absolute; display: none; top: .75rem; right: .5rem; } /* From: https://stackoverflow.com/a/2776136/6929343 */ .rouge-code-block:hover .copy-rouge-button { display: block; } Copy Code Block Javascript
JavaScript is used to copy a Fenced Code Block to the System Clipboard. The code is located in assets/js/copyCode.js:
// COPY ROUGE CODE BLOCKS const copyButtonLabel = "Copy 📋"; let blocks = document.querySelectorAll("div.highlight") // Rouge second level out of three blocks.forEach((block) => { // only add button if browser supports Clipboard API if (navigator.clipboard) { block.classList.add("rouge-code-block") let copyRougeButton = document.createElement("button") // Remove ', "page-header-button"' or replace with your own button styling class name copyRougeButton.classList.add("copy-rouge-button", "page-header-button") copyRougeButton.innerText = copyButtonLabel copyRougeButton.setAttribute('title', 'Copy code to clipboard') copyRougeButton.setAttribute('aria-label', "Copy code to clipboard") copyRougeButton.addEventListener("click", copyRougeCode) block.appendChild(copyRougeButton) } }); async function copyRougeCode(event) { const button = event.srcElement const pre = button.parentElement let code = pre.querySelector("code") let text = code.innerText await navigator.clipboard.writeText(text) button.innerText = "Copied ✔️" setTimeout(()=> { button.innerText = copyButtonLabel },1000) } Summary Totals
When the stack-to-blog.py finishes a summary appears on your screen:
// =============================/ T O T A L S \============================== \\ Run-time options: RANDOM_LIMIT: 10,000 | PRINT_RANDOM: False | NAV_FORCE_TOC: True NAV_BAR_MIN: 3 | NAV_WORD_MIN: 700 | COPY_LINE_MIN: 20 Totals written to: '../_config.yml' (relative to /sede directory) accepted_count: 632 | total_votes: 7,149 | total_views: 52,632,065 question_count: 300 | answer_count: 2,145 | save_blog_count: 1,218 blog_question_count: 50 | blog_answer_count: 1,073 | blog_accepted_count: 491 total_self_answer: 112 | total_self_accept: 58 | Self Needing Accept: 54 total_headers: 1,651 | total_header_spaces: 402 | total_quote_spaces: 1,574 total_lines: 56,558 | total_paragraphs: 16,050 | total_words: 324,607 total_pre_codes: 0 | total_alternate_h1: 0 | total_alternate_h2: 59 total_code_blocks: 2,587 | total_block_lines: 3,606 | total_clipboards: 293 total_code_indents:2,319 | total_indent_lines: 22,274 | total_half_links: 205 total_tail_links: 111 | total_bad_half_links: 0 | Half Links Changed: 187 total_no_links: 291 | total_full_links: 80 | Bad No Links: 211 total_pseudo_tags: 425 | total_copy_lines: 17,240 | total_toc: 26 most_lines: 820 | total_force_end: 1,057 | total_nav_bar: 55 total_header_levels: [600, 828, 221, 2, 0, 0] Every total name with an underscore (_) is the python program internal variable name. The first four total lines apply to all Stack Exchange Questions and Answers you have posted. The remaining total lines apply only to posts that qualify for saving as a Jekyll blog post.
If you want to change the totals’ layout, it is found in the code below:
if RANDOM_LIMIT is None: random_limit = ' None' else: # noinspection PyStringFormat random_limit = '{:>6,}'.format(RANDOM_LIMIT) print('// =====================/ T O T A L S \\====================== \\\\') print('Run-time options:\n') print('RANDOM_LIMIT: ', random_limit, ' | PRINT_RANDOM: {:>11}'.format(str(PRINT_RANDOM)), ' | NAV_FORCE_TOC: {:>11}'.format(str(NAV_FORCE_TOC))) print('NAV_BAR_MIN: {:>6,}'.format(NAV_BAR_MIN), ' | NAV_WORD_MIN: {:>11}'.format(NAV_WORD_MIN), ' | COPY_LINE_MIN: {:>11}'.format(COPY_LINE_MIN)) print() print('Totals written to:', "'" + CONFIG_YML + "'", '(relative to /sede directory)\n') print('accepted_count: {:>6,}'.format(accepted_count), ' | total_votes: {:>11,}'.format(total_votes), ' | total_views: {:>11,}'.format(total_views)) print('question_count: {:>6,}'.format(question_count), ' | answer_count: {:>6,}'.format(answer_count), ' | save_blog_count: {:>6,}'.format(save_blog_count)) print('blog_question_count:{:>4,}'.format(blog_question_count), ' | blog_answer_count: {:>6,}'.format(blog_answer_count), ' | blog_accepted_count:{:>6,}'.format(blog_accepted_count)) print('total_self_answer:{:>6,}'.format(total_self_answer), ' | total_self_accept: {:>6,}'.format(total_self_accept), ' | Self Needing Accept:{:>6,}'.format(total_self_answer - total_self_accept)) print('total_headers: {:>6,}'.format(total_headers), ' | total_header_spaces:{:>6,}'.format(total_header_spaces), ' | total_quote_spaces: {:>6,}'.format(total_quote_spaces)) print('total_lines: {:>11,}'.format(total_lines), ' | total_paragraphs:{:>9,}'.format(total_paragraphs), ' | total_words: {:>13,}'.format(total_words)) print('total_pre_codes: {:>6,}'.format(total_pre_codes), ' | total_alternate_h1: {:>6,}'.format(total_alternate_h1), ' | total_alternate_h2: {:>6,}'.format(total_alternate_h2)) print('total_code_blocks:{:>6,}'.format(total_code_blocks), ' | total_block_lines: {:>7,}'.format(total_block_lines), ' | total_clipboards: {:>7,}'.format(total_clipboards)) print('total_code_indents:{:>5,}'.format(total_code_indents), ' | total_indent_lines:{:>7,}'.format(total_indent_lines), ' | total_half_links: {:>7,}'.format(total_half_links)) print('total_tail_links: {:>5,}'.format(total_tail_links), ' | total_bad_half_links:{:>5,}'.format(total_bad_half_links), ' | Half Links Changed:{:>7,}'.format(total_half_links - total_bad_half_links)) print('total_no_links: {:>5,}'.format(total_no_links), ' | total_full_links: {:>5,}'.format(total_full_links), ' | Bad No Links: {:>7,}'.format(total_no_links - total_full_links)) # Note "Bad No Links" only accurate when full_links aren't native in posts # and are created internally by stack-to-blog.py. Therefore, a negative total # is possible when [https://...](https://...) appears in a post. print('total_pseudo_tags:{:>6,}'.format(total_pseudo_tags), ' | total_copy_lines: {:>7,}'.format(total_copy_lines), ' | total_toc: {:>7,}'.format(total_toc)) print('# total_tag_names:{:>6,}'.format(len(total_tag_names)), ' | total_force_end: {:>8,}'.format(total_force_end), ' | total_nav_bar: {:>7,}'.format(total_nav_bar)) print('all_tag_counts: {:>8,}'.format(all_tag_counts), ' | # tag_posts: {:>8,}'.format(len(tag_posts)), ' | # total_tag_letters:{:>6,}'.format(len(total_tag_letters))) print('total_header_levels: ', total_header_levels) SAP Warehouse Material Dashboard
A dashboard for Warehouse Inventory Items (Material)
MM#: 1000109999 | Description | 4200 - Edmonton Inventory Type: RAW, V1, etc. | Reorder Point: 999 | Reorder Qty: 999 | Min Qty: 999 | Max Qty: 999 | Old MM#: 1000109999 Purchasing UoM: 1 case = 12 rolls (of 20) = 240 sheets | Issuing UoM: 1 roll = 20 sheets Proof of temperature required? Yes/No | POT email address: xxx@xxx.com | temperature range: +/-99C to +/-99C CofA required? Yes/No | Product Insert (PI) required? Yes/No | Last PI document / revision on file: Xxxx Xxxx / yyyy-mm-dd Internal inspection required? Yes/No | Shipment Contents? N/A or Temp controls active: Yes/No | Product Owner: First, Last name Manufacturer: Xxxxx | Website: https://manu.com | Criticality level: 9 | Web documentum: Xxxxx/Xxxx/Xxxx/Xxxx FIFO Batches released: Batch 1111 | Qty: 999 | SLED yyyy-mm-dd | STO / PO# 999999 | Recv: yyyy-mm-dd | Lead time: 9 days | PO qty: 999 | Buyer: First, Last name Batch 2222 | Qty: 999 | SLED yyyy-mm-dd | STO / PO# 999999 | Recv: yyyy-mm-dd | Lead time: 9 days | PO qty: 999 | Buyer: First, Last name Batch 3333 | Qty: 999 | SLED yyyy-mm-dd | STO / PO# 999999 | Recv: yyyy-mm-dd | Lead time: 9 days | PO qty: 999 | Buyer: First, Last name Batches quarrantine / blocked: Batch 4444 | Qty: 999 | SLED yyyy-mm-dd | PO# 999999 | Recv: yyyy-mm-dd | Lead time: 9 days | PO qty 999 | Buyer: First, Last | Status: Quarrantine Batch 0000 | Qty: 999 | SLED yyyy-mm-dd | PO# 999999 | Recv: yyyy-mm-dd | Lead time: 9 days | PO qty 999 | Buyer: First, Last | Status: Blocked Other plants FIFO Batches: Batch 1111 | Qty: 999 | SLED yyyy-mm-dd | 9999 - Bramptom Batch 2222 | Qty: 999 | SLED yyyy-mm-dd | 9999 - Calgary Batch 3333 | Qty: 999 | SLED yyyy-mm-dd | 9999 - Vancouver Transaction History: red issue | yyyy-mm-dd | qty | cost centre | gl account red issue | yyyy-mm-dd | qty | cost centre | gl account red issue | yyyy-mm-dd | qty | cost centre | gl account green receipt | yyyy-mm-dd | qty | cost centre | gl account | where green issue return | yyyy-mm-dd | qty | cost centre | gl account On Order: STO / PO # 999999 | qty | est arrival yyyy-mm-dd STO / PO # 999999 | qty | est arrival yyyy-mm-dd Vendors: BD | Catalog # 999-99 | PS Details 1.pdf | PS Details 2.pdf | PS Details 3.pdf Fisher Scientifc | Catalog # 999-99 | PS Details 1.pdf Cardinal Health | Catalog # 999-99 | PS Details 1.pdf | PS Details 2.pdf