

Real-time collaboration has become the standard for modern productivity tools, transforming how we work and interact. In this tutorial, you’ll learn how to build a Google Docs–style collaborative editor that lets multiple users create, edit, and share documents in real time.
We’ll use QuillJS to integrate a rich WYSIWYG editor, Next.js for full-stack development, and the Stream Chat SDK to synchronize live changes across users. By the end of this tutorial, you’ll have a fully functional collaborative editor that allows teams to work together on the same document, just like in Google Docs.
Prerequisites
To fully understand this tutorial, you need to have a basic understanding of React or Next.js.
We will use the following tools:
- Stream React Chat SDK - Enables real-time chat communication in your application.
- Stream Chat Firebase Extension - A Firebase extension that automatically connects your Firebase users to Stream.
- Quill - A powerful, rich-text editor for creating and formatting documents.
- Firebase - A backend-as-a-service platform developed by Google to enable us to add authentication, database, real-time communication, file storage, cloud functions, and many others within software applications.
- Shadcn UI - A UI component library that provides customizable, beautifully designed, and accessible UI components for your applications.
Create a Next.js project by running the following code snippet:
1npx create-next-app google-docs
Install the package dependencies for the project:
1npm install firebase stream-chat stream-chat-react
To install the Shadcn UI library, follow the installation guide and add the Dialog component to the package.
Now, let's start building! 🚀
Configure Stream Chat SDK in Next.js
In this section, you will learn how to set up the Stream Chat SDK, integrate it with your Next.js application, and set up the backend functionality required to create channels using the Stream Chat SDK.
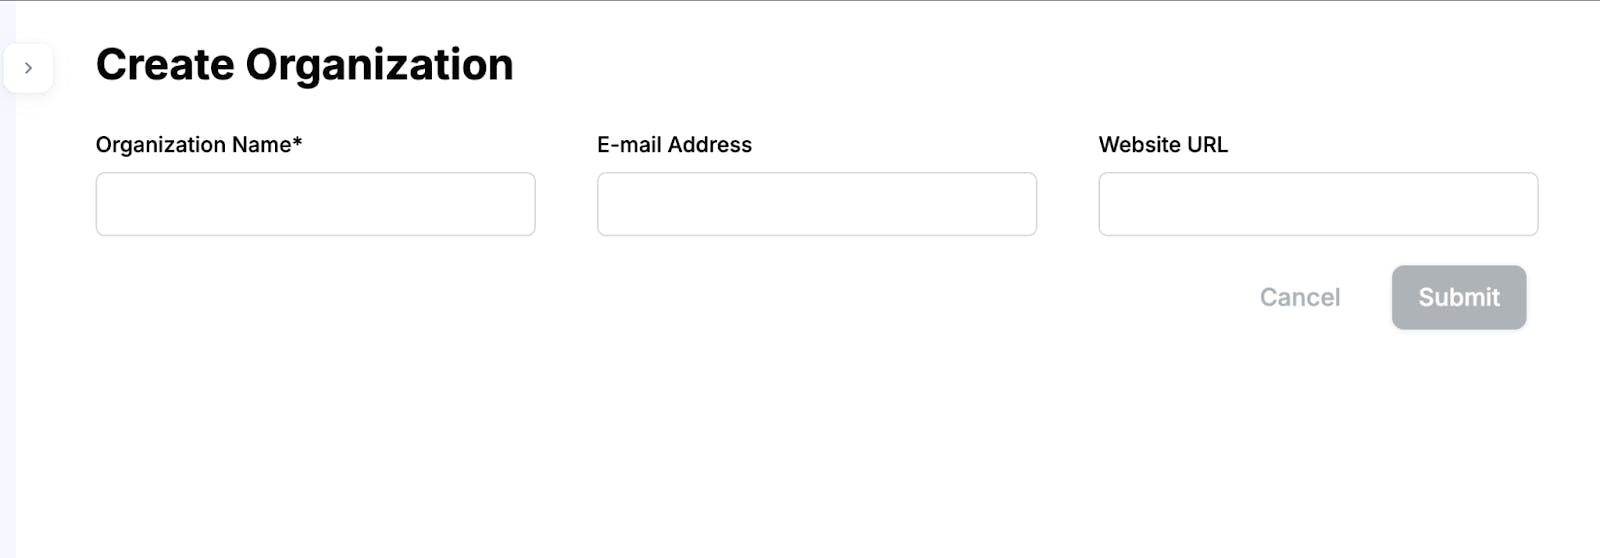
Create a free Stream account and a new organization to manage your apps.
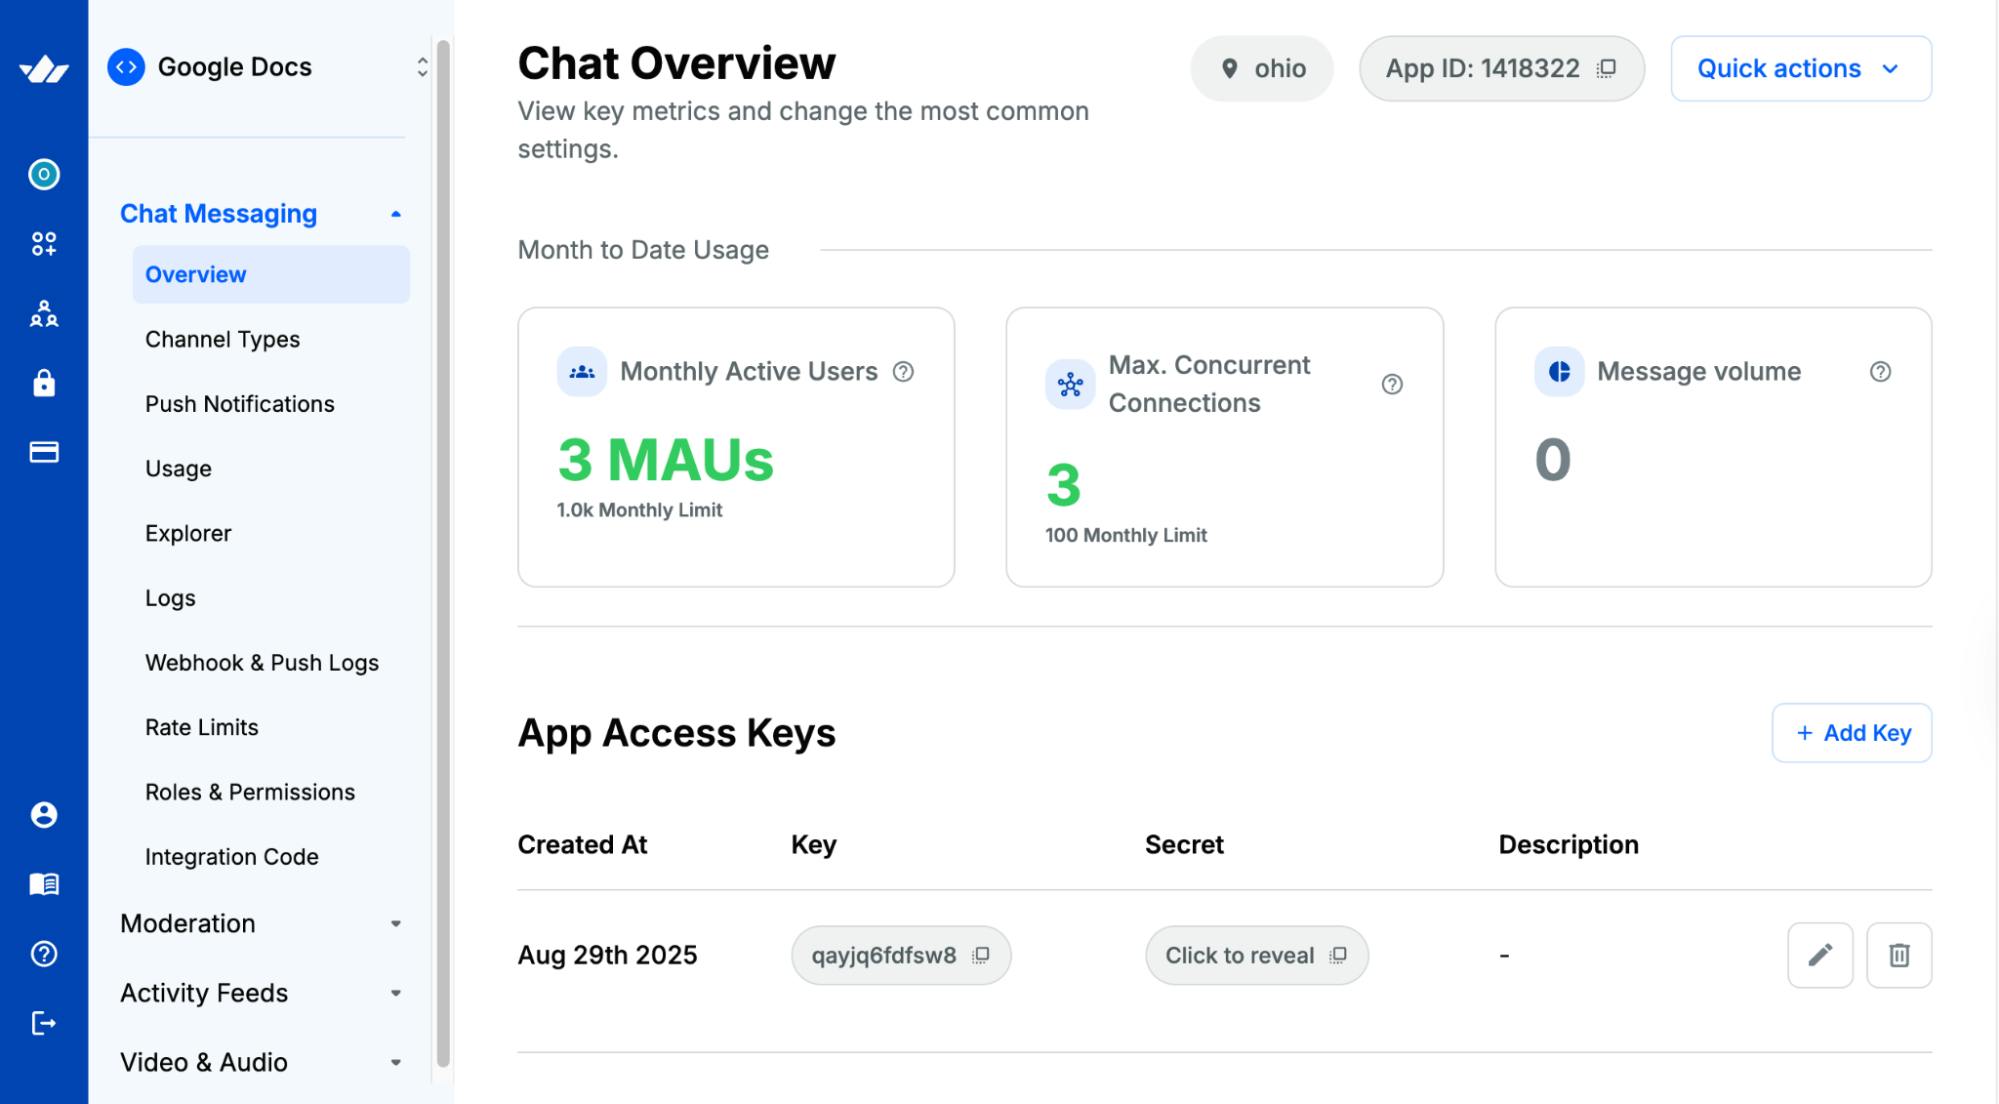
Add a new app to the organization and copy the Stream API and Secret key into the .env.local file.
12NEXT_PUBLIC_STREAM_API_KEY=<paste_from_Stream_app_dashboard> STREAM_SECRET_KEY=<paste_from_Stream_app_dashboard>
Create an actions folder containing a stream.ts file at the root of the Next.js project.
12cd google-docs && mkdir actions && \ cd actions && touch stream.ts
Copy the following code snippet into the stream.ts file:
12345678910111213"use server"; import { StreamChat } from "stream-chat"; const STREAM_API_KEY = process.env.NEXT_PUBLIC_STREAM_API_KEY!; const STREAM_API_SECRET = process.env.STREAM_SECRET_KEY!; // 👇🏻 -- For Stream Chat -- const serverClient = StreamChat.getInstance(STREAM_API_KEY, STREAM_API_SECRET); export async function createToken(userID: string): Promise<string> { if (!userID) throw new Error("User is not authenticated"); return serverClient.createToken(userID); }
The code snippet above initializes the Stream Chat server client using your API key and secret. Then, the createToken function is defined to generate a user authentication token for the given user's ID.
How will the Stream Chat SDK handle document changes in real time?
We’ll achieve this by leveraging Stream Channels and assigning each document to its own channel. As users modify the document, changes are sent and received within that channel, ensuring real-time synchronization across all collaborators.
Add the following code snippet to the file:
123456789101112131415161718192021222324252627282930export const createChannel = async ({ name, uid, }: { name: string; uid: string; }) => { try { //👇🏻 declare channel type const channel = serverClient.channel( "messaging", `${crypto.randomUUID()}`, { name: name || "Unknown", image: `https://api.dicebear.com/9.x/pixel-art/svg?seed=${name}`, members: [uid], created_by_id: uid, } ); //👇🏻 create a channel await channel.create(); return { success: true, error: null, id: channel.id }; } catch (err) { return { success: false, error: err instanceof Error ? err.message : "Failed to create channel", id: null, }; } };
The createChannel function accepts a user’s name and ID, creates a unique channel for that document, and assigns the user as its creator and member. This function runs whenever a new document is created, ensuring that every document is automatically tied to a dedicated Stream channel.
Next, copy the following code snippet into the stream.ts file:
12345678910111213141516171819202122232425262728293031export const deleteChannel = async (id: string) => { try { const channel = serverClient.channel("messaging", id); await channel.delete(); return { success: true, error: null }; } catch (err) { return { success: false, error: err instanceof Error ? err.message : "Failed to delete channel", }; } }; export const getChannelById = async (id: string) => { try { const channels = await serverClient.queryChannels({ id }); const channel = channels[0]; if (!channel) { return { success: false, error: "Channel not found", id: null }; } return { success: true, error: null, id: channel.id }; } catch (err) { return { success: false, error: err instanceof Error ? err.message : "Failed to get channel", id: null, }; } };
The deleteChannel function removes a channel using its ID, and the getChannelById function retrieves a channel by its ID. You call these functions when deleting or fetching a document.
Since each document has a dedicated channel, you must delete its channel when you delete the document from the database to keep both the database and existing channels in sync.
Finally, update the Stream Chat roles and permissions as shown below:
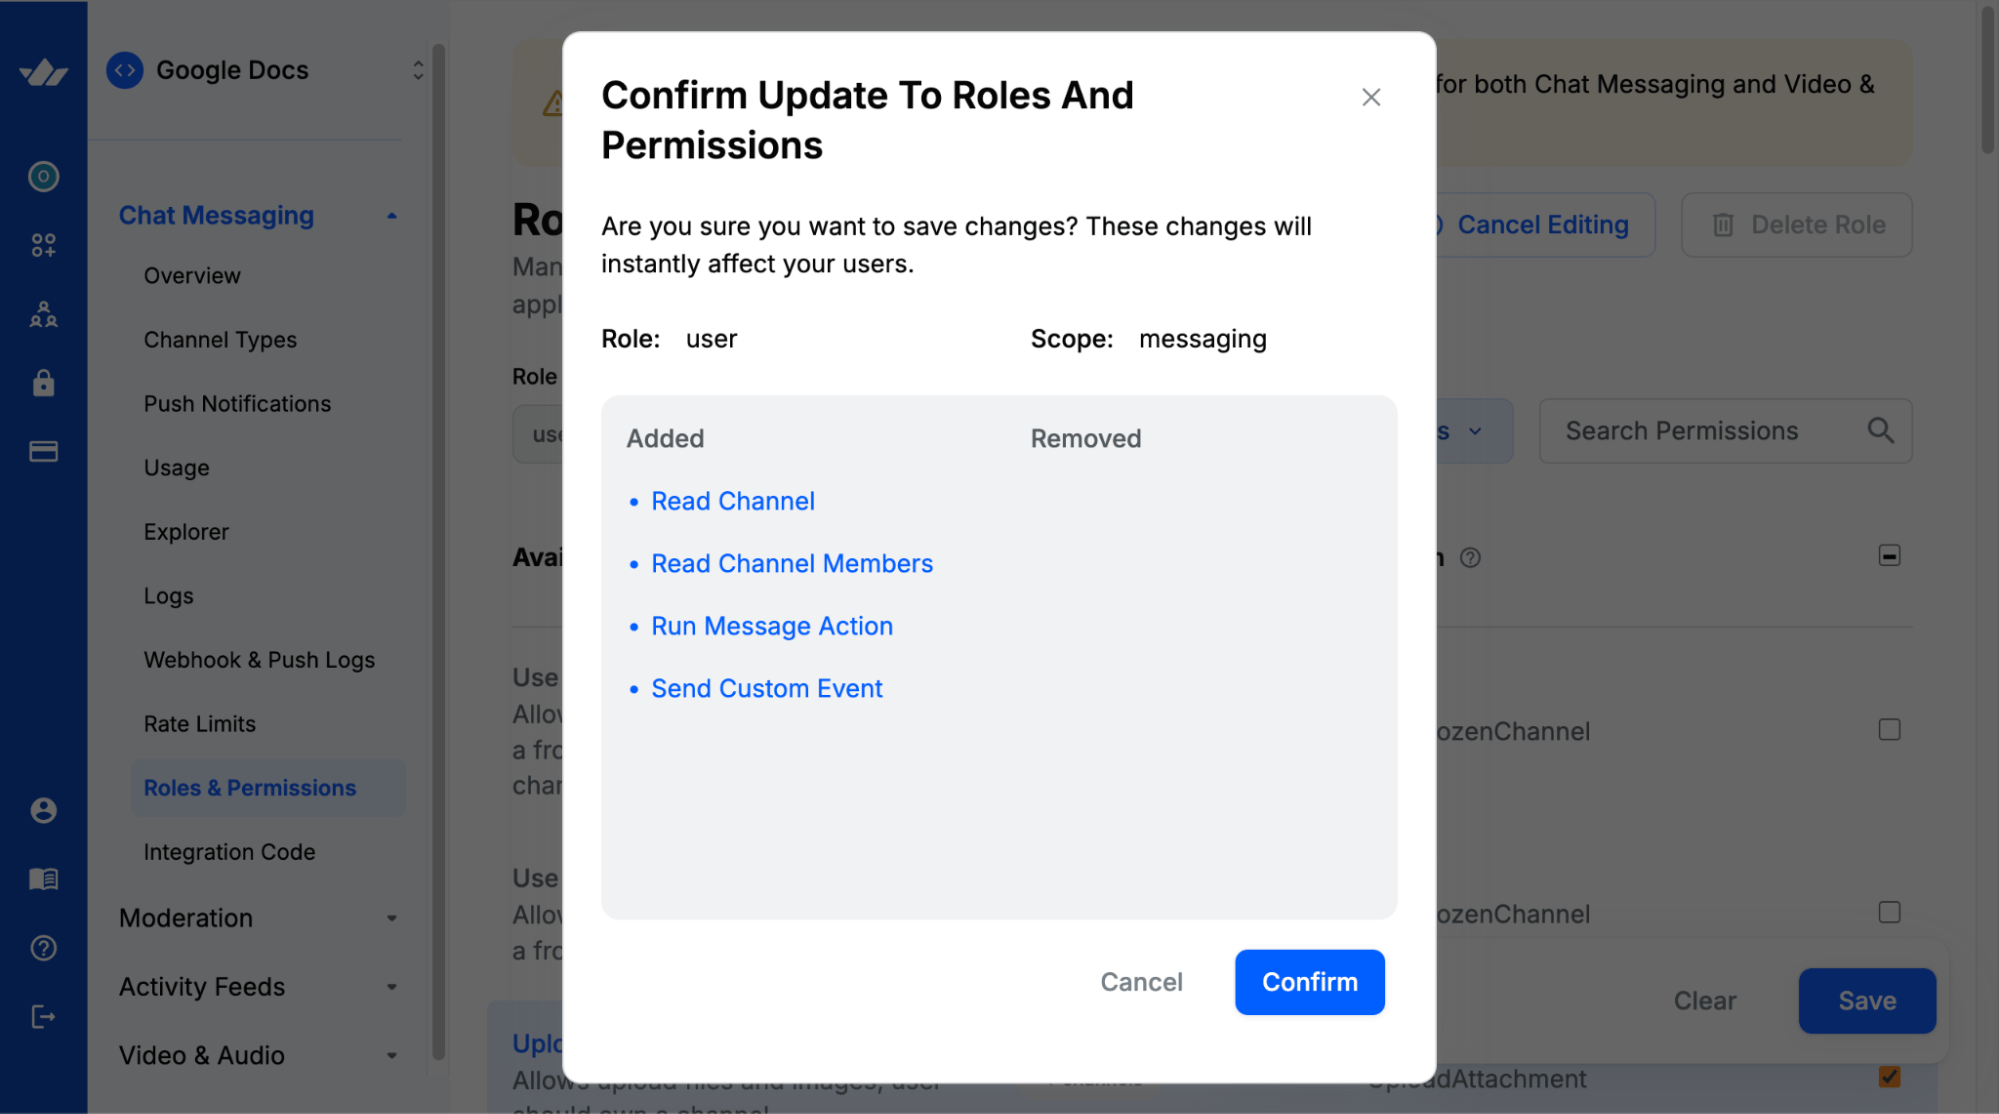
The image above ensures that any authenticated user can view a channel (document), and all changes made to the document are propagated to other users reading the document, regardless of who created the document (channel).
Setting Up Firebase Authentication and Firestore
Firebase is a cloud platform that enables you to build full-stack software applications without worrying about managing your database or server infrastructure. It provides features like authentication, real-time database, cloud functions, file storage, and more.
In this section, you'll learn how to install Firebase and configure the Firestore Database and Firebase authentication in your Next.js application.
Install the Firebase Node.js package by running the code snippet below:
1npm install firebase
Open the Firebase Console in your browser and create a new Firebase project.
Within the project dashboard, click the web icon \</> to add a Firebase app to the project.

Register the app by entering a nickname, then copy the auto-generated Firebase configuration code.
Create a lib/firebase.ts file within the Next.js src folder and paste the following code snippet into the file:
12345678910111213141516171819// Import the functions you need from the SDKs you need import { initializeApp, getApps } from "firebase/app"; import { getFirestore } from "firebase/firestore"; import { GoogleAuthProvider } from "firebase/auth"; import { getAuth } from "firebase/auth"; const firebaseConfig = { // 👉🏻 paste your Firebase config }; // Initialize Firebase const app = getApps().length === 0 ? initializeApp(firebaseConfig) : getApps()[0]; const provider = new GoogleAuthProvider(); const db = getFirestore(app); const auth = getAuth(app); export { provider, auth }; export default db;
The code snippet above initializes the Firestore database and sets up Firebase's Google authentication provider, allowing your application to interact with the database and handle user authentication.
Next, select "Authentication" and "Firestore Database" from the sidebar menu and add them to the project.
Congratulations! You can now start interacting with these Firebase features in your Next.js project.
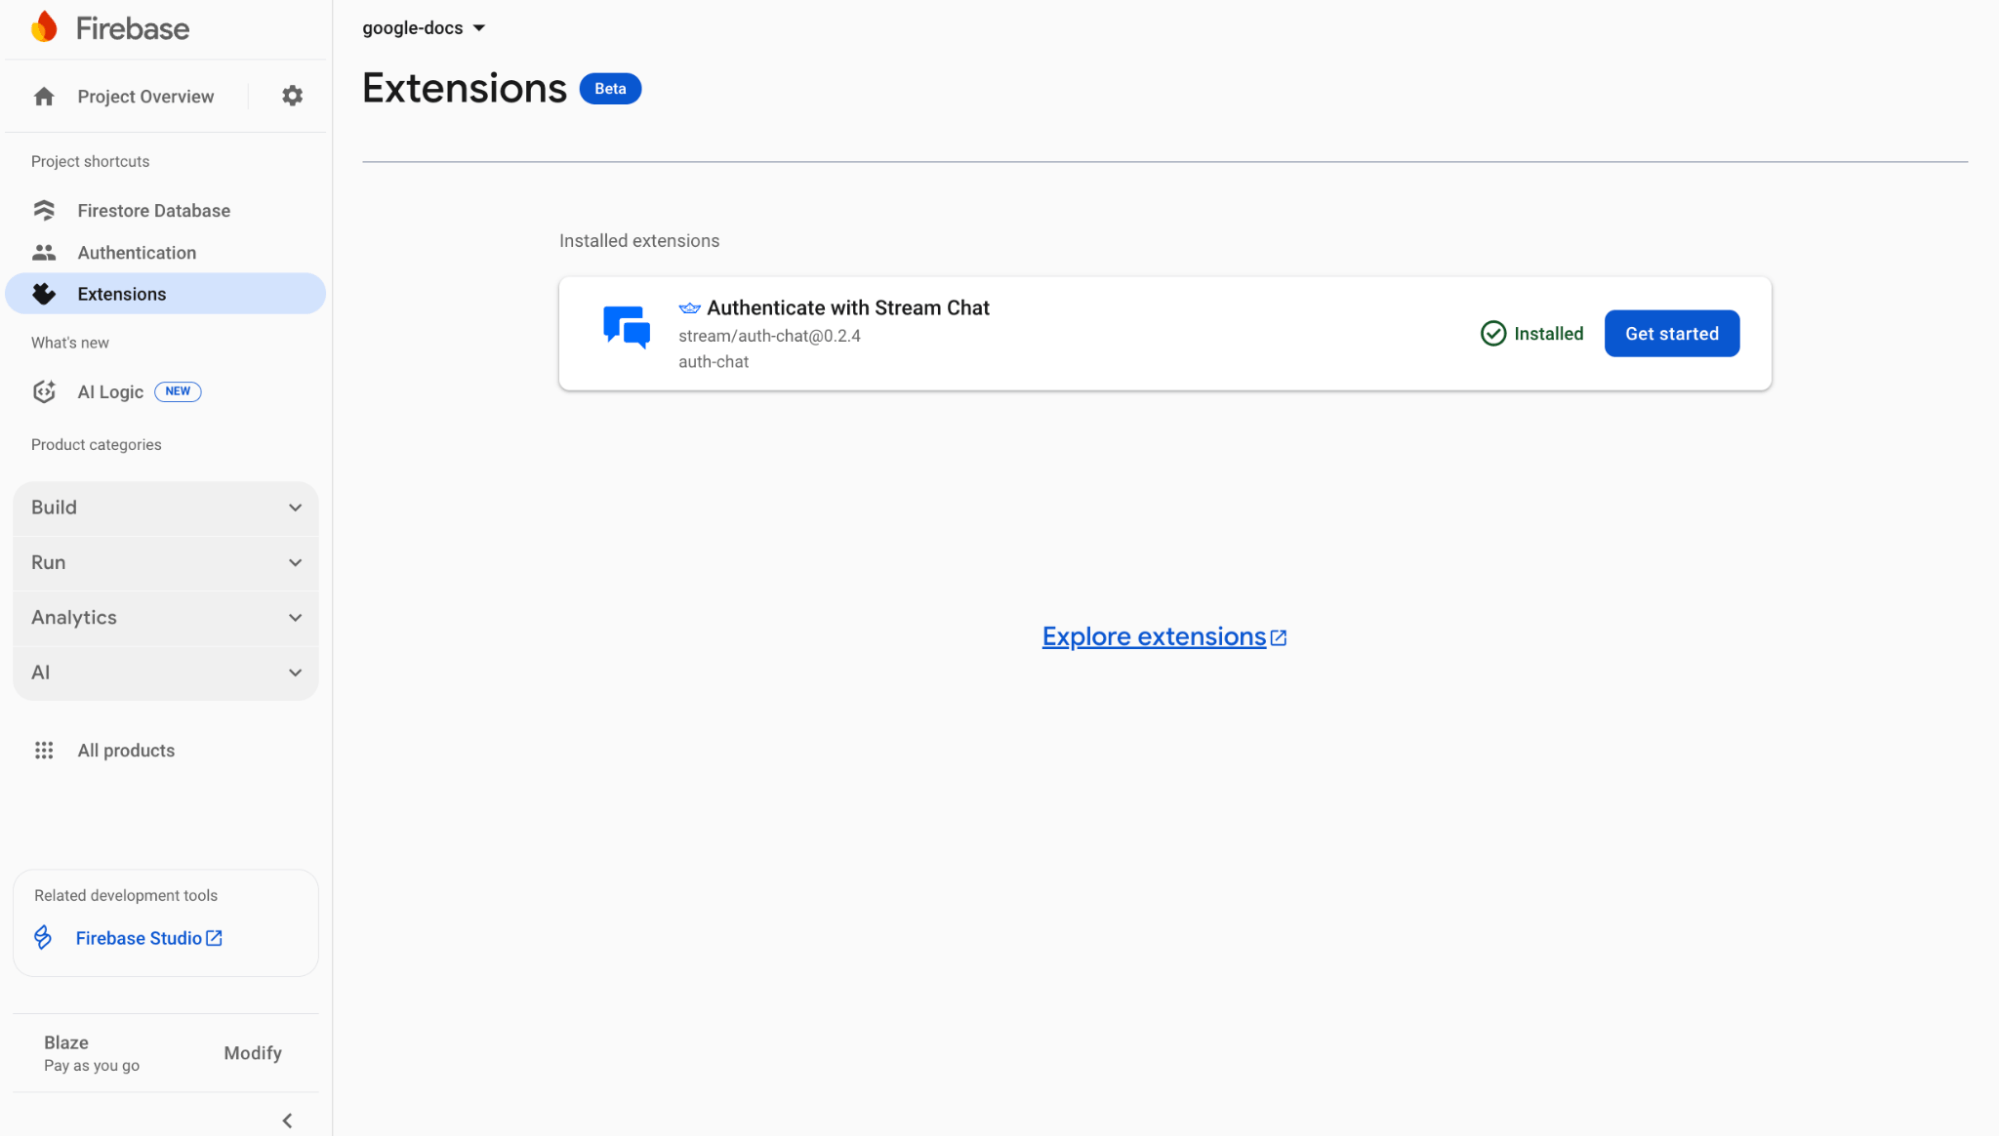
Installing the Stream Chat Firebase Extension
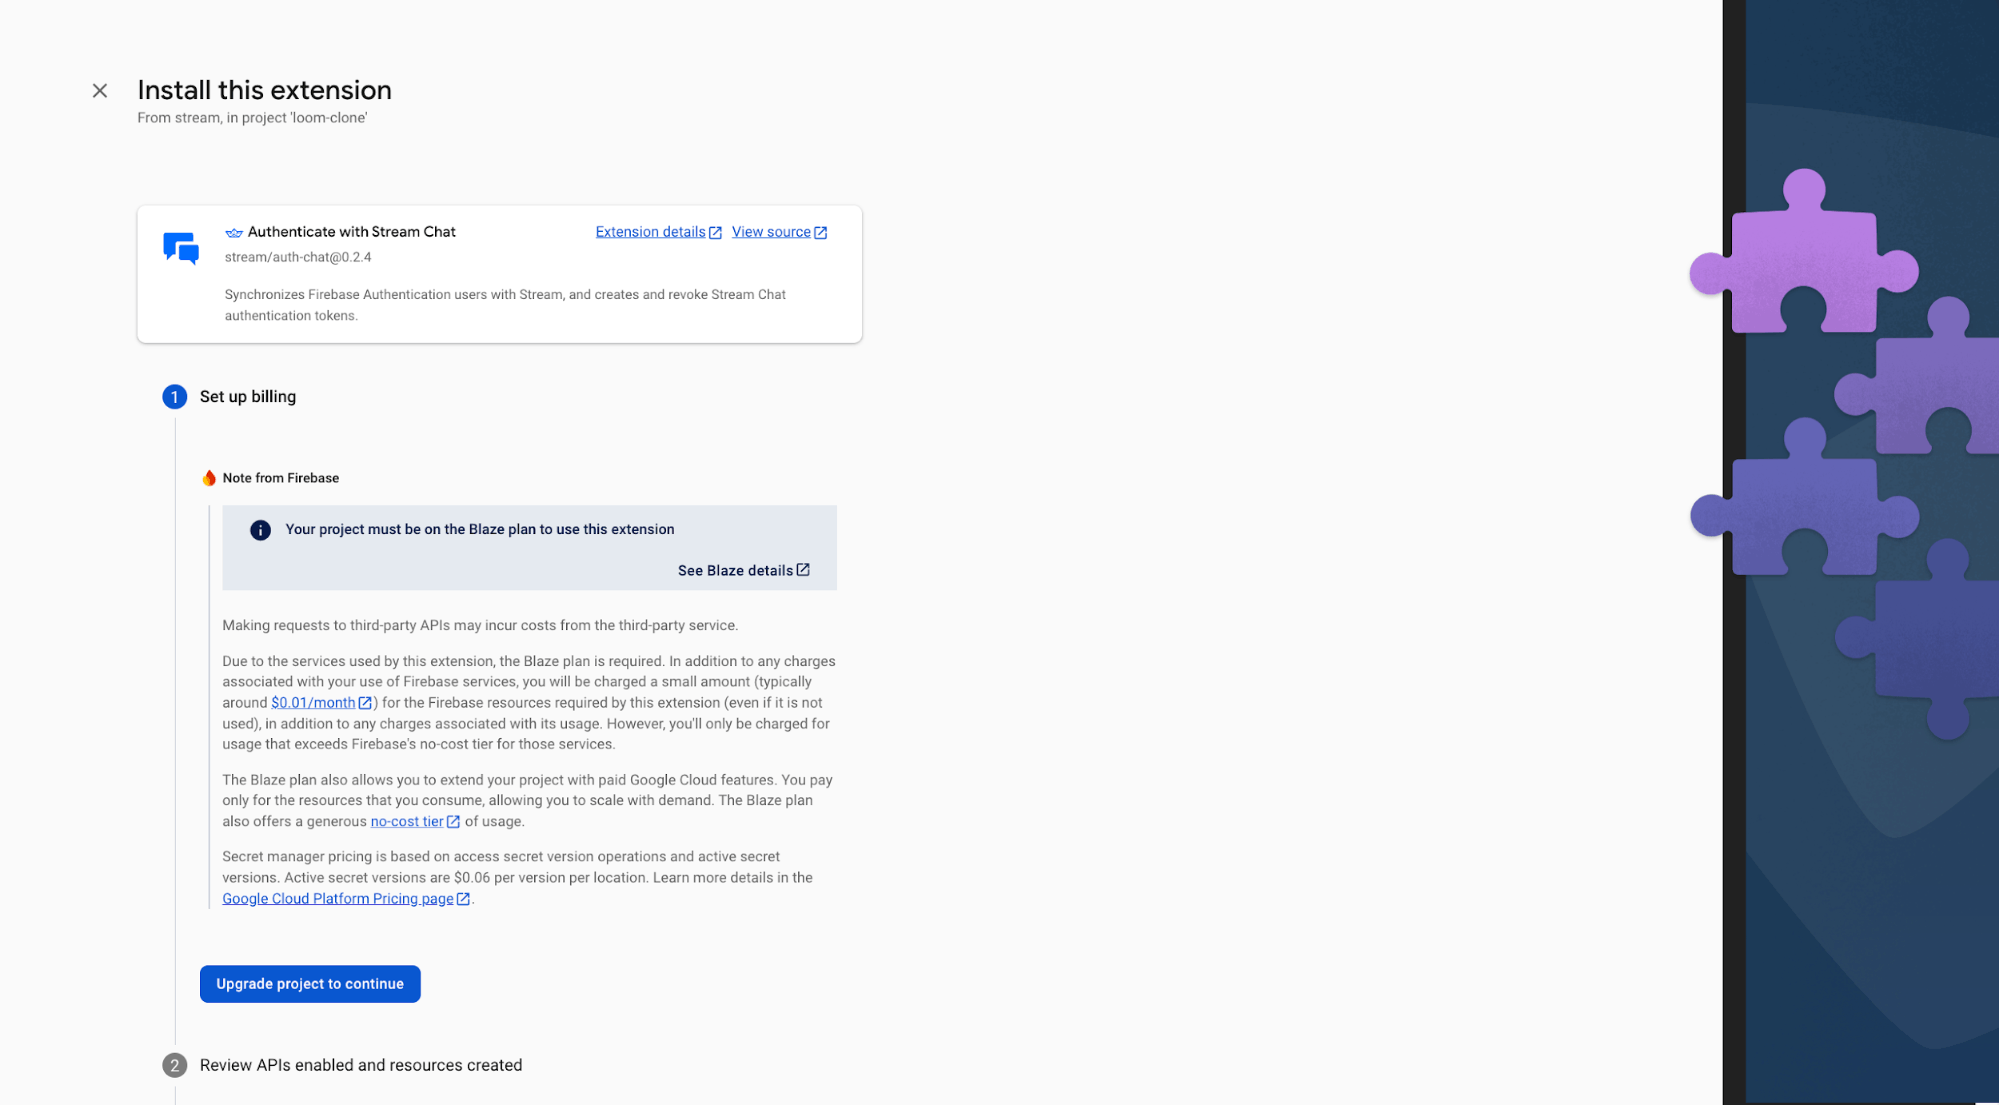
The Authenticate with Stream Chat extension automatically connects your Firebase users to Stream Chat, making it easy for Stream to access and manage your users.
Visit the Stream Chat Firebase Extension page and select the Firebase project where you want to install the extension.
Note: Upgrade your Firebase project to the Blaze (pay-as-you-go) plan before installing the extension.
During installation, enable Artifact Registry, Cloud Functions, and Secret Manager. These permissions allow Stream to access and manage your Firebase users.
Finally, enter your Stream API key and secret in the configuration fields, then click the Install Extension button.
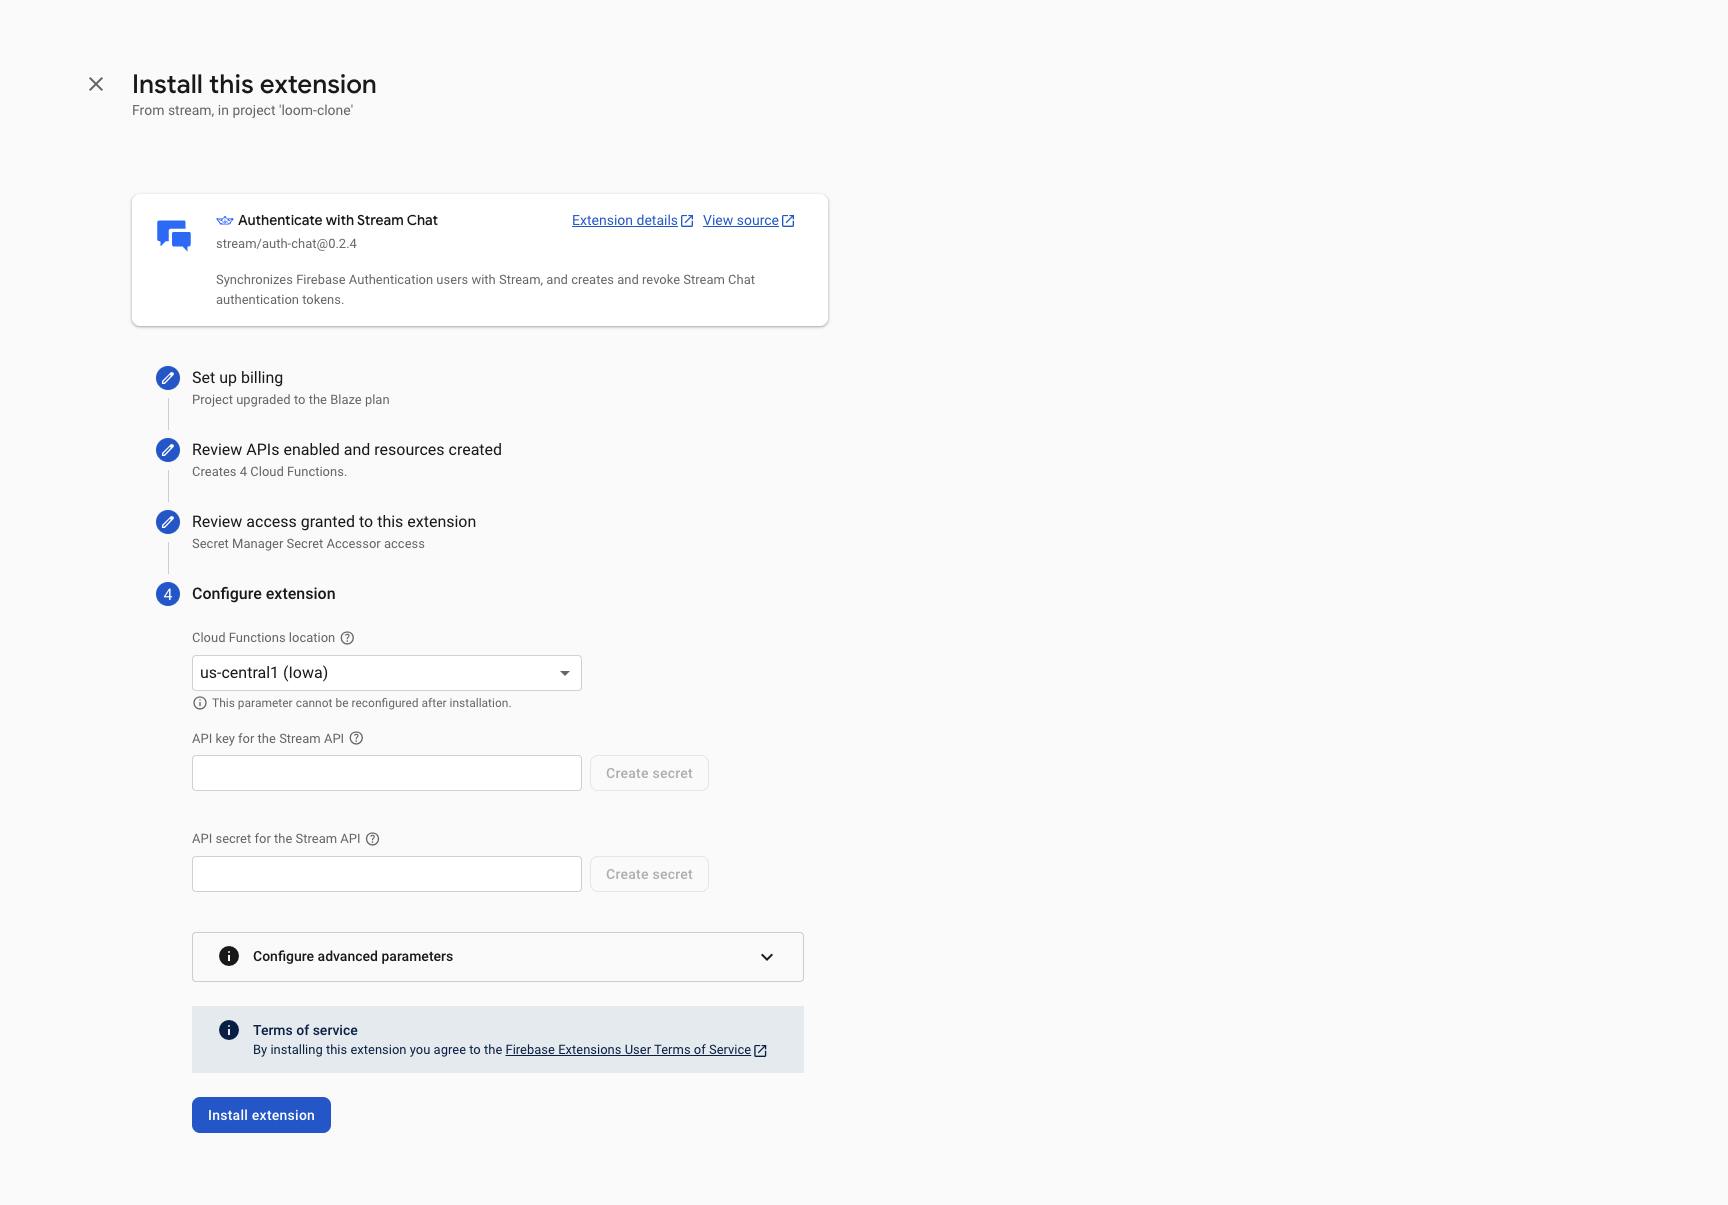
The extension will be installed within a few minutes. Once setup is complete, every new Firebase user will automatically be added to Stream.
Building the Application Pages
In this section, you will learn how to build the application pages, which are:
- Home Page: Displays a button that allows users to sign in with their Google account.
- Dashboard Page: Shows all documents created by the user.
- Document Page: Displays the WYSIWYG editor, allowing users to create and collaborate on a document in real-time.
Before we proceed, create a lib/server.ts file and add the following code snippet to the file:
1234567891011121314151617181920212223242526272829import { signInWithPopup } from "firebase/auth"; import { FirebaseError } from "firebase/app"; import { provider, auth } from "./firebase"; //👇🏻 sign in with Google export const signInWithGoogle = async () => { try { const { user } = await signInWithPopup(auth, provider); if (!user) { throw new Error("No user returned"); } return { user, message: "User signed in successfully" }; } catch (error) { const errorMessage = error instanceof FirebaseError ? error.message : "Error signing in"; return { user: null, message: errorMessage }; } }; //👇🏻 handle log out export const logoutUser = async () => { try { await auth.signOut(); return { success: true, message: "User logged out successfully" }; } catch (error) { console.error("Error logging out:", error); return { success: false, message: "Error logging out" }; } };
The signInWithGoogle function triggers a Google sign-in pop-up, allowing users to log into the application using their Gmail accounts. When executed, the logoutUser function signs the user out of the application.
The Home Page
Copy the following code snippet into the app/page.tsx file:
12345678910111213141516171819202122232425262728293031323334"use client"; import { signInWithGoogle } from "@/lib/server"; export default function Home() { const router = useRouter(); //👇🏻 handles user sign in const handleSubmit = async () => { const { user, message } = await signInWithGoogle(); if (user) { console.log("User signed in:", user); router.push("/dashboard"); } else { console.error("Sign in failed:", message); } }; return ( <section> <h1>Collaborative Documents, Made Simple</h1> <p> Create, edit, and share documents with your team in real time — from anywhere. </p> <p> No installs, no hassle. Just open, write, and collaborate instantly. </p> <div className='flex items-center justify-center mt-8'> <button onClick={handleSubmit}>Log in to start</button> </div> </section> ); }
The code snippet above defines the application home page, which renders a sign-in button that allows users to log in using their Gmail account.
The Dashboard Page
First, create a dashboard folder containing a page.tsx file in the Next.js app folder.
123cd app && \ mkdir dashboard && cd dashboard && \ touch page.tsx
Copy the following code snippet into the dashboard/page.tsx file:
1234567891011121314151617181920212223242526272829303132333435363738394041424344454647484950515253545556575859"use client"; //👇🏻 type declaration for document interface DocumentState { created_by: { name: string; id: string; date: string; }; last_modified: { id: string; name: string; date: string; }; content: string; title: string; slug: string; } //👇🏻 custom component import DocBox from "../components/DocBox"; export default function DashboardPage() { const [documents, setDocuments] = useState<DocumentState[]>([]); const handleLogout = async () => { const { success } = await logoutUser(); if (success) { router.push("/"); } }; const handleCreateDocument = async () => { //👉🏻 create document }; return ( <main> <nav> <h1 className='font-bold text-2xl'>Dashboard</h1> <div> <button onClick={handleCreateDocument}>New Document</button> <button onClick={handleLogout}>Log Out</button> </div> </nav> <section> {documents.map((doc) => ( <DocBox key={doc.created_by.date} title={doc.title || "Untitled Document"} author={doc.created_by.name} slug={doc.slug} /> ))} {documents.length === 0 && <p>No existing documents found</p>} </section> </main> ); }
From the code snippet above:
- The DocumentState interface defines the data structure for each document, including the created_by and last_modified objects and the content, title, and slug values.
- The DashboardPage component renders the documents array by mapping it to a DocBox component, which receives the title, author, and slug as props.
Create the DocBox component as follows:
123456789101112131415161718192021222324252627282930313233343536373839"use client"; import { Dialog, DialogTrigger } from "@/components/ui/dialog"; import { ExternalLink, Trash2 } from "lucide-react"; import { truncateString } from "@/lib/utils"; import DeleteModal from "./DeleteModal"; import { useState } from "react"; import Link from "next/link"; export default function DocBox({ title, author, slug, }: { title: string; author: string; slug: string; }) { const [deleteModalOpen, setDeleteModalOpen] = useState<boolean>(false); return ( <div> <h3>{title}</h3> <p>By {author}</p> <div> <Link href={`/${slug}`} target='_blank'> <ExternalLink size={24} /> </Link> <Dialog open={deleteModalOpen} onOpenChange={setDeleteModalOpen}> <DialogTrigger asChild> <Trash2 size={24} /> </DialogTrigger> <DeleteModal id={slug} /> </Dialog> </div> </div> ); }
The DocBox component displays each document’s title and author and uses the slug to:
- Generate a link that opens the document’s page in a new tab, and
- Identify the document when a user wants to delete it.
Finally, add the DeleteModal component to the components folder:
1234567891011121314151617181920212223242526272829import { DialogContent, DialogDescription, DialogHeader, DialogTitle, } from "@/components/ui/dialog"; export default function DeleteModal({ id }: { id: string }) { const handleDelete = async () => { //👉🏻 trigger delete function }; return ( <DialogContent className='sm:max-w-4xl'> <DialogHeader> <DialogTitle className='text-2xl text-blue-700'> Delete Document </DialogTitle> <DialogDescription> Are you sure you want to delete this document? </DialogDescription> </DialogHeader> <div className='flex justify-end'> <button onClick={handleDelete}>Delete</button> </div> </DialogContent> ); }
Configure the WYSIWYG Editor with Quill and Stream
In this section, you’ll set up QuillJS and integrate its fully customizable WYSIWYG editor so users can create and edit documents in real time. You’ll also configure the editor to broadcast content updates to all users viewing the document.
Before we proceed, install the following Quill packages.
1npm install quill quill-delta
Next, create a QuillEditor.tsx file and copy the following code snippet into the file:
12345678910111213141516171819202122232425"use client"; import React, { forwardRef, useEffect, useLayoutEffect, useRef, RefObject, } from "react"; import Quill, { EmitterSource, QuillOptions, Range } from "quill"; // Define props interface interface EditorProps { readOnly?: boolean; defaultValue?: string | object; onTextChange?: ( delta: object, oldContents: object, source: EmitterSource ) => void; onSelectionChange?: ( range: Range | null, oldRange: Range | null, source: EmitterSource ) => void; }
The EditorProps interface defines the prop types for the Quill editor component. It specifies optional values such as readOnly, defaultValue and callback functions like onTextChange and onSelectionChange, which handle text updates and selection changes inside the editor.
Declare the QuillEditor component as shown below:
12345678910111213141516171819202122232425262728293031const QuillEditor = forwardRef<Quill | null, EditorProps>( ({ readOnly, defaultValue, onTextChange, onSelectionChange }, ref) => { const containerRef = useRef<HTMLDivElement | null>(null); const defaultValueRef = useRef<EditorProps["defaultValue"]>(defaultValue); const onTextChangeRef = useRef<EditorProps["onTextChange"]>(onTextChange); const onSelectionChangeRef = useRef<EditorProps["onSelectionChange"]>( onSelectionChange ); // Keep callbacks in sync useLayoutEffect(() => { onTextChangeRef.current = onTextChange; onSelectionChangeRef.current = onSelectionChange; }, [onTextChange, onSelectionChange]); // Enable/disable editor when readOnly changes useEffect(() => { if ((ref as RefObject<Quill | null>)?.current) { (ref as RefObject<Quill | null>).current?.enable( !readOnly ); } }, [ref, readOnly]); return <div ref={containerRef}></div>; } ); QuillEditor.displayName = "QuillEditor"; export default QuillEditor;
Add the following useEffect function with the QuillEditor component to listen for changes when the user updates the editor’s content:
123456789101112131415161718192021222324252627282930313233343536373839404142434445464748// Initialize Quill useEffect(() => { const container = containerRef.current; if (!container) return; const editorContainer = container.ownerDocument.createElement("div"); container.appendChild(editorContainer); const quill = new Quill(editorContainer, { theme: "snow", } as QuillOptions); // Attach quill to forwarded ref if (typeof ref === "function") { ref(quill); } else if (ref) { (ref as RefObject<Quill | null>).current = quill; } // Set default value if provided if (defaultValueRef.current) { if (typeof defaultValueRef.current === "string") { quill.clipboard.dangerouslyPasteHTML(defaultValueRef.current); } else { // eslint-disable-next-line @typescript-eslint/no-explicit-any quill.setContents(defaultValueRef.current as any); } } // Event listeners quill.on("text-change", (delta: object, oldContents: object, source: EmitterSource) => { onTextChangeRef.current?.(delta, oldContents, source); }); quill.on("selection-change", (range: Range | null, oldRange: Range | null, source: EmitterSource) => { onSelectionChangeRef.current?.(range, oldRange, source); }); // Cleanup return () => { if (typeof ref === "function") { ref(null); } else if (ref) { (ref as RefObject<Quill | null>).current = null; } container.innerHTML = ""; }; }, [ref]);
From the code snippet above, the quill.on("text-change") event listener tracks every change made inside the editor and allows us to run custom functions whenever the document updates. We’ll use this event to broadcast changes in real-time, ensuring that all users viewing the same document stay in sync.
After declaring the QuillEditor component, the next step is integrating it into the application. Create an Editor component by copying this content into the file, and include the corresponding CSS styles in globals.css to ensure the editor is properly styled.
If you encounter any issues while setting up Quill in React applications, you can explore the official Quill React code playground.
Sending and Listening to Real-Time Events with Stream Chat SDK
Events can only be sent or received within Stream channels. This means you need to create a channel when creating a document, then wrap the Channel provider component around the Editor component to listen to updates when the user types or performs various actions within the text editor.
First, create a custom useGetStreamClient hook as follows:
12345678910111213141516171819202122232425import { useCreateChatClient } from "stream-chat-react"; import { createToken } from "../../../actions/stream"; import { User } from "firebase/auth"; import { useCallback } from "react"; export const useGetStreamClient = ( user: User ) => { const tokenProvider = useCallback(async () => { return await createToken(user.uid); }, [user]); const client = useCreateChatClient({ apiKey: process.env.NEXT_PUBLIC_STREAM_API_KEY!, tokenOrProvider: tokenProvider, userData: { id: user.uid, name: user.displayName, image: `https://api.dicebear.com/9.x/pixel-art/svg?seed=${user.displayName}` }, }); if (!client) return { client: null }; return { client }; };
The useGetStreamClient hook generates a token for the current user and creates a chat client using the user's credentials from the user object. It then returns the chat client, which can be used to perform client-side Stream operations.
Then, create a [slug] folder containing a page.tsx file and add the following code snippet into the file:
12345678910111213141516171819202122232425262728293031323334353637383940414243444546474849export default function Page() { // get Stream client const { client } = useGetStreamClient(user); const { slug } = useParams<{ slug: string }>(); const [channel, setChannel] = useState<ChannelType | null>(null); const [document, setDocument] = useState<DocumentState | null>(null); const [loading, setLoading] = useState<boolean>(true); const router = useRouter(); const getChannel = useCallback(async () => { if (!slug || !client) return; try { const { id } = await getChannelById(slug); const { document } = await getDocumentById(slug); if (id && document) { const channels = await client.queryChannels({ id }); const channel = channels[0]; if (!channel) return; setChannel(channel); setDocument(document as DocumentState); setLoading(false); } else { router.replace("/dashboard"); } } catch (error) { console.error("Error fetching channel:", error); } }, [slug, router, client]); useEffect(() => { getChannel(); }, [getChannel]); if (loading || !client || !channel || !document) return ( <div> <Loader2 size={30} /> </div> ); return ( <Chat client={client} theme='messaging light'> <Channel channel={channel}> <PageComponent documentData={document} /> </Channel> </Chat> ); }
From the code snippet above:
- The Page component is responsible for rendering each document page.
- The slug parameter (extracted from the URL) fetches both the document metadata and its corresponding Stream channel.
- The getChannel function queries the Stream client for the channel that matches the document’s ID. If either the channel or the document does not exist after querying, the user is redirected to the dashboard. If both exist, they are stored in the local state.
- While waiting for the channel, client, or document to load, a loader icon indicates progress.
- Once everything is ready, the document is wrapped inside the Chat and Channel providers. This setup enables the PageComponent to send and receive real-time events in the document editor.
Render the Editor component within the PageComponent as shown below:
1234567891011121314151617181920212223const PageComponent = ({ documentData }: { documentData: DocumentState }) => { return ( <div> <Header documentData={documentData} /> <div id='quill-container'> <Editor dbContent={documentData.content} /> <div> <div> <div> <h3>Document History</h3> <p>Created by: {documentData?.created_by?.name}</p> <p> Date Created: {new Date(documentData?.created_by?.date).toLocaleString()} </p> </div> </div> </div> </div> </div> ); };
The code snippet above renders the WYSIWYG editor and the document’s metadata on the page.
Within the Editor component, you can send events using the useEffect hook as shown below:
12345678910111213141516171819202122232425262728293031323334import { useChannelStateContext } from "stream-chat-react"; import DeltaQuill from "quill-delta"; import Quill from "quill"; export default function Editor({ dbContent }: { dbContent: string }) { const { channel } = useChannelStateContext(); const quillRef = useRef<Quill | null>(null); useEffect(() => { const quill = quillRef.current; if (!quill) return; const handleLocalChange = ( delta: DeltaQuill, old: DeltaQuill, source: string ) => { //👇🏻 send event containing the current content channel.sendEvent({ type: "text-change", payload: { delta: quillRef.current.getContents(), user_id: userIDRef.current, }, }); }; //👇🏻execute the handleLocalChange function when text changes quill.on("text-change", handleLocalChange); return () => { quill.off("text-change", handleLocalChange); }; }, []); }
The useEffect hook sets up an event listener on the Quill editor to detect whenever a user changes the document. The handleLocalChange captures the editor’s content and uses the channel.sendEvent function to broadcast a custom event type to all users in real-time.
This event includes two key pieces of data:
- delta: the current document content
- user_id: the user's ID making the change.
You can listen for changes in the text editor using the following code snippet.
123456789101112131415useEffect(() => { if (!channel) return; const handleDelta = (event: any) => { if (event.payload.user_id === userID) return; const incomingDelta = new DeltaQuill(event.payload.delta); quillRef.current?.updateContents(incomingDelta); }; channel.on("text-change", handleDelta); return () => { channel.off("text-change", handleDelta); }; }, [channel, userID]);
The useEffect hook above listens for text-change events within the channel. When a new event arrives, it checks whether the event originated from the current user by comparing the user_id. If the event came from another user, it extracts the incoming delta and updates the Quill editor’s content using the updateContents function.
This ensures that all changes made by collaborators are reflected in the text editor in real time, while avoiding duplicate updates from the user who initially triggered the change.
Note: When a user types very quickly, the channel.sendEvent function can fire too often, sending many messages rapidly. This may exceed Stream’s rate limits. To prevent this, implement a slight delay (such as debouncing or throttling) that accumulates changes for a few seconds before sending them as a single event, as shown in the following code sample.
Saving Document Changes with Firebase Firestore
In this section, you will learn how to create functions that allow you to create a new Firebase document, update it, retrieve it by its ID, and delete it.
Execute the function below when users create a new document:
12345678910111213141516171819202122export const createDocument = async ({ date_created, slug, created_by, }: { date_created: string; slug: string; created_by: { id: string; name: string }; }) => { try { await setDoc(doc(db, "documents", slug), { created_by: { date: date_created, ...created_by, }, }); return { message: "Document created successfully", success: true }; } catch (error) { return { success: false, message: "Error creating document" }; } };
The createDocument function runs concurrently with the previously declared createChannel function. It uses the channel’s ID (slug) as the document ID in Firestore and stores other metadata, ensuring that every new document has a matching Firestore record tied to its corresponding Stream channel.
Users can save changes made within the text editor when they click the Save button:
123456789101112131415161718192021222324252627282930export const updateDocuments = async ({ last_modified, content, slug, title, }: { last_modified: { id: string; name: string; date: string; }; content: string; slug: string; title: string; }) => { try { await setDoc( doc(db, "documents", slug), { last_modified, content, title, }, { merge: true } ); return { message: "Document updated successfully", success: true }; } catch (error) { return { success: false, message: "Error updating document" }; } };
The updateDocuments function accepts the document’s slug, title, content, and last_modified metadata (user ID, name, and timestamp) and merges these updates into the corresponding document record in the database.
On the dashboard page, you can retrieve all documents created by the current user with the following code snippet:
12345678910111213141516171819import { collection, onSnapshot, query, where } from "firebase/firestore"; useEffect(() => { if (!user) return; const q = query( collection(db, "documents"), where("created_by.id", "==", user.uid) ); const unsubscribe = onSnapshot(q, (snapshot) => { const docs = snapshot.docs.map((doc) => ({ slug: doc.id, ...doc.data(), })) as DocumentState[]; setDocuments(docs); }); return () => unsubscribe(); }, [user]);
To retrieve a specific document, you can query Firestore using its slug value as the document ID:
1234567891011121314151617181920export const getDocumentById = async (slug: string) => { try { const docRef = doc(db, "documents", slug); const docSnap = await getDoc(docRef); if (docSnap.exists()) { return { document: { slug: docSnap.id, ...docSnap.data() }, success: true, }; } else { return { document: null, success: true, message: "Document not found" }; } } catch (err) { return { document: null, success: false, message: "Error fetching document", }; } };
Lastly, execute the function below to delete a document:
123456789export const deleteDocument = async (slug: string) => { try { await deleteDoc(doc(db, "documents", slug)); return { success: true }; } catch (error) { console.error("Error deleting document:", error); return { success: false, message: "Error deleting document" }; } };
Congratulations! You have completed this tutorial. The source code is available on GitHub.
What’s Next?
So far, you’ve learned how to integrate Stream into a Next.js application, use Firebase for authentication and database operations, and create, send, and listen to real-time events within Stream Chat channels. The application can be further enhanced by adding features such as permissions to give users read-only or editor access, as well as document sharing via invites.
Whether you’re creating a simple communication tool or a fully featured collaborative platform, Stream provides the building blocks to launch quickly, scale confidently, and operate efficiently.
Check out more tutorials on how to build powerful features and apps with Stream:
- Build a Chat to Slack Integration for Real-Time Feedback
- Build a Multiplayer Gaming App with Next.js and Firebase
- Build AI-Generated Chat Summaries in Your React Chat App
- Build a SaaS AI Agent Platform
Thank you for reading! 🎉