Set the terrain surface with elevation described by a raster file.
Use case
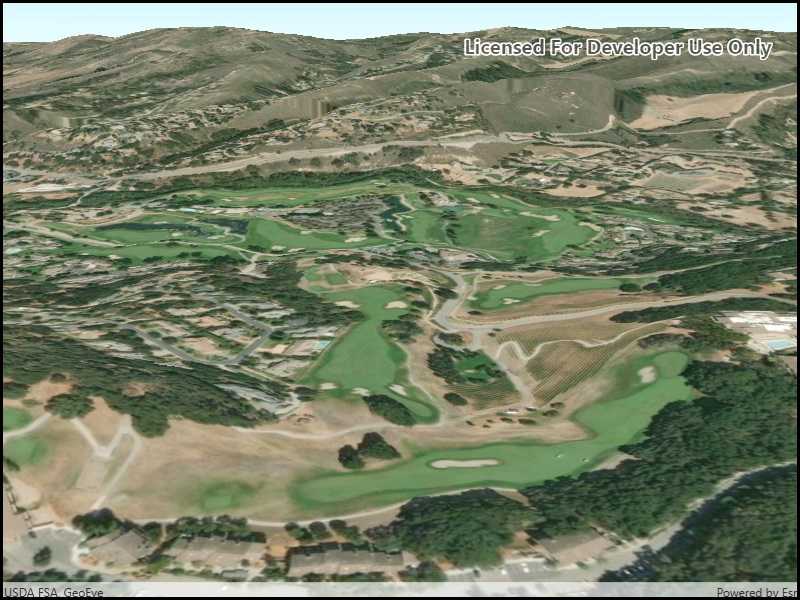
In a scene view, the terrain surface is what the basemap, operational layers, and graphics are draped onto. For example, when viewing a scene in a mountainous region, applying a terrain surface to the scene will help in recognizing the slopes, valleys, and elevated areas.
How to use the sample
When loaded, the sample will show a scene with a terrain surface applied. Pan and zoom to explore the scene and observe how the terrain surface allows visualizing elevation differences.
How it works
- Create a
Sceneand add it to aSceneView. - Create a
RasterElevationSourcewith a list of raster file paths. - Add this source to the scene's base surface:
Scene.BaseSurface.ElevationSources.Add(rasterElevationSource).
Relevant API
- RasterElevationSource
- Surface
Additional information
Supported raster formats include:
- ASRP/USRP
- CIB1, 5, 10
- DTED0, 1, 2
- GeoTIFF
- HFA
- HRE
- IMG
- JPEG
- JPEG 2000
- NITF
- PNG
- RPF
- SRTM1, 2
Tags
3D, elevation, raster, surface, terrain
Sample Code
// Copyright 2019 Esri. // // Licensed under the Apache License, Version 2.0 (the "License"); you may not use this file except in compliance with the License. // You may obtain a copy of the License at: http://www.apache.org/licenses/LICENSE-2.0 // // Unless required by applicable law or agreed to in writing, software distributed under the License is distributed on an // "AS IS" BASIS, WITHOUT WARRANTIES OR CONDITIONS OF ANY KIND, either express or implied. See the License for the specific // language governing permissions and limitations under the License. using ArcGIS.Samples.Managers; using Esri.ArcGISRuntime.Mapping; namespace ArcGIS.WPF.Samples.CreateTerrainSurfaceRaster { [ArcGIS.Samples.Shared.Attributes.Sample( name: "Create terrain surface from a local raster", category: "Scene", description: "Set the terrain surface with elevation described by a raster file.", instructions: "When loaded, the sample will show a scene with a terrain surface applied. Pan and zoom to explore the scene and observe how the terrain surface allows visualizing elevation differences.", tags: new[] { "3D", "elevation", "raster", "surface", "terrain" })] [ArcGIS.Samples.Shared.Attributes.OfflineData("98092369c4ae4d549bbbd45dba993ebc")] public partial class CreateTerrainSurfaceRaster { public CreateTerrainSurfaceRaster() { InitializeComponent(); Initialize(); } private void Initialize() { // Create the scene. MySceneView.Scene = new Scene(BasemapStyle.ArcGISImageryStandard); // Get the path to the elevation raster. string packagePath = DataManager.GetDataFolder("98092369c4ae4d549bbbd45dba993ebc", "MontereyElevation.dt2"); // Create the elevation source from a list of paths. RasterElevationSource elevationSource = new RasterElevationSource(new[] { packagePath }); // Create a surface to display the elevation source. Surface elevationSurface = new Surface(); // Add the elevation source to the surface. elevationSurface.ElevationSources.Add(elevationSource); // Add the surface to the scene. MySceneView.Scene.BaseSurface = elevationSurface; // Set an initial camera viewpoint. Camera camera = new Camera(36.51, -121.80, 300.0, 0, 70.0, 0.0); MySceneView.SetViewpointCamera(camera); } } }