


Saving a Broken Dev Board with a USB-UART Bridge
Oh no! Now you've done it. Somehow, some way, the USB port on your development board has broken off. Might as well just chuck it in the bin...
Not so fast! Depending how the port broke off, causing other damage or not, you may be able to continue to use, and most importantly program, the board.
USB-UART Bridge Can Save Your Board
With a USB-UART Bridge, you can save your board from the bin. If only the USB port is damaged (in this case, the USB-C) but the rest of the circuitry is functional, all you need is a programmer to handle communication between the computer and the dev board.
The USB-UART Bridge (or A.K.A. U2B) does just that. It can be set to work with either 5V microcontroller development boards (that is its default), or 3.3V dev boards. The change can easily be done by cutting and soldering the respective trace/jumper pad on the back of the board. This is outlined in the Datasheet of the U2B.
Now of course the U2B does not just fix and save broken dev boards from the eternal bin waste basket, it can be used on boards that never had an onboard programmer in the first place. For example, the popular Pro Mini requires, by design, an external programmer or serial adapter to upload sketches to it.
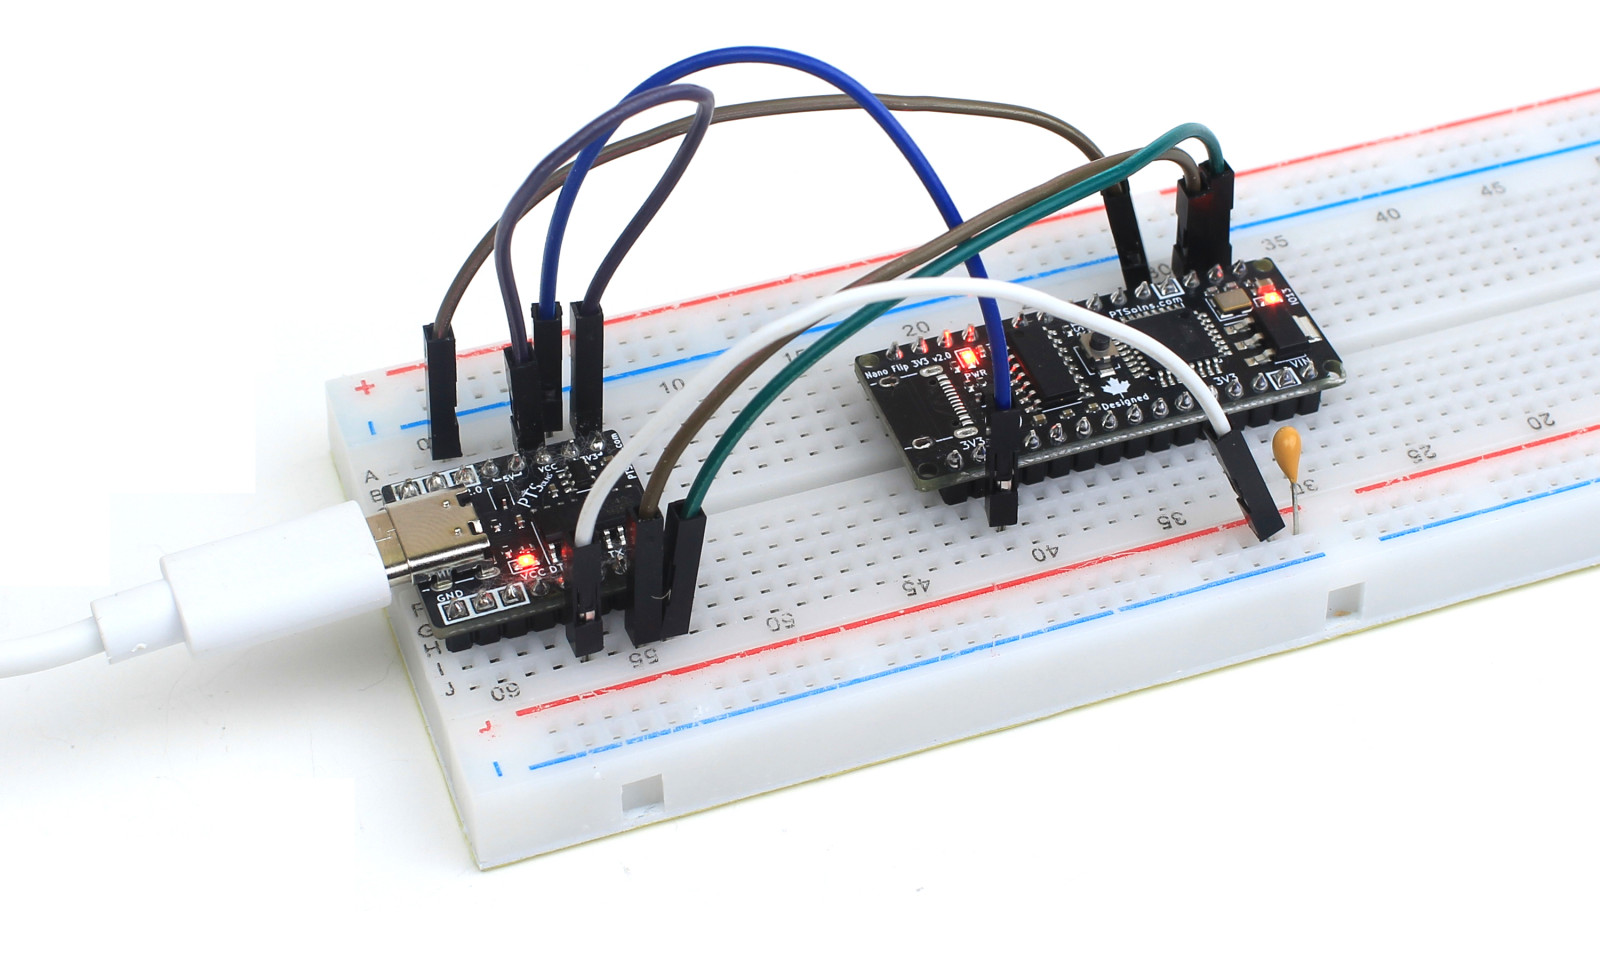
Connections Particular to the Nano Flip 3V3
In this blog we are dealing with the Nano Flip 3V3, which operates on 3.3V logic. Therefore, the first thing we must make sure is to change the jumper on the back. To make it easy, we just cut the trace on the jumper and then we will use an external wire on a breadboard to connect VCC to 3.3V. This way we can easily, and very quickly with a change of a single wire toggle between 5V and 3.3V by changing the connecting to VCC respectively.
For the Nano Flip 3V3, we need to make the following connections:
U2B <-> Nano Flip 3V3
GND to GND
VCC to 3.3V pin
Rx to Tx
Tx to Rx
[optional] DTR to 0.1uF capacitor to Reset pin
Some important notes:
Note 1: Tx is always on Rx, and Rx always on Tx. If there are problems when trying to upload a code, check that this connection is correct.
Note 2: The optional pin DTR is a nice-to-have. If you have a 0.1uF capacitor kicking around, then go ahead and put it in series between DTR and the Reset pin. This allows for automatic reset during the upload process. If you don't do this, you'll have to manually press the RST button right at the time when the sketch is being uploaded.
Note 3: Make sure that if you are using Arduino IDE to select the board "Arduino Pro or Pro Mini" and that the processor is set to 3.3V and 8MHz.
Below is an image of these connections as outlined above using the optional capacitor for automatic resetting.
Connections Examples for Other Boards
The table below outlines some more connection examples for other boards, including both 5V and 3.3V dev. boards.

For the ESP32 microWatt development board, the trigger sequence is as follows:
- Enter Boot mode
- Press and hold Boot button
- Single quick press RST button
- After 1 second, release Boot button
- Upload sketch
- Wait until this is fully completed
- Exit Boot mode
- Single quick press RST button
Conclusion
A broken USB port doesn’t have to send your development board to the scrap pile. With a USB-UART Bridge, you can bring it back to life and keep programming without hassle. Better yet, this tool isn’t just for repairs; it also works perfectly with boards that never had a USB port at all, like the Pro Mini. Thanks to its flexibility in switching between 5V and 3.3V operation, the U2B is a versatile solution that belongs in every maker’s toolkit.
Resources
PTSolns Documentation Repository: https://docs.ptsolns.com
PTSolns Website: https://ptsolns.com
PTSolns Newsletter: http://eepurl.com/hnESjL