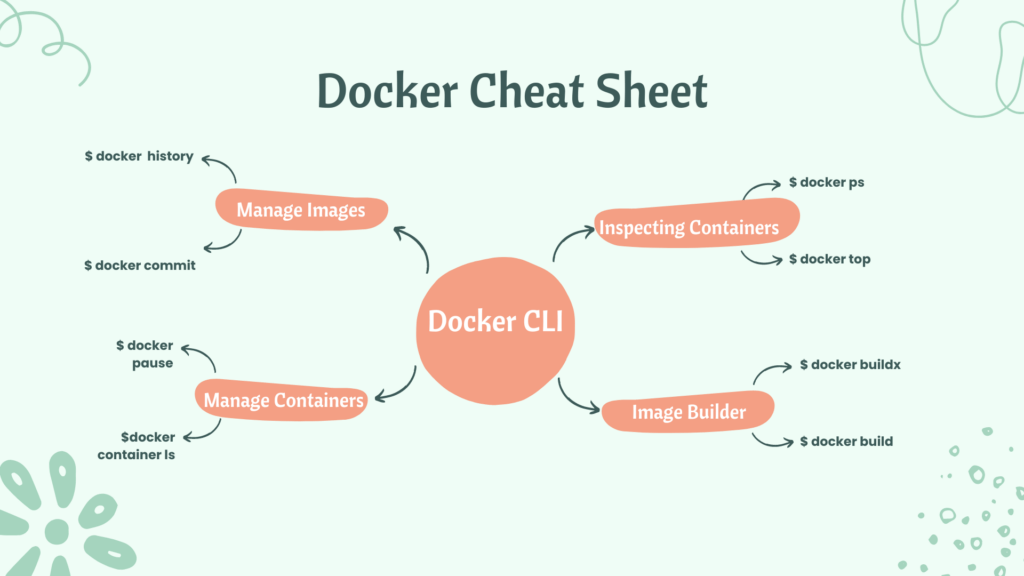
Essential Docker Cheatsheet for Quick Reference
A cheat-sheet is a concise summary of important information that is meant to be used as a quick reference. Cheat-sheets are often used in the form of a list or a table, and they typically cover a specific topic or subject area. In the context of Docker, a Docker cheat-sheet is a summary of commonly used Docker commands and their options, as well as other useful information related to Docker.
Cheat-sheets can be particularly helpful when learning a new tool or technology, as they provide a convenient way to quickly look up and remind oneself of key concepts and commands. They can also be useful for experienced users who need to recall a specific command or option but may not remember all the details.
Table of Contents
- Categories
- 🧑🤝🧑 Contributors
- 💬 Support and Community
- 👉 References
Basic Docker CLIs
| Command | Description |
|---|---|
docker run | Run a command in a new container |
docker build | Build an image from a Dockerfile |
docker push | Push an image to a registry |
docker pull | Pull an image from a registry |
docker stop | Stop a running container |
docker rm | Remove one or more containers |
Container Management CLIs
| Command | Description |
|---|---|
docker create image[command]docker run image[command] | create the container |
docker start container... docker stop container... docker kill container... docker restart container... | start the container |
docker pause container...docker unpause container... | Suspend the container Resume the container |
docker wait container... | Block until one or more containers stop, then print their exit codes |
docker top container... | Display the running processes of a container |
docker rm[-f3] | destroy the container |
_____________________________________________________________________________________
2send SIGTERM to the main process + SIGKILL 10 seconds later
3-f allows removing running containers (=docker kill + docker rm)
Let’s break down each of these commands and provide examples for better understanding.
- Create a Container from an Image using
docker run:
Before you can execute commands inside a container, you typically need to create a container from an image. This is usually done using the docker run command. Here’s a basic example:
docker run -d --name my_container_name my_image:tagReplace my_container_name with the desired name for your container, my_image:tag with the name and tag of the Docker image you want to use.
- Execute Commands in a Running Container using
docker exec:
You can execute commands in a running container using the docker exec command. The syntax is as follows:
docker exec [options] CONTAINER COMMANDHere’s an example:
docker exec -it my_container_name ls /appThis would execute the ls /app command inside the container named my_container_name.
- Start a Stopped Container using
docker start:
If you have a stopped container, you can start it again using the docker start command. Here’s an example:
docker start my_container_nameThis will start the container named my_container_name.
- Stop a Running Container using
docker stop:
You can stop a running container using the docker stop command. Here’s an example:
docker stop my_container_nameThis will gracefully stop the container named my_container_name.
Remember that you need to replace my_container_name with the actual name of your container. Additionally, you can add flags like -i (interactive) and -t (tty) to the docker exec command to make the interaction more user-friendly, especially when running commands that require user input.
For more advanced usage and options, you can refer to the official Docker documentation:
Inspecting The Container
Here’s the list of the basic Docker commands that helps you inspect the containers seamlessly:
| Command | Description |
|---|---|
docker ps | list running container |
docker ps -a | list all containers |
docker logs [-f6] container | Show the container output(stdout+stderr) |
docker diff container | Show the differences with the image (modified files) |
docker top container... | Display the running processes of a container |
docker inspect --format | Inspect a container and extract specific information using |
Interacting with Container
Do you want to know how to access the containers?Check out this fundamental command below
| Command | Description |
|---|---|
docker attach container | attach to a running container(stdin/stdout/stderr) |
docker cp container:path hostpath|docker cp hostpath| - container: path | copy files from the containercopy files into the container |
docker export container | export the content of the container (tar archive) |
docker exec container args ... | run a command in an existing container (useful for debugging) |
docker wait container... | wait until the container terminates and return the exit code |
docker commit | commit a new docker image (snapshot of the image) |
Image Management Commands
Docker provides a set of commands to manage Docker images efficiently. Here is a list of some important Docker image management commands:
| Command | Description |
|---|---|
docker images | list all local images |
docker history imagedocker inspect image... | show the image history(list of ancestors)show level-info's(in json format) |
docker tag image tag | tag an image |
docker commit container image | |
docker import url| -[tag] | Create an image(from a tarball) |
docker rmi . | delete images |
Image Transfer Commands
To transfer Docker images between different environments or systems, you have a few options. Here are some commonly used methods to transfer Docker images:
| Using the registry API | Description |
|---|---|
docker push | push an image /repository from a registry |
docker pull repo[:tag].. | pull an image /repository from a registry |
docker search text | search an image on the official registry |
docker login... | |
docker logout... | logout from a registry |
docker export <container_id> >image.tar | exporting: You can export a Docker image as a tarball file using the |
docker import | importing: On the target system, you can import the Docker image from the tarball using the |
| Manual Transfer | Description |
|---|---|
docker save repo| [:tag]... | export an image/repo as a tarball |
docker load | load images from a tarball |
docker-ssh10 | proposed script to transfer images between two daemons over ssh |
Builder Main Commands
Want to know how to build Docker Image? Do check out the list of image commands below:
| Command | Description |
|---|---|
FROM image|scratch | base image for the build |
MAINTAINER email | name of the maintainer(metadata). |
COPY path dst | copy path from the context into the container at location destination(dst) |
ADD src dst | same as COPY but untar archives and accepts https urls |
RUN args.. | run an arbitrary command inside the container |
USER | set the default username |
WORKDIR | set the default working directory |
CMD args.. | set the default command |
ENV | set an environment variable |
In Docker, the “builder pattern” is a technique used to create optimized and efficient Docker images by separating the build environment from the runtime environment. It involves using a multi-stage build process, where one stage is used for building the application, and another stage is used to package the application for runtime. This pattern helps to reduce the size of the final Docker image and ensures that only the necessary runtime dependencies are included.
Here are the main commands used in the builder pattern in Docker:
- FROM: The
FROMinstruction specifies the base image for the build stage. It sets up the build environment and contains all the tools and dependencies needed for building the application.
FROM base_image_for_building AS build_stage- RUN: The
RUNinstruction executes commands inside the build stage container. It is used to install dependencies, compile code, or perform any other build-related tasks.
RUN apt-get update && apt-get install -y build-essential RUN npm install RUN go build -o my_app- COPY/ADD: The
COPYorADDinstruction is used to copy files from the local directory (context) into the build stage container.
COPY . /app- WORKDIR: The
WORKDIRinstruction sets the working directory inside the build stage container where subsequent commands will be executed.
WORKDIR /app- FROM (second stage): After the build stage is complete, you use another
FROMinstruction to start a new stage for the runtime environment. This new stage starts from a smaller base image, typically one containing only the necessary runtime dependencies.
FROM base_image_for_runtime AS runtime_stage- COPY –from: The
COPY --frominstruction copies files from the build stage container to the runtime stage container.
COPY --from=build_stage /app/my_app /app/my_app- CMD/ENTRYPOINT: The
CMDorENTRYPOINTinstruction specifies the default command or entry point to run when the container starts. It is used in the runtime stage to define the application that should be executed when the container runs.
CMD ["/app/my_app"]Here’s a complete example of a multi-stage Dockerfile using the builder pattern:
# Build stage FROM golang:1.16 AS build_stage WORKDIR /app COPY . . RUN go build -o my_app # Runtime stage FROM alpine:latest AS runtime_stage WORKDIR /app COPY --from=build_stage /app/my_app /app/my_app CMD ["/app/my_app"]In this example, the first stage uses the Go programming language image as the base image for building the application, compiles the Go code, and generates the my_app executable. In the second stage, the Alpine Linux image is used as the base image for the runtime, and the my_app binary is copied from the first stage. The final image will only include the compiled my_app binary and not the entire build environment, resulting in a smaller and more optimized image for runtime.
The Docker CLI
A brief description of some essential Docker CLI commands related to image management and container operations are seen below. Below, I’ve expanded on the descriptions of each command:
- Docker build:
docker build [options] -t "app/container_name" .This command is used to create a Docker image from a Dockerfile, which is a text file containing instructions to define the image. The -t option is used to specify a tag or name for the built image. The . at the end of the command refers to the build context, i.e., the current directory where the Dockerfile is located.
- Docker run:
docker run [options] IMAGEThis command is used to run a command or application in a Docker container based on the specified IMAGE. It creates a new container from the image and executes the default command specified in the image, or any command provided as arguments to the docker run command. This is one of the primary ways to start a container.
- Docker create:
docker create [options] IMAGEThe docker create command creates a new container from the specified IMAGE, but it does not start the container. It prepares the container to be started using the docker start command. You can use this command to create a container and then start it later.
- Manage images:
Docker provides several commands to manage images:
docker images: Lists all Docker images available on your system.docker pull: Downloads Docker images from a registry.docker push: Pushes Docker images to a registry (e.g., Docker Hub) for sharing with others.docker rmi: Removes Docker images from your system.
- Manage containers:
Docker provides several commands to manage containers:
docker ps: Lists all running containers.docker ps -a: Lists all containers (including stopped ones).docker start: Starts one or more stopped containers.docker stop: Stops one or more running containers.docker restart: Stops and then starts a container.docker rm: Removes one or more containers (use with caution).
These commands are just the basics of working with Docker images and containers. Docker provides a rich set of commands and options to interact with containers, networks, volumes, and more. You can always explore the official Docker documentation for more in-depth information on each command and its options.
To run a command in a Docker container using the docker create command, you first need to create a container from an image. The docker create command creates a container but does not start it. It returns a container ID that you can use to manage the container.
Here’s the basic syntax of the docker create command:
docker create [options] IMAGE [COMMAND] [ARG...]Let’s break down the options:
-a,--attach: Attach STDOUT/STDERR and forward signals.-i,--interactive: Keep STDIN open even if not attached.--name NAME: Assign a name to the container.-p,--publish 5000:5000: Publish a container’s port to the host. In this example, port 5000 from the container will be mapped to port 5000 on the host.--expose 5432: Expose a port internally to linked containers. This does not publish the port to the host machine.-P,--publish-all: Publish all exposed ports to the host.--link container:alias: Link the container to another container with an optional alias.-v,--volume 'pwd:/app: Mount a host directory into the container. In this example, the current working directory is mounted to the/appdirectory in the container.-e,--env NAME=hello: Set an environment variable inside the container.
Here’s an example of using the docker create command:
docker create -a -i --name my_container -p 5000:5000 --expose 5432 -P --link db_container:db_alias -v "$(pwd):/app" -e NAME=hello my_image-a -i: Attach STDOUT/STDERR and keep STDIN open for an interactive session.--name my_container: Assign the name “my_container” to the created container.-p 5000:5000: Publish port 5000 from the container to port 5000 on the host.--expose 5432: Expose port 5432 internally for linking to other containers.-P: Publish all exposed ports to the host.--link db_container:db_alias: Link the container to another container named “db_container” with the alias “db_alias”.-v "$(pwd):/app": Mount the current working directory on the host into the “/app” directory in the container.-e NAME=hello: Set an environment variable “NAME” with the value “hello” inside the container.my_image: The name of the Docker image from which to create the container.
Please note that some of the options like --link are deprecated in recent versions of Docker, and it’s recommended to use user-defined networks for container communication instead.:
| Variable Name | Value | |-------------- | ------- | | VAR1 | value1 | | VAR2 | value2 | | VAR3 | value3 |Replace VAR1, VAR2, and VAR3 with the actual names of your environment variables, and value1, value2, and value3 with their respective values.
Remember, to execute the docker create command, you must have Docker installed and running on your system.
Docker Compose
Basic Example
version: '2' services: web: build: context: ./Path dockerfile: Dockerfile ports: - "5000:5000" volumes: - .:/code redis: image: redisIn this configuration:
- The
webservice is defined, which will build an image using the Dockerfile located in the./Pathdirectory. It exposes port 5000 from the container to port 5000 on the host and mounts the current directory (.) to/codeinside the container. - The
redisservice is defined, which uses the official Redis image from Docker Hub.
Please ensure that you replace ./Path with the actual path to your Dockerfile and update any other placeholders with your specific project details. Make sure the indentation is correct as YAML is indentation-sensitive.
References
- Building Images:
To build images using Docker Compose, you can specify the build section within a service definition. You can build from a Dockerfile in a directory (context) and specify a custom Dockerfile if needed. Alternatively, you can directly use an existing image.
version: '3' services: web: build: context: ./dir dockerfile: Dockerfile.dev image: my-custom-image:tag database: image: postgres:latestIn this example, the web service is built using a custom Dockerfile located in the ./dir directory. The resulting image is then tagged as my-custom-image:tag. The database service uses an existing postgres image.
- Exposing Ports:
To expose ports from containers to the host machine, you can use the ports section within a service definition. You can specify both the guest (container) port and the host port.
version: '3' services: app: image: my-app-image:latest ports: - "3000" - "8000:80"#Expose port to linked service (not to host) Expose :["3000"]In this example, the app service exposes port 3000 from the container to a random port on the host. It also maps port 80 from the container to port 8000 on the host.
Please note that these examples are meant to illustrate the structure and syntax of Docker Compose configurations. Make sure to replace my-custom-image:tag and my-app-image:latest with the actual image names you intend to use.
Remember that proper YAML indentation is crucial in Docker Compose files.
Advanced Features
- Labels:
Labels allow you to attach metadata to your Docker services, containers, and other objects. Here’s how you can define labels in a Docker Compose YAML file:
version: '3' services: web: image: my_web_app_image labels: com.example.description: "Accounting web app"In this example, the web service is assigned a label com.example.description with the value "Accounting web app".
- DNS Servers:
You can configure DNS servers for your services using the dns option. Here’s how you can define DNS servers in a Docker Compose YAML file:
version: '3' services: web: image: my_web_app_image dns: - 8.8.8.8 - 8.8.4.4In this example, the web service is configured to use the Google DNS servers (8.8.8.8 and 8.8.4.4).
- Devices:
You can assign devices to a service using the devices option. Here’s how you can define devices in a Docker Compose YAML file:
version: '3' services: web: image: my_web_app_image devices: - "/dev/ttyUSBO:/dev/ttyUSBO"In this example, the web service is assigned the device /dev/ttyUSBO from the host, and it will be available at the same path inside the container.
Remember to replace my_web_app_image with the actual image name you’re using.
Make sure to save these configurations in a .yml file (e.g., docker-compose.yml) and use the docker-compose command to manage your services:
docker-compose up -d # to start your services docker-compose down # to stop and remove your servicesPlease note that YAML indentation is crucial. Be sure to maintain proper indentation levels as shown in the examples.
Docker Services
- To view a list of all the services running in the swarm:
docker service ls- To see all running services in a Docker stack:
docker stack services STACK_NAME- To see the logs of a specific service in a Docker stack:
docker service logs STACK_NAME_SERVICE_NAME- To scale a service quickly across qualified nodes in a Docker stack:
docker service scale STACK_NAME_SERVICE_NAME=REPLICASReplace STACK_NAME, SERVICE_NAME, and REPLICAS with the actual names of the Docker stack, service, and the desired number of replicas, respectively.
Please note that the command for viewing logs (docker service logs) requires both the stack name and the service name as arguments. The scaling command (docker service scale) should be used when you want to adjust the number of replicas (instances) of a specific service within a Docker swarm.
Docker Clean
- To clean or prune unused (dangling) images:
docker image prune- To remove all images which are not in use containers (including dangling images):
docker image prune -a- To prune your entire system (including unused images, containers, networks, and volumes):
docker system prune- To leave a Docker swarm (if you are a node in a swarm):
docker swarm leave- To remove a Docker swarm (delete all services and volumes related to the stack):
docker stack rm STACK_NAME- To kill all running containers:
docker kill $(docker ps -q)Note: The “docker swarm leave” command should be executed on a worker or manager node within the swarm. The “docker stack rm” command is used to remove a Docker stack (services) from a swarm cluster. Also, be cautious while using the “docker system prune” command, as it will remove all unused data (images, containers, networks, and volumes) from your system, and the operation cannot be undone. Always review what will be pruned before confirming the action.
Docker Security (Scout,SBOM)
The provided commands are part of a tool called “Docker Scout” used to analyze software artifacts, especially Docker images, for vulnerabilities. Below is a description of each command:
- Display vulnerabilities from a Docker save tarball:
This command analyzes vulnerabilities in a Docker image saved as a tarball.
docker scout cves [OPTIONS] IMAGE | DIRECTORY | ARCHIVEExample usage:
docker scout cves redis.tar- Display vulnerabilities from an OCI directory:
This command analyzes vulnerabilities in a Docker image stored in an OCI (Open Container Initiative) directory.
skopeo copy --override-os linux docker://alpine oci:redisNote: Skopeo is a tool for working with container images and can be used to copy an image from one location to another.
- Export vulnerabilities to a SARIF JSON file:
This command exports vulnerabilities detected in a Docker image to a SARIF (Static Analysis Results Interchange Format) JSON file.
docker scout cves --format sarif --output redis.sarif.json redisThe above command generates a SARIF JSON file named redis.sarif.json containing the vulnerabilities found in the redis Docker image.
- Comparing two images:
This command compares two Docker images to identify any differences in vulnerabilities between them.
docker scout compare --to redis:6.0 redis:6-bullseyeThe above command compares the vulnerabilities in the redis:6.0 and redis:6-bullseye Docker images.
- Displaying the Quick Overview of an Image:
This command provides a quick overview of the vulnerabilities in a Docker image.
docker scout quickview redis:6.0The above command displays a summary of vulnerabilities found in the redis:6.0 Docker image.
Please note that the commands provided assume you have the “Docker Scout” tool installed and properly configured. The tool may not be a standard Docker command, so you may need to install it separately. Additionally, the options and capabilities of the tool might change over time, so it’s always a good idea to refer to the tool’s documentation for the most up-to-date information.:
🔒 Docker Scout Advanced Commands
Docker Scout is a comprehensive security solution that enhances your software supply chain security by analyzing container images for vulnerabilities, creating Software Bill of Materials (SBOM), and providing actionable remediation guidance.
Core Security Analysis Commands
| Command | Description |
|---|---|
docker scout cves IMAGE | Analyze vulnerabilities in an image |
docker scout cves --only-severity critical,high IMAGE | Show only critical and high severity CVEs |
docker scout cves --only-package PACKAGE_NAME IMAGE | Filter vulnerabilities by specific package |
docker scout cves --format sarif --output report.sarif.json IMAGE | Export vulnerabilities to SARIF JSON format |
docker scout cves --format json --output report.json IMAGE | Export vulnerabilities to JSON format |
Image Comparison and Analysis
| Command | Description |
|---|---|
docker scout compare --to IMAGE1 IMAGE2 | Compare vulnerabilities between two images |
docker scout quickview IMAGE | Get quick overview of image vulnerabilities |
docker scout sbom IMAGE | Generate Software Bill of Materials (SBOM) |
docker scout sbom --format json --output sbom.json IMAGE | Export SBOM to JSON format |
Policy and Compliance Commands
| Command | Description |
|---|---|
docker scout config organization ORG_NAME | Configure Docker organization for policy evaluation |
docker scout quickview --org ORG_NAME IMAGE | Evaluate image against organization policies |
docker scout policy IMAGE | Check image compliance against policies |
docker scout push IMAGE | Push image and trigger Scout analysis |
Advanced Scout Operations
| Command | Description |
|---|---|
docker scout repo enable --org ORG_NAME REPO_NAME | Enable Scout for repository |
docker scout repo list | List Scout-enabled repositories |
docker scout enroll ORG_NAME | Enroll organization with Docker Scout |
docker scout cves --exit-code | Exit with non-zero code if vulnerabilities found |
Scout in CI/CD Pipelines
# GitHub Actions Example - name: Run Docker Scout run: | docker scout cves $IMAGE_NAME --exit-code --only-severity critical,high # Azure DevOps Pipeline - task: CmdLine@2 displayName: 'Docker Scout Security Scan' inputs: script: | docker scout cves $(image):$(tag) --exit-code --only-severity critical,high 🧠 Docker Model Runner Commands
Docker Model Runner makes AI model execution as simple as running a container, providing local LLM inference with GPU acceleration and seamless Docker integration.
Basic Model Operations
| Command | Description |
|---|---|
docker model pull MODEL_NAME | Download a model from Docker Hub |
docker model list | List all available models |
docker model ls | List downloaded/cached models |
docker model run MODEL_NAME "prompt" | Run inference with a model |
docker model rm MODEL_NAME | Remove a downloaded model |
docker model status | Check Model Runner status |
docker model version | Show Model Runner version |
Popular Models Available
| Model | Image | Size | Description |
|---|---|---|---|
| SmolLM2 | ai/smollm2:360M-Q4_K_M | 360M | Small, efficient model for on-device use |
| SmolLM2 | ai/smollm2:1.7B-Q4_K_M | 1.7B | Balanced performance and efficiency |
| Llama 3.3 | ai/llama3.3:70B-Q4_K_M | 70B | Large, high-performance model |
| Gemma 3 | ai/gemma3:9B-Q4_K_M | 9B | Google’s efficient language model |
| Qwen | ai/qwen2.5:7B-Q4_K_M | 7B | Alibaba’s multilingual model |
Model Inference Examples
# Pull and run a small model docker model pull ai/smollm2:360M-Q4_K_M docker model run ai/smollm2:360M-Q4_K_M "Explain Docker containers" # Use larger model for complex tasks docker model pull ai/llama3.3:70B-Q4_K_M docker model run ai/llama3.3:70B-Q4_K_M "Write a Python function to sort a list" # Run model with JSON output docker model run ai/gemma3:9B-Q4_K_M "Generate a JSON object with user data" OpenAI-Compatible API Usage
Docker Model Runner provides an OpenAI-compatible API endpoint for seamless integration:
# Enable TCP access (for host applications) docker desktop enable model-runner --tcp 12434 # API endpoint for containers # http://model-runner.docker.internal/engines/v1 # API endpoint for host (when TCP enabled) # http://localhost:12434/engines/llama.cpp/v1 API Integration Examples
# cURL example curl http://localhost:12434/engines/llama.cpp/v1/chat/completions \ -H "Content-Type: application/json" \ -d '{ "model": "ai/smollm2", "messages": [ {"role": "system", "content": "You are a helpful assistant."}, {"role": "user", "content": "What is Docker?"} ] }' Docker Compose Integration
# docker-compose.yml version: '3.8' services: my-app: build: . environment: - MY_MODEL_URL=http://model-runner.docker.internal/engines/v1 - MY_MODEL_MODEL=ai/smollm2 depends_on: - my-model my-model: image: ai/smollm2:360M-Q4_K_M x-model-runner: true Model Management Commands
| Command | Description |
|---|---|
docker model inspect MODEL_NAME | View model details and metadata |
docker model history MODEL_NAME | Show model layers and build history |
docker model tag MODEL_NAME NEW_TAG | Tag a model with new name |
docker model push MODEL_NAME | Push custom model to registry |
Custom Model Creation
# Dockerfile for custom model FROM scratch COPY model.gguf /model.gguf LABEL org.docker.model.format="gguf" LABEL org.docker.model.name="my-custom-model" LABEL org.docker.model.version="1.0" # Build and package custom model docker build -t my-org/custom-model:v1 . docker model push my-org/custom-model:v1 Performance Optimization
| Configuration | Description |
|---|---|
| GPU Acceleration | Automatic on Apple Silicon, configurable on Windows/NVIDIA |
| Memory Management | Models cached for 5 minutes after last use |
| Host Execution | Models run directly on host for optimal performance |
| Model Quantization | GGUF format provides optimized model sizes |
Development Workflow Commands
# Development cycle example docker model pull ai/smollm2:360M-Q4_K_M # Download model docker model run ai/smollm2 "test prompt" # Test inference docker model ls # Check loaded models docker model status # Verify runner status # Integration testing docker compose up # Start application with model docker model logs # Check model runner logs docker compose down # Clean up Model Runner with Testcontainers
// Java example with Testcontainers @Container static GenericContainer<?> modelRunner = new GenericContainer<>("ai/smollm2:360M-Q4_K_M") .withExposedPorts(8080) .withLabel("model-runner", "true"); 🤖 Docker MCP (Model Context Protocol) Commands
Model Context Protocol (MCP) is an open standard that enables AI assistants to securely connect with external data sources and tools. Docker provides comprehensive MCP support through containerized servers and integrated tooling.
Docker MCP Toolkit CLI Commands
| Command | Description |
|---|---|
docker mcp server --help | Show MCP server management help |
docker mcp server list | List all available MCP servers |
docker mcp server list --json | List servers in JSON format |
docker mcp server inspect SERVER_NAME | Get detailed information about a server |
docker mcp server enable SERVER_NAME | Enable a specific MCP server |
docker mcp server disable SERVER_NAME | Disable a specific MCP server |
docker mcp server reset | Disable all servers |
MCP Tools Management
| Command | Description |
|---|---|
docker mcp tools call --help | Show tools calling help |
docker mcp tools call TOOL_NAME [args...] | Execute a specific MCP tool |
Troubleshooting Commands
| Command | Description |
|---|---|
docker model status | Check if Model Runner is operational |
docker system df | Check disk usage (models can be large) |
docker model ls --format table | Detailed view of cached models |
docker desktop diagnose | Generate diagnostic information |
Best Practices
- Resource Management: Monitor system resources as models can consume significant RAM/GPU memory
- Model Selection: Choose appropriate model size for your hardware capabilities
- Caching Strategy: Frequently used models stay cached longer
- Security: Only pull models from trusted sources (Docker Hub ai/ namespace)
- Version Control: Pin model versions in production environments
Security-First Development Workflow
# 1. Scout analysis during build docker build -t myapp:latest . docker scout cves myapp:latest --exit-code --only-severity critical,high # 2. Run application with MCP capabilities docker compose -f ai-app-stack.yml up -d # 3. Interact with AI agent docker ai "Analyze recent GitHub commits and check database status" # 4. Monitor and cleanup docker model status docker scout quickview myapp:latest docker compose down 📚 Additional Resources
Docker Scout Resources
Docker MCP Resources
Docker Model Runner Resources
Contributors
Join our vibrant community of 8000+ DevOps engineers, including Docker Captain Ajeet Raina. Collaborate and contribute to empower cloud-native education and innovation.
Support and Community
Support & Community: Engage with Collabnix on various platforms. Access community-contributed blogs, stay updated with announcements, connect on slack , Twitter, Dev, and chat on Discord.
References
Discover a wealth of hands-on labs, tutorials, and curated lists here . Explore DockerLabs, KubeLabs, Kubetools, DockerTools, and more. Enhance your DevOps and cloud-native skills.
Contributing to Collabnix
If you’re excited about cloud-native technologies and have a passion for sharing your knowledge, we welcome you to contribute to Collabnix. Whether you’re a seasoned pro or just starting your journey, our community provides a nurturing environment for collaboration and growth.
Get in Touch!
Docker Captain Ajeet Raina is here to guide you through the Collabnix experience. And don’t forget to explore collabnix.com to embark on a journey of learning and innovation.
Join me and the entire Collabnix community as we explore the fascinating world of DevOps, Cloud-Native, AI, and beyond. Let’s empower each other, one cloud-native step at a time.
Cheers to the exciting journey ahead! 🚀🌟👨💻