Close
0%
0%

OpenMote: Arduino-Compatible Controller for Makers

Transform Your Old Wii Remotes into a Versatile Tool for Home Automation, Gaming, and DIY Projects

Public Chat
Similar projects worth following
Hack the world with a wii-remote: https://www.crowdsupply.com/hat-and-hammer/openmote The OpenMote is an Arduino-compatible, Wi-Fi and Bluetooth enabled development board that turns your nostalgic game controller shell into a powerhouse of innovation. Designed to make interacting with projects more exciting and fun OpenMote gives you a new way to control and hack your digital world!

Check out the Campaign: https://openmote.io

Old game controllers lying around? Tired of screens taking over? Bring back the glory days of buttons and fun interaction with OpenMote. Designed to be a drop in replacement for your most nostalgic game controller OpenMote empowers you to program and develop a controller for any project you can dream of.

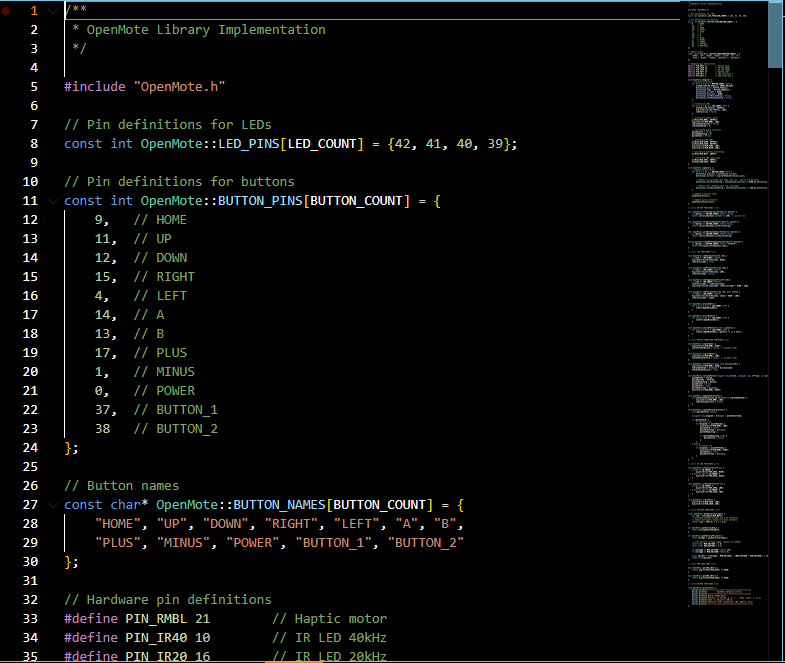
Powered with the popular ESP32-S3 Platform it's armed to the tooth with connectivity solutions and computing. Plus all the old sensors and buttons from your old controllers.

- Bluetooth

- Wifi

- 6 axis IMU

- Haptic Motor

- Speaker

- 12 programmable buttons

- 4 RBG LEDs

- IR LEDs

- Built in battery Charging

- USB-C for Programming and Charging

- Open GPIO to expand to your hearts content

OpenMote brings the joy and excitement back into controlling projects and is a fun way to show off what your working on to your non-technical friends!

  • 1 × ESP32-S3 WiFi Bluetooth MCU for programming and control

  • Wii remote as a TV remote!

    Gangwa Labsa day ago 0 comments

    Welcome back Hackers!

    I have finally completed a big goal and test that I set out way back when this project was simply just an idea: What if you could use a wii remote to control your TV? A pretty simple idea in concept and a pretty silly one at that.

    Turns out smart TVs while being smart can also be a propriety pain in the behind. For example, the FireTV that I have doesn't actually communicate with the TV only over IR! In fact it communicates through bluetooth! and uses the IR as a backup. This is good and bad for OpenMote. 

    It's good because writing a sketch to turn openmote into a bluetooth keyboard is SUPER easy. It Does mean however that I need to bust out the IR receiver to borrow the NEC IR code from the stock remote to use it to power on my TV. 


    All that to say, I am the proud owner of a WII remote that acts as a tv remote, connects via Bluetooth (meaning you don't actually need to point the remote at the TV to get the signals to send) and it can even turn the TV on or off a pretty important feature of a remote. Even better is that you can turn up and down the volume, do pretty much anything the old remote could do.

    I'm pretty proud of this update as it's proved a vitally important feature of OpenMote is feasible beyond just theory but in practice it works.


    As usual I've attached the code below, be mindful that it might not work with your TV and could require some reworking. Also huge shout out to the wonderful humans that wrote the OMOTE-Firmware as I used a heavy amount of inspiration and their code to get this working on my TV.

    See you next week :)

    Read more »

  • OpenMote Working as a Spotify Controller

    Gangwa Labs10/28/2025 at 03:15 0 comments

    Hello Again!

    I've been hard at work posting daily TikToks showing off the different capabilities of openmote, one of the best features that I personally love is as a media controller.

    The ability to pull out your phone and skip, pause, even change the volume all with a wii-remote is the funniest and most head turning thing I can think of. The applications and devices that it works with is kinda shocking.

    - In the car, even with carplay you can pause, skip

    - a smartphone

    - wearing headphones

    - a computer

    Check out my Tiktoks @Bird.Builds and see what I'm building, I've attached the Bluetooth media controller code for anyone interested.

    Learn more about this project and subscribe for updates when the campaign goes live: openmote.io

    /* * OpenMote BLE Media Controller * * Turn your OpenMote into a Bluetooth media remote control! * Control music playback and volume on any Bluetooth device. * * Controls: * - Plus Button → Volume Up * - Minus Button → Volume Down * - D-Pad Left → Previous Track * - D-Pad Right → Next Track * - A Button → Play/Pause Toggle * * Features: * - BLE HID Consumer Control (works with phones, tablets, computers) * - LED feedback for button presses * - Haptic feedback on actions * - Connection status indicators */ #include <Arduino.h> #include <OpenMote.h> #include <NimBLEDevice.h> #include <NimBLEHIDDevice.h> // ===== DEBUG CONFIGURATION ===== #define DEBUG_SERIAL true // ===== MEDIA CONTROL KEY CODES (Consumer Page) ===== #define MEDIA_PLAY_PAUSE 0xCD #define MEDIA_NEXT_TRACK 0xB5 #define MEDIA_PREV_TRACK 0xB6 #define MEDIA_VOLUME_UP 0xE9 #define MEDIA_VOLUME_DOWN 0xEA #define MEDIA_MUTE 0xE2 // ===== DEBOUNCE SETTINGS ===== #define DEBOUNCE_DELAY_MS 50 #define VOLUME_REPEAT_DELAY 200 // Faster repeat for volume buttons // ===== GLOBAL OBJECTS ===== OpenMote mote; // BLE HID Device NimBLEHIDDevice* hid; NimBLECharacteristic* input; // ===== STATE VARIABLES ===== bool isConnected = false; // Button state tracking bool plusButtonPressed = false; bool minusButtonPressed = false; bool dpadLeftPressed = false; bool dpadRightPressed = false; bool aButtonPressed = false; unsigned long lastDebounceTime = 0; unsigned long lastVolumeRepeatTime = 0; // ===== HID REPORT DESCRIPTOR - CONSUMER CONTROL ONLY ===== // This descriptor defines a pure media controller (no keyboard functionality) const uint8_t hidReportDescriptor[] = { 0x05, 0x0C, // Usage Page (Consumer Devices) 0x09, 0x01, // Usage (Consumer Control) 0xA1, 0x01, // Collection (Application) 0x85, 0x01, // Report ID (1) 0x75, 0x10, // Report Size (16 bits) 0x95, 0x01, // Report Count (1) 0x15, 0x00, // Logical Minimum (0) 0x26, 0xFF, 0x07, // Logical Maximum (2047) 0x19, 0x00, // Usage Minimum (0) 0x2A, 0xFF, 0x07, // Usage Maximum (2047) 0x81, 0x00, // Input (Data, Array, Absolute) 0xC0 // End Collection }; // ===== CONSUMER CONTROL REPORT STRUCTURE ===== typedef struct { uint16_t usage; // 16-bit consumer control usage code } ConsumerReport; ConsumerReport consumerReport = {0}; // ===== BLE SERVER CALLBACKS ===== class ServerCallbacks: public NimBLEServerCallbacks { void onConnect(NimBLEServer* pServer) { isConnected = true; #if DEBUG_SERIAL Serial.println(">>> BLE Device Connected!"); #endif // Visual feedback: Quick LED flash mote.turnOnAllLEDs(); delay(100); mote.turnOffAllLEDs(); mote.rumblePulse(100); } void onDisconnect(NimBLEServer* pServer) { isConnected = false; #if DEBUG_SERIAL Serial.println(">>> BLE Device Disconnected!"); #endif // Restart advertising NimBLEDevice::startAdvertising(); // Visual feedback: Slow blink mote.blinkAllLEDs(300); } }; // ===== MEDIA CONTROL FUNCTIONS ===== // Send a consumer control command (press and release) void sendMediaKey(uint16_t keyCode) { if (!isConnected) return; // Press key consumerReport.usage = keyCode; input->setValue((uint8_t*)&consumerReport, sizeof(consumerReport)); input->notify(); delay(50); // Release key consumerReport.usage...
    Read more »

  • BLE keyboard for computer gaming

    Gangwa Labs10/13/2025 at 19:36 0 comments

    Greetings! As promised today I'm going to be talking about turning OpenMote into a BLE keyboard for computer control!

    For some low level gaming and simple keystroke replacement this project log is all you need to know! Today I configured OpenMote to play the Dino game and pacman on my computer wirelessly! 

    I'm hoping to get some more complex and complicated gaming controller connections -- think dolphin -- in the next couple of weeks!

    If you're looking for a fun and silly way to connect and control your computer with a wii-remote then look no further than the code I provide today. I tried getting it to work with a couple other BLE libraries and found the NimBLE was easily the best one as it worked first time out of the box.

    Enjoy and stay fun!

    #include <Arduino.h> #include <NimBLEDevice.h> #include <NimBLEHIDDevice.h> // Pin definitions based on your custom board #define A_BUTT 14 #define UP_BUTT 11 #define DOWN_BUTT 12 #define LEFT_BUTT 4 #define RIGHT_BUTT 15 // BLE HID Keyboard NimBLEHIDDevice* hid; NimBLECharacteristic* input; NimBLECharacteristic* output; // Button state variables bool aButtonPressed = false; bool upButtonPressed = false; bool downButtonPressed = false; bool leftButtonPressed = false; bool rightButtonPressed = false; unsigned long lastDebounceTime = 0; const unsigned long debounceDelay = 50; // Status tracking unsigned long lastStatusTime = 0; const unsigned long statusInterval = 5000; bool isConnected = false; // HID Report Descriptor for Keyboard const uint8_t hidReportDescriptor[] = { 0x05, 0x01, // Usage Page (Generic Desktop) 0x09, 0x06, // Usage (Keyboard) 0xA1, 0x01, // Collection (Application) 0x85, 0x01, // Report ID (1) 0x05, 0x07, // Usage Page (Key Codes) 0x19, 0xE0, // Usage Minimum (224) 0x29, 0xE7, // Usage Maximum (231) 0x15, 0x00, // Logical Minimum (0) 0x25, 0x01, // Logical Maximum (1) 0x75, 0x01, // Report Size (1) 0x95, 0x08, // Report Count (8) 0x81, 0x02, // Input (Data, Variable, Absolute) 0x95, 0x01, // Report Count (1) 0x75, 0x08, // Report Size (8) 0x81, 0x01, // Input (Constant) 0x95, 0x06, // Report Count (6) 0x75, 0x08, // Report Size (8) 0x15, 0x00, // Logical Minimum (0) 0x25, 0x65, // Logical Maximum (101) 0x05, 0x07, // Usage Page (Key Codes) 0x19, 0x00, // Usage Minimum (0) 0x29, 0x65, // Usage Maximum (101) 0x81, 0x00, // Input (Data, Array) 0xC0 // End Collection }; // Keyboard report structure typedef struct { uint8_t modifiers; uint8_t reserved; uint8_t keys[6]; } KeyReport; KeyReport keyReport = {0}; // BLE Server Callbacks class ServerCallbacks: public NimBLEServerCallbacks { void onConnect(NimBLEServer* pServer) { isConnected = true; Serial.println(">>> BLE Client Connected!"); } void onDisconnect(NimBLEServer* pServer) { isConnected = false; Serial.println(">>> BLE Client Disconnected!"); NimBLEDevice::startAdvertising(); } }; void sendKey(uint8_t key) { keyReport.keys[0] = key; input->setValue((uint8_t*)&keyReport, sizeof(keyReport)); input->notify(); delay(50); // Release keyReport.keys[0] = 0; input->setValue((uint8_t*)&keyReport, sizeof(keyReport)); input->notify(); } void setup() { // Initialize serial for debugging Serial.begin(115200); delay(1000); Serial.println("================================="); Serial.println("OpenMote NimBLE Keyboard Starting..."); Serial.println("================================="); // Configure button pins pinMode(A_BUTT, INPUT_PULLUP); pinMode(UP_BUTT, INPUT_PULLUP); pinMode(DOWN_BUTT, INPUT_PULLUP); pinMode(LEFT_BUTT, INPUT_PULLUP); pinMode(RIGHT_BUTT, INPUT_PULLUP); // Initialize NimBLE NimBLEDevice::init("OpenMote Controller"); // Create BLE Server NimBLEServer *pServer = NimBLEDevice::createServer(); pServer->setCallbacks(new ServerCallbacks()); // Create HID Device hid = new NimBLEHIDDevice(pServer); // Set HID parameters hid->manufacturer()->setValue("OpenMote"); hid->pnp(0x02, 0xe502, 0xa111, 0x0210); hid->hidInfo(0x00,...
    Read more »

  • OpenMote Is Compatible with Esphome & Home Assistant

    Gangwa Labs10/11/2025 at 04:57 0 comments

    Hello again hackers!

    I come bearing good news about the universal remote aspect of OpenMote! After 4 hours of bug fixing and chasing a corrupt platformio file I am happy to announce that OpenMote is fully compatible with Esphome and by extension Home assistant! I've provided a lovely gif showing the wireless and automation features of OpenMote!

    https://drive.google.com/file/d/1KpuRrlwi4Olt1J8T5HpseYAywZVrz9lH/view?usp=sharing (sorry for the link can't figure out how to attach a gif or webp...)

    In this demo OpenMote is Connecting to a home Wifi Network, sending MQTT calls to another esp32s3 and has full OTA (over the air updating) functionality.

    I'm quite proud of the universality of OpenMote and am excited to see what everyone is able to build and control with it!

    Tune in and follow this project as next update will be about Bluetooth keyboards and the possibilities that this opens up for OpenMote to control not just your computer but even your phone!?

    I've attached the YAML file for OpenMote and the Light in this post so check it out if you want to replicate my project, you'll just have to switch keys for your own configurations.

    esphome: name: light friendly_name: Light esp32: board: esp32-s3-devkitc-1 framework: type: arduino # Enable logging logger: # Enable Home Assistant API api: encryption: key: "" ota: - platform: esphome password: "" wifi: ssid: !secret wifi_ssid password: !secret wifi_password # Enable fallback hotspot (captive portal) in case wifi connection fails ap: ssid: "Light Fallback Hotspot" password: "" mqtt: broker: # 👈 MUST be your computer’s local IP port: 1883 discovery: false # Listen for commands from the remote on_message: # Toggle command for the A button - topic: light_strip/command/toggle then: - light.toggle: my_led_strip # Next Color command for Button 1 - topic: light_strip/command/color_up then: - lambda: |- static const std::vector<Color> colors = { Color(255, 0, 0), // Red Color(255, 165, 0), // Orange Color(255, 255, 0), // Yellow Color(0, 255, 0), // Green Color(0, 0, 255), // Blue Color(75, 0, 130), // Indigo Color(238, 130, 238),// Violet Color(255, 255, 255) // White }; id(color_index) = (id(color_index) + 1) % colors.size(); auto new_color = colors[id(color_index)]; auto call = id(my_led_strip).turn_on(); // ✅ CORRECTED LINE: Pass the R, G, and B components separately. call.set_rgb(new_color.r / 255.0f, new_color.g / 255.0f, new_color.b / 255.0f); call.perform(); # Previous Color command for Button 2 - topic: light_strip/command/color_down then: - lambda: |- static const std::vector<Color> colors = { Color(255, 0, 0), // Red Color(255, 165, 0), // Orange Color(255, 255, 0), // Yellow Color(0, 255, 0), // Green Color(0, 0, 255), // Blue Color(75, 0, 130), // Indigo Color(238, 130, 238),// Violet Color(255, 255, 255) // White }; id(color_index)--; if (id(color_index) < 0) { id(color_index) = colors.size() - 1; } auto new_color = colors[id(color_index)]; auto call = id(my_led_strip).turn_on(); // ✅ CORRECTED LINE: Pass the R, G, and B components separately. call.set_rgb(new_color.r / 255.0f, new_color.g / 255.0f, new_color.b / 255.0f); call.perform(); # A global variable to keep track of which color is currently selected globals: - id: color_index type: int restore_value: no initial_value: '0' # Define the LED strip light: - platform: fastled_clockless id: my_led_strip name: "LED Strip" pin: GPIO8 num_leds: 86 chipset: WS2812B rgb_order: GRB captive_portal: 
    esphome: name: openmote friendly_name: openmote esp32: variant: ESP32S3 framework: type: arduino # Enable logging logger: mqtt: broker: xxx.xxx.x.xxx # 👈 replace with your computer’s local IP or your MQTT server's IP port: 1883 discovery: false id: mqtt_client ssl: false # Enable Home Assistant API api: encryption: key: "" #replace with your own Key! ota: - platform: esphome password: ""...
    Read more »

  • OpenMote is Alive and Well!

    Gangwa Labs10/08/2025 at 01:16 0 comments

    Hey everyone! Sorry for the radio silence, life kinda happens sometimes! Enough of that lets talk OpenMote...


    Updates are going to start flowing in! From some silkscreen errors to fix to building out a comprehensive library there's much work to do on OpenMote before the launch. 

    I'm currently working on building out an OpenMote library and Board definitions to make it more approachable and easier to program for makers just getting started on their hardware journey. I had an idea for a drag and drop OpenMote website for programming and wanted to know if anyone had any experience with a dev board providing that level of support to makers.


    Enjoy a sneak-peak screenshot at the OpenMote library. Check back in the next couple days and I'll be going over manufacturing updates, Wiki deep-dives and other goodies!

    Keep hacking :)

  • OpenMote Gen 3.0 boards!

    Gangwa Labs03/12/2025 at 05:14 0 comments

    BIG announcement for openmote coming soon! PS. We're re-launching better than ever! Expect a TON more documentation and social posts about it soon!


    OpenMote has been slowly improving in the background and I'm more than proud to announce that our most recent generation of designs is ready to hit the shelves! (well metaphorical shelves) complete with an micro SD card reader for those large audio files. A QWIIC connector for any additional boards that you want to add on, thanks everyone who joined us in the adafruit show and tell streams for this amazing add on.


    Some Quality of life improvements we made were:

    - moving the LiPo connector to be accessible from the back battery clip

    - Moving the Qwiic connector to be accessible again from the back battery clip

    - finally put the IR Leds on the board (control your TV with a wii remote?!)

    - a bunch of other under the hood things that will make working with openmote a makers dream

    enjoy this artsy picture of our hotel room for CES 2025 this year where we were hard at work writing code and testing 3d prints for OpenMote Gen3.0
     

  • Building a Testbed for getting Audio Out

    Gangwa Labs07/15/2024 at 23:51 0 comments

    One of the more difficult things we've had to deal with was the loss of the DAC on the ESP32-S3 framework. Without an onboard DAC we've had to get creative with driving the speaker on OpenMote. We started out with a MAX98357 a very popular I2S DAC + AMP combo IC that manages all things mono speakers. However this component was proving to be unreliable from our PCBA supplier, they were pricey and stocked in scary short numbers.

    To solve this problem we dove into how to get an analog signal from the ESP without having it be an actual analog signal. This lead to the discovery of PDM and sigma delta modulation. Special shoutout to @atomic14 (Chris Greening) for his illuminating blog post about how to drive a speaker from an esp32-s3 without the need for an external DAC. 

    After doing some research on amp and looking at Espressif's own documentation and guides we found an active amp that uses a TL07x. A few hours later and we've whipped up a testbed for the active amp and a microSD card slot to test all our audio needs. On this testbed we also included a 3.3V LDO to test the difference in volume from the speaker between 3.3v and 5v. Lastly we also included a little notch near the USB-C port to remove the need to clip a little piece of plastic on the old game controllers.

View all 7 project logs

  • 1
    Preparation

    - Find your old game controllers

    - Take off the battery clip on the back

  • 2
    Disassembly

    - Unscrew the 4 screws holding the case together

    - Pry the top of the shell apart from the bottom of the shell (be careful of the 2 clips on the top of the controller by the power button as they are quite fragile and easy to snap off)

    - Remove the old PCB from the game controller making sure to keep track of all the buttons and the membranes

  • 3
    Assembly

    - Place your OpenMote PCB into the bottom shell, make sure that the reset button slots in nicely to the hole in the bottom of the shell

    - Place the top of the shell with the membranes and buttons onto the bottom and snap it all together

    - Tighten the 4 screws to close up the controller

View all 4 instructions

Enjoy this project?

Share

Discussions

Does this project spark your interest?

Become a member to follow this project and never miss any updates